
Faded Black Trim on Your Car: 5 Causes & How to Fix It for Good

Faded Black Trim on Your Car: 5 Causes & How to Fix It for Good
Faded black trim is one of the most common cosmetic complaints among car owners. When black trim turns gray and dull, it drags down the whole look of the car — even if everything else is shiny and clean.
Maybe you’ve already tried washing the car thoroughly, buffing the surface, or using off-the-shelf products, only to find they didn’t do the trick. That’s usually because you haven’t addressed the root cause with the right solution.
This guide walks you through why black trim fades in the first place, and how to fix it at home using modern restoration methods.
Mục lục
Why Does Black Trim Fade? 5 Main Causes
To restore faded black trim effectively, you first need to understand what’s causing it. There are 5 main culprits:
1. UV rays from sunlight
UV exposure is the number-one cause of faded black trim. When a car sits outside for long stretches, UV rays penetrate the plastic’s structure and break down its molecular bonds, leaving the surface gray and dull.
This isn’t just a cosmetic issue — it also weakens the plastic’s structure, making it more prone to cracking and breaking.
2. Oxidation and airborne chemicals
Air pollution, acid rain, and airborne chemicals seep into plastic and cause surface oxidation. This process leaves the plastic rough and strips away its smooth shine.
3. Improper washing technique
Using high-pH car wash soap, harsh solutions, or scrubbing plastic too aggressively strips away the plastic’s natural protective layer.
Some owners use products with strong chemicals or acids, which dry out the plastic and leave scratches.
4. Road grime, dust, and bug residue
Road tar, dead insect residue, dust, and debris that build up on faded black trim form a layer of grime that works its way deep into the surface. Left uncleaned, these contaminants can bond with the plastic and cause lasting damage.
5. High humidity, mold, and mildew
In tropical climates, high humidity creates ideal conditions for mold and mildew to grow on plastic. This doesn’t just dull the color — it can also pose health risks and make restoring faded trim more difficult.
According to reports on urban climate conditions in Vietnam, humidity in major cities typically runs 70–80%, creating favorable conditions for these damaging agents.
The Real Cost of Faded Black Trim
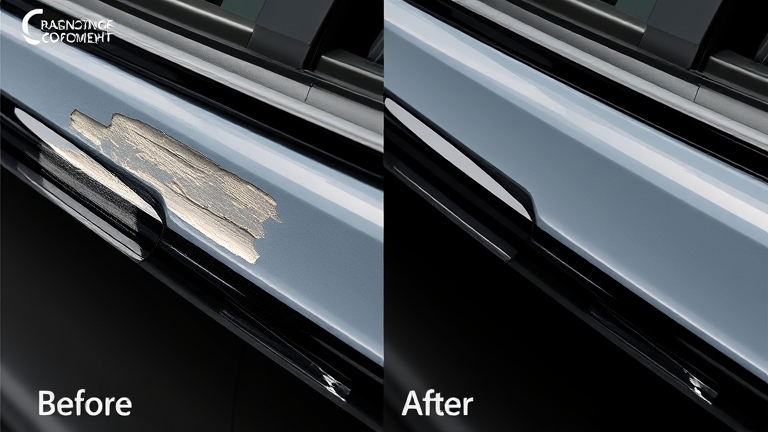
Faded black trim isn’t just a cosmetic issue — it comes with real downsides:
 The real cost of faded black trim
- Lower resale value: A car with faded, dull black trim looks older than it is, which can hurt resale value and insurance assessments.
- Faster deterioration: Fading is a sign the plastic’s structure has already weakened, making it more prone to cracking and losing its original protective function.
- Functional issues: If fading affects seals, mirrors, or headlight housings, it can impact lighting performance and how well accessories stay attached.
- Health concerns: Chemical compounds released from oxidized plastic can circulate inside the cabin, potentially affecting respiratory health — especially in hot, humid climates.
Temporary Fixes vs. Permanent Solutions for Faded Black Trim
There are two categories of fixes for faded black trim: temporary and permanent. Understanding the difference helps you choose the right one.
Temporary fixes (1–3 months)
Temporary fixes just mask the surface without repairing the plastic’s structure:
- Dedicated plastic oils: Create shine using oil-based ingredients, but fade quickly within 2–4 weeks.
- Color-restoring dyes: Re-darken the surface with pigment, but tend to peel or smear when the car is washed.
- Protective dressings: Add a lubricating layer for a temporary improvement, but don’t repair the plastic’s underlying damage.
Downside: Ongoing maintenance costs, without addressing the root cause.
Permanent solutions (6–12+ months)
Permanent solutions repair the plastic’s structure and provide long-term protection:
- pH-neutral plastic restoration solutions: Penetrate deep into the plastic’s structure, repairing damage from within while building UV and oxidation resistance. Results last 6–12 months depending on usage conditions.
- Surface dye + protective sealant: Restores the original black color and adds UV and water resistance.
- Professional shop treatment: Uses industrial equipment and chemicals for comprehensive restoration, though it’s costlier and takes more time.
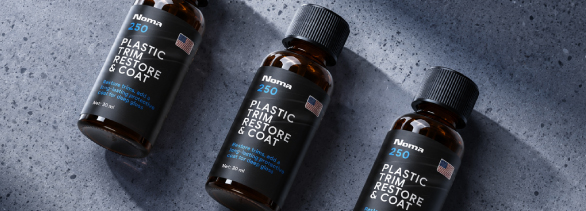
Modern American-engineered solutions like NOMA use a safe, pH-neutral formula that restores black trim from deep within, delivering long-term protection without posing risks to users.
Check out our guide to exterior car care at home for tips on applying these dedicated products.
Step-by-Step: How to Restore Faded Black Trim
Restoring faded black trim at home isn’t hard if you follow the right process:
Step 1: Clean the plastic surface
Wash the black trim with clean water and a pH-neutral car wash solution. Avoid dish soap, harsh cleaners, or strong chemicals.
Use a soft brush or soft cloth to gently scrub away dust, tar, and debris. Rinse 2–3 times until nothing remains.
Step 2: Dry it completely
Use a clean, soft towel to dry off all the water on the plastic surface. Leftover moisture will keep the restoration solution from absorbing properly.
Wait 15–30 minutes to make sure the plastic is completely dry.
Step 3: Apply the black trim restoration solution
Choose a pH-neutral restoration solution (such as NOMA 250). Apply a small amount to a brush or soft cloth and spread it evenly across the plastic surface.
Work top to bottom, then side to side, to ensure full coverage. Don’t overapply — just enough to leave the surface visibly wet is plenty.
Step 4: Let it soak in, then wipe
Wait 5–10 minutes for the solution to soak deep into the plastic’s structure. You’ll notice the surface gradually becoming glossier.
Use a clean, soft towel to gently wipe away any excess solution. This step matters — skipping it can leave an oily residue or streaks.
Step 5: Let it fully cure
Wait at least 2–4 hours before washing the car again or exposing it to water. Ideally, let it cure overnight so the solution bonds fully with the plastic’s structure.
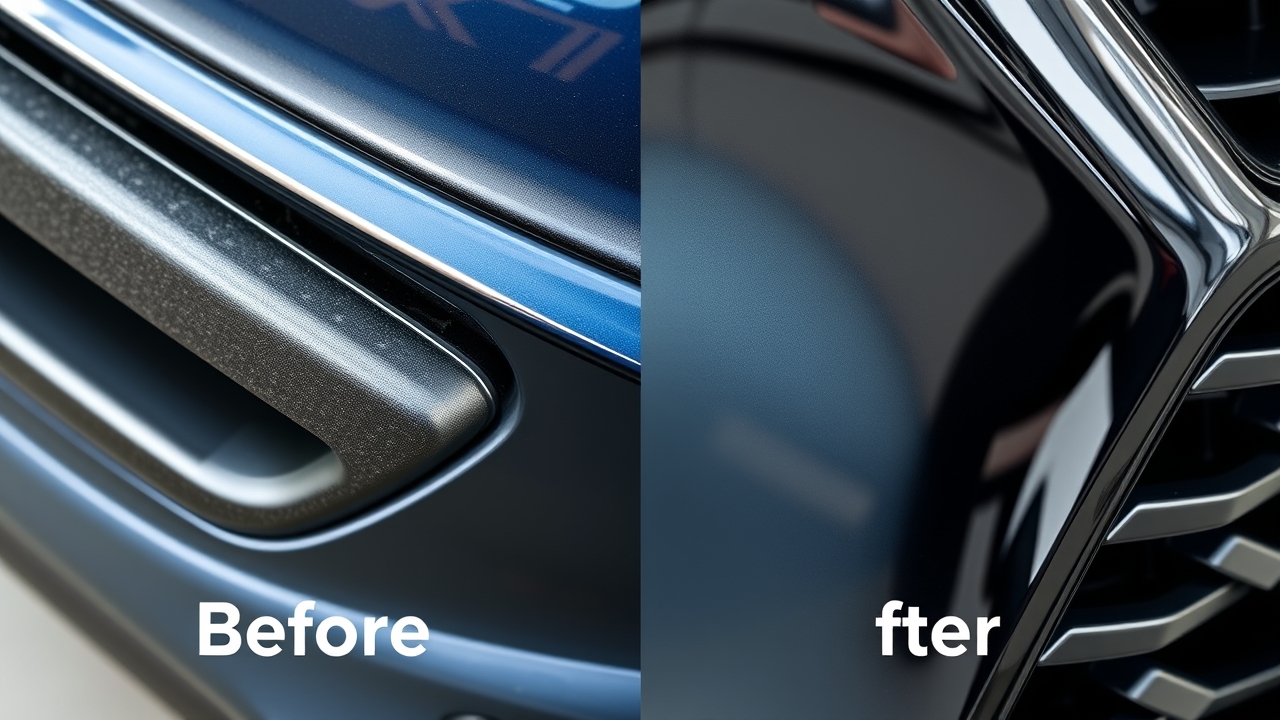
Once restored, faded black trim will return to a deep, glossy black, with lasting protection against UV rays, water, and mildew.
Comparing Black Trim Restoration Products on the Market
| Criteria | NOMA (USA) | 3M (USA) | Liqui Moly (Germany) | Sonax (Germany) |
|---|---|---|---|---|
| pH-neutral formula | ✓ Yes, 100% safe | ✓ Yes | – Unclear | – Unclear |
| Deep restoration of plastic structure | ✓ Deep, 6–12 months | ✓ Good, 3–6 months | ✓ Good, 2–4 months | ✓ Good, 3–6 months |
| Oxidation & UV resistance | ✓ Excellent | ✓ Good | ✓ Good | ✓ Good |
| Easy for DIY use | ✓ Very easy | ✓ Easy | ✓ Easy | ✓ Easy |
| Price | ✓ Competitive | ~ High | ~ High | ~ High |
| Availability | ✓ Yes, at localhost:10003 | ✓ Yes | ✓ Yes | ✓ Yes |
| No health risks | ✓ Completely safe | ✓ Safe | – Needs verification | – Needs verification |
Looking at the table above, NOMA stands out for its completely safe pH-neutral formula, ease of DIY use, and long-lasting results.
How to Prevent Black Trim From Fading in the First Place
Prevention always beats cure. Here’s how to keep black trim from fading:
- Park in the shade: Avoid leaving your car under direct sun for long periods. Use a sunshade, garage, or covered parking whenever possible.
- Wash regularly: Wash your car every two weeks with a pH-neutral solution. This removes damaging contaminants before they can bond with the surface.
- Reapply protectant regularly: Every 2–3 months, reapply a restoration solution to renew the protective layer. Check out our routine car maintenance schedule for a detailed timeline.
- Avoid harsh chemicals: Skip strong acidic cleaners, cooking oil, dish soap, or industrial degreasers.
- Check regularly: Once a month, wipe down the plastic surface and check for early signs of fading. Catching it early makes it easier to treat.
Frequently Asked Questions About Faded Black Trim
Q1: How long does it take to restore faded black trim?
The application itself only takes 15–20 minutes. However, you’ll need to wait 2–4 hours for the solution to fully cure before using the car normally.
Q2: Is black trim restoration solution safe for skin?
pH-neutral products like NOMA are designed to be safe for users. That said, wearing gloves during application is a good precaution.
Q3: Can severely faded black trim be restored?
Yes, but it may take multiple applications. For badly faded trim, apply the solution once, wait a week, then apply again. After 2–3 applications, the trim should be fully restored.
Q4: Is glass mold related to faded black trim?
Yes — both are caused by high humidity and lack of protection. Using a glass anti-mold solution alongside a trim restoration product gives your car comprehensive protection.
Q5: What’s the best time of year to restore black trim?
The dry season (November to March) is ideal. Avoid restoring trim during the rainy season, since high humidity slows down drying and bonding.
Q6: Do I need to go to a shop to restore faded black trim?
Not necessarily. You can absolutely restore it yourself at home with the right solution. A shop visit only makes sense if the plastic is severely damaged (cracked or broken) or if you want to combine it with other services like polishing or dyeing.
Q7: Is car trim plastic different from motorcycle trim plastic?
Yes. Car trim plastic is typically thicker and more durable, but it’s still prone to oxidation without proper care. Dedicated restoration solutions work on both.
Conclusion: Restoring Faded Black Trim Is Worth Doing
Restoring faded black trim doesn’t just make your car look fresher — it also protects the plastic’s structure from further damage. Understanding the causes, applying the right fix, and maintaining it regularly will keep your car looking sharp for the long haul.
Instead of relying on temporary fixes or expensive shop visits, try a pH-neutral, American-engineered restoration solution that’s completely safe for both you and your car. Doing it yourself at home saves money — and there’s real satisfaction in caring for your own vehicle.
Get started today and bring your car’s black trim back to its best!
Sources
- Reports on urban climate and humidity conditions in Vietnam
Related Posts
Faded Black Trim: Why It Happens and How to Fix It with NOMA 250

Faded Black Trim: Why It Happens and How to Fix It with NOMA 250
Black plastic trim on your car (trunk trim, air vents, door moldings, exterior dash trim) gradually fading and dulling over time is something almost every DIY car owner deals with. It’s not just dirt — it’s caused by oxidation, UV exposure, and environmental humidity. Understanding why black trim fades helps you choose the right fix and protect it for the long haul. This article walks through the causes, the warning signs of damage, and how to restore faded black trim using NOMA 250 — an effective black trim restoration solution that’s safe and easy to do at home.
Mục lục
Why Does Black Trim Fade? 3 Root Causes
Faded black trim isn’t caused by paint wearing off — it’s the plastic surface itself breaking down at a molecular level. According to detailing industry care guidance, this happens due to three main factors.
1. UV rays and oxidation
Sunlight’s UV-A and UV-B rays penetrate the plastic, breaking the carbon bonds within the polymer. At the same time, oxygen in the air chemically reacts with the plastic surface, forming a whitish, oxidized layer. This builds up over weeks and months, especially in areas exposed to direct sunlight.
If a car isn’t covered or protected, black trim will show noticeable fading within 6–12 months.
2. Moisture and rain
Rainwater and high humidity speed up oxidation, especially in tight seams and where plastic meets metal. Road salt (in coastal areas) accelerates plastic breakdown even further.
3. Dirt and pollutants
Dust, pollen, and brake dust (carbon particles) settle on the plastic surface, trap moisture, and create the conditions for mold and mildew to grow — stripping away the plastic’s natural shine.
Classifying Fade Severity — How to Tell What You’re Dealing With
Not every case of faded black trim can be fully restored — the severity of the damage determines both the method and the end result.
Level 1 — Mild fading (early stage)
The plastic is still mostly black, but the surface looks dull and has lost its original shine. Run your hand across it and you’ll feel a fine, chalky residue (oxidized plastic dust).
This level is the easiest to restore, and products will deliver strong results.
Level 2 — Moderate fading (a few years in)
Noticeable gray-white streaks appear, with uneven coloring — areas that get more sun are more faded, while shaded spots stay darker.
Restoration is still very doable, but you’ll likely need 2–3 applications for the best results.
Level 3 — Heavy fading (over 3–5 years)
The plastic has turned almost entirely grayish-white, and the surface may be flaking. This usually signals oxidation that’s gone deep into the plastic’s structure.
Full restoration is difficult in this case — you’ll see improvement, but the trim may not return 100% to its original black.
How to Restore Faded Black Trim with NOMA 250
NOMA 250 is a dedicated restorer for oxidized, textured plastic trim, bringing back natural color and shine without needing to replace the part. Its formula, built to American standards, lets the plastic absorb protective agents beneath the surface, restoring long-lasting shine.
Step-by-step restoration process
Step 1 — Clean the surface thoroughly
Start by washing the entire plastic component with cold water and a mild soap. Use a soft brush to remove dirt and stuck-on debris.
Once washed, dry it completely with a microfiber towel or absorbent cloth. The plastic needs to be fully dry for the product to absorb properly.
Step 2 — Apply NOMA 250
Shake the NOMA 250 bottle well for 15–20 seconds. Spray a moderate amount onto the plastic surface — you don’t need much (roughly one spray per 12–16 inches of surface).
Using a microfiber cloth or a soft dedicated applicator brush, spread the product evenly in circular motions or top to bottom. Focus extra attention on the more heavily faded areas.
The product will soak into the plastic’s micro-pores, gradually reversing the oxidized structure.
Step 3 — Let it dry and let the protection set in
After wiping it in, park the car in the shade for 30–60 minutes to let NOMA 250 fully absorb into the plastic. Avoid touching the surface during this time.
For heavier fading, you can repeat the process after a week to build up more shine. Each application helps the plastic recover a little more.
Safety notes when using NOMA 250
The product can irritate skin — wear gloves while applying it. Avoid contact with eyes; if it gets in your eyes, flush immediately with clean water for 15 minutes.
Use it in a well-ventilated space, and avoid inhaling the spray directly.
Comparison Table: NOMA 250 vs. Other Methods
| Criteria | NOMA 250 | Polish + Recoat (detail shop) | Rinse with water only | Replace the part |
|---|---|---|---|---|
| Cost | $3–6 | $12–32 | Free | $40–120 |
| Time | 15–20 min | 2–4 hours | 5 min | 1–2 days |
| Works on mild fading | ✓ Good | ✓ Excellent | ✗ Temporary | ✓ Good |
| Works on heavy fading | ◐ Improves it | ✓ Good | ✗ No | ✓ Good |
| Durability | 2–4 months | 6–12 months | A few days | Long-term |
| DIY-friendly? | ✓ Yes | ✗ Needs skill | ✓ Yes | ✗ No |
| Won’t damage the plastic | ✓ Safe | ◐ Requires recoating | ✓ Safe | ✗ Loses original part |
Bottom line: NOMA 250 is the best option for car owners doing their own detailing at home — strong results, low cost, easy to apply, and no risk to the part itself. It’s especially well suited to Level 1–2 fading.
Preventing Faded Black Trim Down the Road
Once you’ve restored your trim, you’ll want to protect it to extend its lifespan and keep the fading from coming back.
Tip 1 — Wash and maintain regularly
Wash the car every 2 weeks to clear away dirt and pollutants.
Tip 2 — Keep it covered when parked
Park in a garage or use a car cover to limit direct exposure to UV rays and rain. This is the single most effective prevention method.
Tip 3 — Reapply NOMA 250 every 3 months
To keep the restored look going, repeat the NOMA 250 application every 3 months (or whenever you notice the shine starting to fade).
Frequently Asked Questions About Restoring Black Trim
Question 1: Can NOMA 250 fix black trim that’s flaking or peeling?
NOMA 250 works best on trim that’s faded from oxidation, not physical damage like cuts or impact-related flaking. If the outer layer has already peeled or there’s a deep tear, the product will improve the color but can’t fill in the physical damage. In that case, you’ll want to consider replacing the part.
Question 2: Can NOMA 250 be used on all types of black plastic trim on a car?
It works on most textured exterior black trim (trunk trim, door moldings, air vents, exterior dash trim). That said, avoid spraying it directly on glass or painted surfaces — the product is formulated specifically for plastic.
Question 3: How soon will I see results after using NOMA 250?
You’ll notice an immediate improvement (the trim looks glossy and black again right away), but the full effect becomes clear after 24–48 hours as the product fully absorbs into the plastic’s pores. For heavier fading, reapplying after 1–2 weeks will boost the results.
Question 4: Is NOMA 250 safe for the paint and glass around the trim?
Yes, NOMA 250 is developed to GHS safety standards and won’t corrode paint or glass. That said, avoid spraying it directly onto paint or glass, since it isn’t formulated for those surfaces. Use a cloth to shield nearby paint if needed.
Question 5: Should NOMA 250 be paired with other products?
Yes. After restoring black trim with NOMA 250, you can follow up with NOMA 230 (plastic gloss spray) for extra shine and protection. Don’t apply both products in the same session — let the first one dry for 24 hours before applying the next.
Question 6: How does the cost of NOMA 250 compare to a detail shop?
A bottle of NOMA 250 typically costs $3–6 and covers a full car 2–3 times over. A detail shop, by comparison, charges $12–32 for a single polish-and-recoat session. NOMA 250 saves you 70–90% on cost.
Question 7: How often does NOMA 250 need to be reapplied?
Depending on sun exposure, rain, and how well the car is maintained, NOMA 250’s effect lasts 2–4 months. For cars parked outside often, reapplying every 2–3 months keeps results looking their best. For garaged cars, you can stretch that to 4–6 months.
Conclusion: A Real Fix for Faded Black Trim
Faded black trim is a natural process driven by UV exposure, oxidation, and humidity — but it’s entirely preventable and fixable. By understanding the root causes and choosing the right method, DIY car owners can get results on par with a detail shop for a fraction of the cost.
NOMA 250 is a dedicated black trim restoration solution built to American standards, helping you bring back natural color, boost shine, and protect your trim from UV damage over the long term. Combined with regular maintenance and smart prevention, your car’s black trim will stay looking like new.
Get started today — check your car’s black trim for signs of fading, and follow this simple at-home restoration process to bring back that professional, showroom-ready look.
References
- Detailing industry car care guidance

Faded Black Trim on Your Car: 3 Root Causes and How to Fix It
Faded Black Trim on Your Car: Understanding the Causes and Choosing the Right Fix
Black plastic trim on your car — wiper blades, bumpers, door trim, and other exterior plastic parts — gradually fades after prolonged exposure to sun, rain, and the elements. Beyond hurting the way your car looks, this fading is also a sign that the plastic surface itself is deteriorating. In this article, we’ll break down the causes, how to prevent it, and an effective restoration solution using NOMA 250.
Mục lục
Why Does Black Trim Fade? 3 Main Causes
Fixing faded black trim starts with understanding what’s causing it. Three main factors damage the plastic’s surface structure: 1. UV rays from the sun Ultraviolet rays (UV-A and UV-B) penetrate deep into the polypropylene or ABS plastic on your car. Over time, this exposure breaks down the molecular bonds, leaving the surface rough and stripped of its natural shine. This is the leading cause — especially in areas with strong sun between 9 a.m. and 4 p.m. 2. Oxidation Oxygen in the air combines with high heat and humidity to form oxidative compounds. These create a dull, grayish film on the plastic surface — that’s the “faded” look you’re seeing. 3. Dirt, road salt, and grime buildup Acid rain, road dust, pet hair, overspray from other vehicles — all of it gradually builds up on the plastic. These contaminants don’t just dull the shine; they also trap moisture and speed up oxidation. Left too long, they can etch into the surface and cause permanent damage.3 Ways to Fix Faded Black Trim Effectively
Prevention always beats a last-minute fix. Here are 3 preventive measures that professional detail shops commonly use: Method 1: Keep it covered and out of direct sun Park in a garage, under a carport, or use a car cover — especially between 9 a.m. and 4 p.m., when UV rays are at their strongest. If that’s not an option, use a breathable car cover. Method 2: Clean it regularly (every 2 weeks) Wash the trim with clean water and a mild car shampoo, then dry it completely with a towel (don’t let it air-dry). This removes dirt, salt, and grime before they can trap moisture and trigger oxidation. According to national quality standards guidance, washing your car every 2 weeks can cut the rate of surface damage by up to 40%. Method 3: Use a protective product (nano coating or trim dressing) to restore black trim After cleaning, apply a protective trim dressing or a dedicated nano coating to the plastic surface. This creates a barrier against UV, water, dirt, and oxidation, offering protection for roughly 3–6 months depending on the product quality.How to Restore Faded Black Trim: A Quick Fix with NOMA 250
If your trim has already faded, don’t worry. NOMA 250 (faded black trim restorer) is specifically designed to bring back that deep black shine on your car’s plastic. How does NOMA 250 work? NOMA 250’s formula combines natural conditioning oils with surface-active agents to:- Penetrate deep into the micro-pores of damaged plastic.
- Break down the dull oxidized layer, restoring natural shine after just one application.
- Form a protective barrier against UV and pollutants for the next 2–3 months.
- Stay safe on every type of plastic: polypropylene (PP), ABS, and EVA.
Comparison Table: NOMA 250 vs. Other Methods
| Criteria | NOMA 250 | Regular gear oil | Silicone oil | No product (wash only) |
|---|---|---|---|---|
| Restores shine | ✓ Strong, lasts 2–3 months | ✓ Strong, but UV-sensitive | ✓ Strong, but hard to wipe clean | ✗ Only 2–3 days |
| UV protection | ✓ Excellent | ✗ Low | ✓ Good | ✗ None |
| Skin-safe | ✓ Just wash hands after use | ✗ Greasy, hard to wash off | ✓ Safe | ✓ Safe |
| Fixes oxidation | ✓ Good (purpose-built product) | ✓ Decent | ✗ No, just masks it | ✗ No |
| Cost per use | ✓ Economical (one bottle, many uses) | ✓ Cheap | ✓ Cheap | N/A |
| Ease of use | ✓ Very simple | ✓ Simple | ✗ Messy, hard to control | ✓ No product needed |
Frequently Asked Questions About Restoring Black Trim
Is faded black trim actually a problem, or just cosmetic?
Restoring faded black trim isn’t just about looks — it’s a sign the plastic itself is breaking down. Once trim fades, UV exposure and oxidation have already damaged the outer polypropylene layer, making it weaker and more prone to cracking and flaking. Left unchecked, the plastic can break down completely, losing its ability to seal out water and insulate against temperature. Faded wiper blades, for example, won’t clear water properly, which can affect your visibility while driving. That’s why fixing it early is the best way to extend the plastic’s lifespan.Can a regular plastic dressing replace NOMA 250?
It can, but the results won’t be the same. Regular dressings (like gear oil or A/C lubricant) only coat the surface, giving black trim a temporary shine. They don’t have a formula designed to actually reverse the oxidized, faded layer, so the effect fades within 3–7 days. NOMA 250 is specifically engineered to penetrate and restore damaged plastic surfaces, giving you protection that lasts 2–3 months. If you want results that last, NOMA 250 is the better choice.Can I use NOMA 250 on other plastic parts, like the dashboard or door trim?
Yes, NOMA 250 is safe on all types of automotive plastic: wiper blades, chrome door trim, door moldings, bumpers, plastic body panels, and even the interior dashboard. Just make sure the surface is clean before applying it evenly.It’s really hot in summer — is it okay to let NOMA 250 absorb for 3–5 minutes at 104°F (40°C)?
Yes, that’s fine. NOMA 250 is formulated to hold up in high heat (it can withstand temperatures up to 122°F/50°C without breaking down). That said, try to avoid applying it between noon and 3 p.m. when surfaces are at their hottest — early morning or late afternoon works better for even absorption.How often should I reapply NOMA 250?
Restoring black trim with NOMA 250 typically lasts 2–3 months depending on conditions (sun exposure, rain, car washing frequency). If your car is parked outside every day, reapply every 6–8 weeks. If it’s garaged, every 12–16 weeks is enough.Conclusion: Don’t Wait to Fix Faded Black Trim
Restoring faded black trim is an easy problem to solve once you understand what’s causing it. The three main culprits — UV, oxidation, and grime — can all be kept in check with regular cleaning, smart sun protection, and the right protective product. If your trim has already faded, reach for NOMA 250 to restore that deep black color and keep it protected in the months ahead. With just 5 minutes of application and a 30-minute wait, you’ll see a real difference. Make washing and conditioning your trim every two weeks a habit, and your car will keep looking like new. Have you dealt with faded trim before? Share what worked for you — we’d love to hear it!Restoring Faded Black Plastic Trim: A 5-Step Guide with NOMA 250
Restoring Faded Black Plastic Trim: A 5-Step Guide with NOMA 250
Black plastic trim is everywhere on modern cars — window surrounds, wheel arch trim, door handles, and other exterior details. Over time, though, that trim tends to fade due to UV exposure, oxidation, and accumulated grime. According to international detailing experts, this happens on most vehicles within 2-3 years.
Restoring faded black plastic trim isn’t complicated once you know which product to reach for. NOMA 250 is one of the go-to dedicated solutions for bringing back that original color, giving your trim a like-new look in just a few minutes. This guide will walk you through the correct technique for the best possible results.
Mục lục
Why does black plastic trim fade, and how do you restore it?
Plastic trim on your car is constantly exposed to strong UV rays, high humidity, and oxidizing elements. When UV light hits the plastic surface, it breaks down the molecular bonds, causing the outer layer to oxidize and lose its natural shine. That’s exactly why the trim looks “faded” — a grayish or whitish haze shows up on the surface.
The silica (SiO₂) and polymer compounds that make up the protective layer on black plastic trim break down over time. To restore it, you need a product that can:
- Clean away the oxidized surface layer
- Restore moisture back into the plastic
- Protect against future UV damage
NOMA 250 is formulated to US detailing industry standards, combining moisturizing and protective ingredients into a single formula.
What is NOMA 250, and what does it actually do?
NOMA 250 is a dedicated restoration spray for faded textured or black plastic trim and other exterior details. It’s built for anyone who wants to handle their own car care at home without a trip to the shop.
Key benefits of NOMA 250:
- Restores the natural black color on plastic trim, window surrounds, and tires
- Removes that faded, oxidized haze
- Provides long-lasting moisture
- Creates a UV-protective barrier
It comes in a spray, making it easy to apply with fast results — just 5 minutes and your black plastic trim looks brand new. No special tools required, so anyone can do it.
Step-by-step: restoring black plastic trim with NOMA 250
Step 1: Prep the car and clean the plastic surface
Before applying NOMA 250, clean the plastic surface to remove dirt, grease, and other buildup. Skip this step, and the product won’t absorb properly into the plastic’s pores.
How to clean it:
- Wash the plastic with clean water and a mild soap.
- Dry it completely with a microfiber towel.
- Pay extra attention to tight spots like the fuel door and door edges.
- Wait 5 minutes for the surface to dry completely before moving on.
Step 2: Shake the NOMA 250 bottle well
Before use, shake the bottle for 20-30 seconds so the moisturizing ingredients mix evenly. Skip this, and the product may not absorb into the plastic as effectively.
- Shake gently — no need to be aggressive
- Check the cap to make sure it isn’t leaking
- Keep the bottle at room temperature (68-77°F) for the best results
Step 3: Spray NOMA 250 onto the black plastic
Spray the product onto the plastic surface you’re restoring, holding the bottle about 6-8 inches away. Apply a thin, even coat — don’t concentrate too much product in any one spot.
- Work from top to bottom
- Spray door trim, tires, dashboard trim, and window surrounds gradually
- You don’t need much — a thin coat is enough
- Avoid getting it on your skin or in your eyes; if it happens, rinse immediately with clean water
Step 4: Let it soak in
After spraying, let the product soak into the plastic for 2-3 minutes. This gives the moisturizing ingredients time to absorb into the plastic’s pores.
- Don’t wipe it off right away — wait 2-3 minutes
- The surface will gradually start to develop a shine
- For extra shine, you can apply a bit more product
Step 5: Wipe clean and finish up
After 3-5 minutes, gently wipe with a clean microfiber towel. Use light, gentle strokes — don’t scrape or scrub hard.
- Wipe from top to bottom
- If there’s excess shine left behind, wipe again
- Let the product dry completely for 10-15 minutes before driving
- Avoid washing the car for 24 hours so the protective layer can fully set
How does NOMA 250 compare to other ways of restoring black plastic trim?
| Criteria | NOMA 250 | Regular silicone oil | Surface repaint | Manual cleaning + polishing |
|---|---|---|---|---|
| Application time | 5 minutes | 10-15 minutes | 30-60 minutes | 45-90 minutes |
| Durability | 2-3 weeks | 1 week | 2-4 weeks | 3-5 days |
| Ease of use | ✓ Very easy | ✓ Easy | ✗ Difficult | ✗ Complicated |
| Cost | Affordable | Affordable | Expensive | Cheap but labor-intensive |
| Results | Natural, moderate shine | Uneven shine, fades fast | Durable but prone to peeling | Good but short-lived |
| UV protection | ✓ Yes | ✗ No | ✓ Yes | ✗ No |
As the table shows, NOMA 250 strikes a great balance between effectiveness, application time, and long-term protection.
Tips for choosing the right black plastic trim restorer
When buying NOMA 250 or a similar product, keep these points in mind:
1. Check the ingredients:
-
- A good product will contain silicone or moisturizing polymers
-
- Avoid products that are just plain mineral oil — they fade quickly
2. Check the shelf life:
-
- Check the manufacturing date on the bottle
-
- Avoid old or expired stock
3. Check the source:
-
- Buy from trusted retailers to ensure you’re getting a genuine product
-
- NOMA 250 is officially imported, with proper invoicing and documentation
4. Check the scent:
-
- A good-quality product has a natural, mild scent
-
- An overpowering smell can be a sign of excessive harmful chemicals
Frequently asked questions about restoring black plastic trim
Do I need to restore black plastic trim regularly?
Yes. To keep your trim looking its best, restore it every 2-4 weeks depending on your local weather. If your car is often parked outdoors or in a sunny, high-UV area, apply it every 2 weeks.
Is NOMA 250 safe for all types of plastic?
NOMA 250 is safe for textured black plastic trim, glossy black plastic trim, window surrounds, and other exterior details. That said, avoid spraying it directly on your skin. If it does get on you, rinse with clean water right away.
How can I make NOMA 250’s results last longer?
To extend the results:
-
- Avoid washing the car for 24 hours after applying it
-
- Keep the car out of direct sunlight for 2-3 days
-
- Don’t scrub the surface with harsh cleaners
-
- Wash the car regularly with water and a mild soap
Can I combine NOMA 250 with other NOMA products?
Yes. NOMA 250 works great alongside other products in the NOMA car care lineup.
Will NOMA 250 work if the trim is severely faded?
For black plastic trim that’s severely oxidized (turned grayish-white, or with deep scratches), NOMA 250 will typically restore about 70-80% of the original look.
The bottom line: restoring black plastic trim is easy with NOMA 250
Restoring black plastic trim doesn’t require a professional shop or expensive tools. With NOMA 250 and the 5 steps above, you can get the job done in just a few minutes at home.
The key to success is thorough prep, correct application, and regular upkeep. Well-maintained black plastic trim doesn’t just make your car look newer — it also protects the surface from harmful environmental damage.
If you’re someone who loves taking care of your car at home, NOMA 250 deserves a spot in your detailing kit. Start today and see the difference a quality product makes.
References
- Research from international detailing experts

Cleaning Hard Water Stains Off Car Glass: NOMA 911 vs. 3M, Sonax, Meguiar’s
Cleaning Hard Water Stains Off Car Glass: NOMA 911 vs. the Leading Brands
Rain spots, fingerprints, and salt residue on your car’s glass don’t just look bad — they cut into your visibility and can become a real safety hazard behind the wheel. Cleaning car glass is a must-do part of exterior car care, but not every stain remover on the market actually gets the job done.
Mục lục
NOMA 911 is a car glass stain remover and water-repellent coating made in the USA, built for car owners who like to handle their own detailing at home. It uses a pH-neutral formula that’s completely safe for glass and every trim piece it touches. In this article, we’re putting NOMA 911 head-to-head against competitors like 3M, Sonax, and Meguiar’s to help you pick the best glass-cleaning solution for your car.
What does cleaning car glass actually involve, and why does it matter?
Cleaning car glass means removing everything that builds up on the surface — dried rain spots, dust, salt residue, fingerprints, or that hazy film that develops over time. These deposits usually leave behind mineral or alkaline residue that clouds the glass and makes it harder to see through clearly.
 What does cleaning car glass actually involve, and why does it matter?
According to auto maintenance research, keeping glass clean is one of the top factors in cutting traffic accidents by up to 20%. On top of the safety angle, clean glass also looks glossier and helps extend the lifespan of the glass itself.
Cleaning car glass with a purpose-built product — instead of just plain water or dish soap — removes buildup completely without leaving streaks or scratching the surface. That’s exactly why dedicated products like NOMA 911 are the recommended route.
How does NOMA 911 perform compared to other products?
NOMA 911 combines two core functions: powerful stain removal and a long-lasting water-repellent (hydrophobic) coating. It’s made with US manufacturing technology using a pH-neutral formula — meaning it’s neither too acidic nor too alkaline, so it’s completely safe for skin and every part of your car it touches.
How the cleaning process works:
-
- Stain removal: NOMA 911’s solution breaks down layers of grime on the glass without heavy scrubbing, cutting down on the risk of scratches.
-
- Water-repellent coating: Once the glass is clean, the product lays down a protective silica layer that lets rain run right off instead of clinging to the surface.
-
- Fast-drying: Thanks to its optimized formula, NOMA 911 dries completely in 5-10 minutes without leaving streaks.
A lot of car owners love NOMA 911 because it’s simple enough to use at home without any special skills. Just spray it on the glass, let it sit for a bit, then wipe it clean with a microfiber towel — that’s it.
NOMA 911 vs. the competition: a detailed comparison
Here’s how NOMA 911 stacks up against its three main competitors in the car glass cleaner category:
| Criteria | NOMA 911 | 3M Glass Clarifier | Sonax GlassCare | Meguiar’s Clarity Glass |
|---|---|---|---|---|
| Main ingredients | pH-neutral solution, US technology | Proprietary 3M formula | Plant extracts + anti-static agents | Polyol + mineral cleaners |
| Primary function | Stain removal + water-repellent coating | Primarily stain removal | Stain removal + anti-static | Stain removal + shine boost |
| Drying time | 5-10 minutes | 10-15 minutes | 8-12 minutes | 10 minutes |
| How long the coating lasts | 2-3 weeks | No water-repellent coating | 2 weeks | 1.5-2 weeks |
| Safe for skin/trim | Very safe (pH-neutral) | Safe (eye protection recommended) | Safe (contains alcohol) | Safe (low odor) |
| DIY-friendly | ✓ Very easy | ✓ Easy | ✓ Easy | ✓ Easy |
| Price | Competitive | Higher | High | Mid-range |
| Heavy-stain performance | 9/10 | 8.5/10 | 8/10 | 7.5/10 |
Looking at the comparison, NOMA 911 pulls ahead in three key areas: the longest-lasting water-repellent coating (2-3 weeks), completely skin-safe thanks to its pH-neutral formula, and the fastest drying time of the bunch.
What NOMA 911 offers that other products don’t
The current trend in car glass cleaners is toward “double duty” — cleaning and protecting at the same time. NOMA 911 nails this trend thanks to its pH-neutral formula.
So what does pH-neutral actually mean? Per official safety guidance, a pH between 6.5 and 7.5 is considered neutral and safe for skin and materials. NOMA 911 is formulated within that exact range, which means:
-
- It won’t irritate your skin if it gets on you while you’re using it.
-
- It won’t corrode paint, rubber, or plastic trim on your car.
-
- It can sit on the glass for a while without any risk of damage.
On top of that, NOMA 911 is manufactured to US standards with rigorous quality testing. You don’t have to worry about effectiveness or safety.
How to use NOMA 911 for the best results
NOMA 911 is easy to use, but for the best possible results, follow these steps in order:
Step 1: Prep
-
- Wash the glass with water and a mild soap, then dry it with a cotton towel.
-
- Make sure the glass is completely dry before applying the product.
-
- Avoid doing this in strong sunlight — early morning or evening is best.
Step 2: Spray on NOMA 911
-
- Spray evenly across the glass, covering the entire area you’re treating.
-
- You don’t need to soak it — just enough to leave the glass damp.
Step 3: Let it sit
-
- Let the product work for 3-5 minutes (longer for heavier stains).
-
- Giving it enough time makes a noticeable difference in how clean your glass ends up.
Step 4: Wipe clean
-
- Use a clean microfiber towel and wipe in one direction to avoid streaking.
-
- Keep wiping until the glass is completely dry with no streaks or fingerprints left behind.
Pro tip: For heavily stained glass, you can repeat the process 2-3 times until you get the result you want. One thorough treatment leaves the glass glossy and effectively water-repellent for 2-3 weeks.
How often should you clean your car’s glass?
How often you need to clean the glass depends on your local weather and driving conditions. In climates with frequent rain and high humidity, cleaning once a month — or whenever stains become noticeable — is a good rule of thumb.
With NOMA 911, the water-repellent coating lasts 2-3 weeks. After that, the protective layer starts to wear thin, so it’s a good time to reapply. This keeps the glass looking sharp without turning car care into a constant chore.
If your car is garaged or rarely exposed to rain, you can stretch that out to once every 1-2 months.
Frequently asked questions about cleaning car glass
Can cleaning car glass damage it?
Not if you use a dedicated product like NOMA 911 instead of harsh cleaners. US-formulated car care products like NOMA are tested and safe for glass. That said, avoid highly acidic car wash soaps or industrial chemicals, since those can scratch or cloud the glass.
Should I go with NOMA 911 or products like 3M and Sonax?
It depends on your priorities. If you want maximum safety and a long-lasting water-repellent coating, NOMA 911 is a great choice. Check out our other glass care product guides to get a better sense of how each option compares.
What is a water-repellent coating, and why do I need one?
A water-repellent (hydrophobic) coating is a protective silica layer on the glass surface that lets rain run off instead of clinging to it. This doesn’t just keep the glass cleaner longer — it also improves visibility and driving safety. NOMA 911 forms this coating automatically after you clean the glass.
Can I use NOMA 911 on the rear windshield?
Yes, NOMA 911 is safe to use on every glass surface on your car, including the rear windshield, side windows, and rear lighting covers. Its pH-neutral formula won’t harm any type of glass.
Is NOMA 911 safe for the person using it?
Very safe. It uses a pH-neutral formula with no harsh chemicals. That said, avoid contact with your eyes and wash your hands after use. If it does get in your eyes, rinse immediately with cool water.
The bottom line: NOMA 911 is an effective, safe way to clean car glass
Cleaning car glass doesn’t have to be difficult, as long as you’re using the right product. NOMA 911 combines excellent stain-removing power, a long-lasting water-repellent coating (2-3 weeks), complete safety thanks to its pH-neutral formula, and effortless at-home use. Compared to 3M, Sonax, and Meguiar’s, NOMA 911 stands out for how long its protective coating lasts and how safe it is to use.
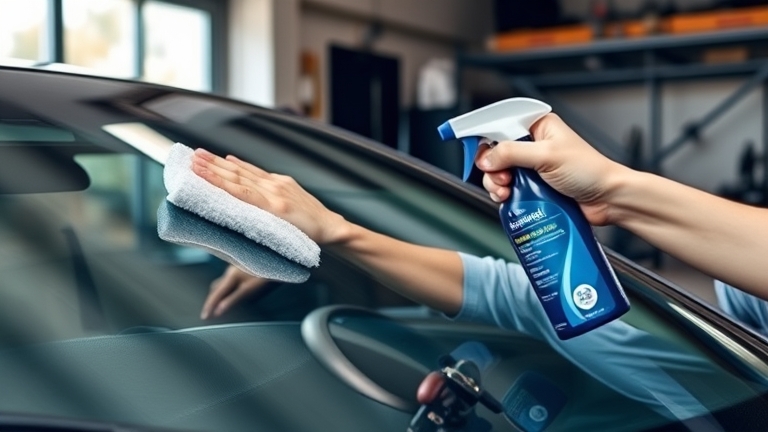 Frequently asked questions about cleaning car glass
If you’re a car owner who likes handling your own exterior detailing at home, NOMA 911 is a solid, reliable choice. Follow the steps above and see the difference for yourself.
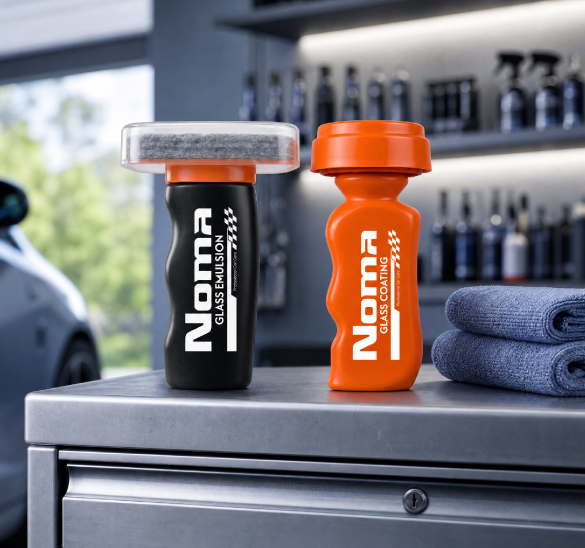
Car Glass Stains: Why You Need a Specialized Product Instead of Regular Glass Cleaner
Car Glass Stains: Why You Need a Specialized Product Instead of Regular Glass Cleaner
Water stains on car glass are a problem nearly every car owner deals with. According to environmental researchers, acid rain and airborne mineral dust are the main culprits behind hazy, stained windshields. The problem is, wiping it down with plain water or dish soap rarely solves it for good. Specialized products like NOMA 911 are formulated to remove car glass stains effectively while still protecting the surface. This article breaks down how water stains actually form, why regular glass cleaner falls short, and why a pH-neutral formula is the key to restoring true clarity to your windshield.What’s really causing your car glass to stain?
Not everything on your windshield is just dust or water droplets. Car glass staining comes from a handful of overlapping causes that most car owners never think about. Acid rain and mineral deposits: Research on urban air quality shows that rainfall in major cities often carries mild acidity (pH 4.5-5.5) from vehicle emissions and industrial pollution. When that rainwater evaporates off your glass without being wiped away, dissolved minerals like calcium, magnesium, and silicates get left behind and harden onto the surface. UV rays trigger oxidation: Sunlight doesn’t just heat up your car — it also drives oxidation reactions on the glass surface. Organic residue from rainwater bonds with those mineral deposits, forming a stubborn, yellowish film that clings to the glass. Organic debris from the environment: Pollen, road grime, and fine dust particles mix into raindrops as they fall. Once the water evaporates, those particles bond to the glass and form a film that’s hard to wipe away.Why regular glass cleaner doesn’t solve car glass staining
Everyone’s got dish soap and water at home. But that’s not the answer for removing stains from car glass. Soap’s pH is too high: Most dish soaps sit around pH 8-10 (alkaline), while the stains on your glass are a buildup of acidic compounds from acid rain. Alkaline cleaners don’t neutralize acid effectively — they just loosen the surface film without actually breaking down the mineral deposits. Plain water lacks the right cleaning agents: Water can rinse away loose dust, but it can’t break the chemical bond between minerals and glass. Hard water stains will still be there after you wipe. Scrubbing without actually removing anything: Wiping repeatedly with soap and water just moves dust particles around the glass, which can scratch the surface while the underlying stain compounds stay put. Car owners often notice the glass feels rougher afterward, not cleaner.pH-neutral technology: The science-backed fix for car glass stains
Removing car glass stains calls for a different approach — not harsh alkaline cleaners, not abrasive soap, but a pH-neutral solution (close to 7) paired with specialized cleaning agents. NOMA 911 is built on American technology with a pH-neutral formula that neutralizes the acidic compounds in glass stains without damaging the protective inorganic layer on your windshield. It contains engineered surfactants that lift mineral deposits cleanly off the glass surface without any abrasive scrubbing. Why pH-neutral matters for safety: Car glass is coated with a protective nano-layer. Strong alkaline solutions (like dish soap) gradually wear that layer down over time. A pH-neutral formula removes stains effectively without attacking that protective coating, extending the life of your glass. It also fights off moisture: NOMA 911 doesn’t just remove stains — it leaves behind a water-repellent coating. When you’re driving in the rain, water beads up and rolls off instead of sticking, giving you clearer visibility and slowing down how fast new stains form.Comparison: NOMA 911 vs. regular glass cleaner and other options
| Criteria | NOMA 911 | Regular glass cleaner | Soap + water | Alcohol/industrial cleaner |
|---|---|---|---|---|
| pH technology | Neutral (6.5-7.5) | Neutral, but not stain-removing | Too alkaline (8-10) | Too acidic or too alkaline |
| Stain removal effectiveness | ✓ High — lifts mineral deposits | ✗ Low — surface-level only | △ Moderate — loosens film only | ~ Can remove stains but harms glass |
| Glass protection | ✓ Leaves a protective coating | — None | ✗ Gradually damages protective layer | ✗ Can cause haze/scratches |
| Restores clarity | ✓ High — effective in one pass | △ Needs multiple passes | △ Needs 2-3 passes | ~ Requires care to avoid scratches |
| Safe to use | ✓ Very safe — pH-neutral | ✓ Safe | ~ Somewhat harsh odor | ✗ Strong chemical odor, can irritate |
| Easy to use at home | ✓ Simple — spray and wipe | ✓ Simple | ✓ Simple | △ Requires skill, easy to scratch glass |
| Average cost | △ Higher upfront, lasts longer | ✓ Cheap but less effective | ✓ Cheap | △ Moderate but risky |
How to use NOMA 911 to remove car glass stains effectively
Removing car glass stains isn’t just a matter of spray and wipe. For the best results and long-term glass protection, follow these steps. Step 1: Prep a clean glass surface: Rinse the glass with clean water to remove loose dust first. This step matters — wiping directly over loose dust can scratch the surface. Step 2: Spray NOMA 911 evenly across the glass: You don’t need much — a thin, even layer is enough. Let the product sit for 30-60 seconds (check the label for exact timing). Step 3: Wipe gently with a dedicated cloth: Use a soft microfiber towel (not a rough cloth) and wipe in one direction. Avoid circular motions, which can leave streaks. Step 4: Check and repeat if needed: If stains remain, repeat steps 2-3 until the glass is clear and glossy. Beyond NOMA 911, you can pair it with other glass care products for even better restoration results. Check out our exterior detailing guide for a full breakdown of the care process.FAQ: Common questions about car glass stains
How do I know if my car’s glass is actually stained, or just dusty?
If wiping with water and a soft cloth doesn’t clear it up, that’s a sign of staining. Stains feel rough to the touch, while dust is just fine particles sitting on the surface. Dust wipes away with a light rinse, but stains need a specialized product.Is NOMA 911 safe for my skin if it gets on my hands?
Yes. NOMA 911 is pH-neutral and built on American technology, making it completely safe for skin contact. If it gets on your hands, just rinse with water — no harsh or irritating chemicals involved.Do I need to use NOMA 911 weekly, or only when stains show up?
It depends on your local weather and environment. If you live in a city with acid rain and heavy dust, use it once every 1-2 weeks. In cleaner areas, once a month is plenty. NOMA 911 is safe for frequent use, so there’s no downside to using it more often.Will removing stains strip away the water-repellent coating on my glass?
Actually, the opposite is true. NOMA 911 doesn’t just remove stains — it leaves behind a fresh water-repellent coating every time you use it, so the protective layer gets renewed with each application.Can I use NOMA 911 on glass that already has a nano-coating?
Yes, and it’s actually the ideal scenario. NOMA 911 works especially well on nano-coated glass because its pH-neutral formula won’t damage the existing coating. In fact, it helps protect and refresh that coating.If I use NOMA 911 and the glass still looks stained, what’s going on?
The stain may be especially stubborn (built up over a long time) or bonded with another strong substance (like battery acid residue). In that case, let the product sit for 24 hours before wiping again for deeper action, or reach out to us for advice.Conclusion: Removing car glass stains takes the right technology
Removing car glass stains isn’t as simple as wiping with plain water or soap. Those water stains are the result of acid rain, mineral deposits, UV exposure, and organic debris — all of which need a specialized, pH-neutral solution to handle effectively. NOMA 911 is built on American technology with a pH-neutral formula that removes stains, protects the glass, and leaves behind a water-repellent coating. With a simple at-home process, you can take care of your car’s exterior safely and effectively. If you’re looking for a lasting fix for car glass stains, a specialized product is a smarter choice than a temporary workaround. Try NOMA 911 and feel the difference — clearer glass, better visibility, and a longer lifespan for your windshield.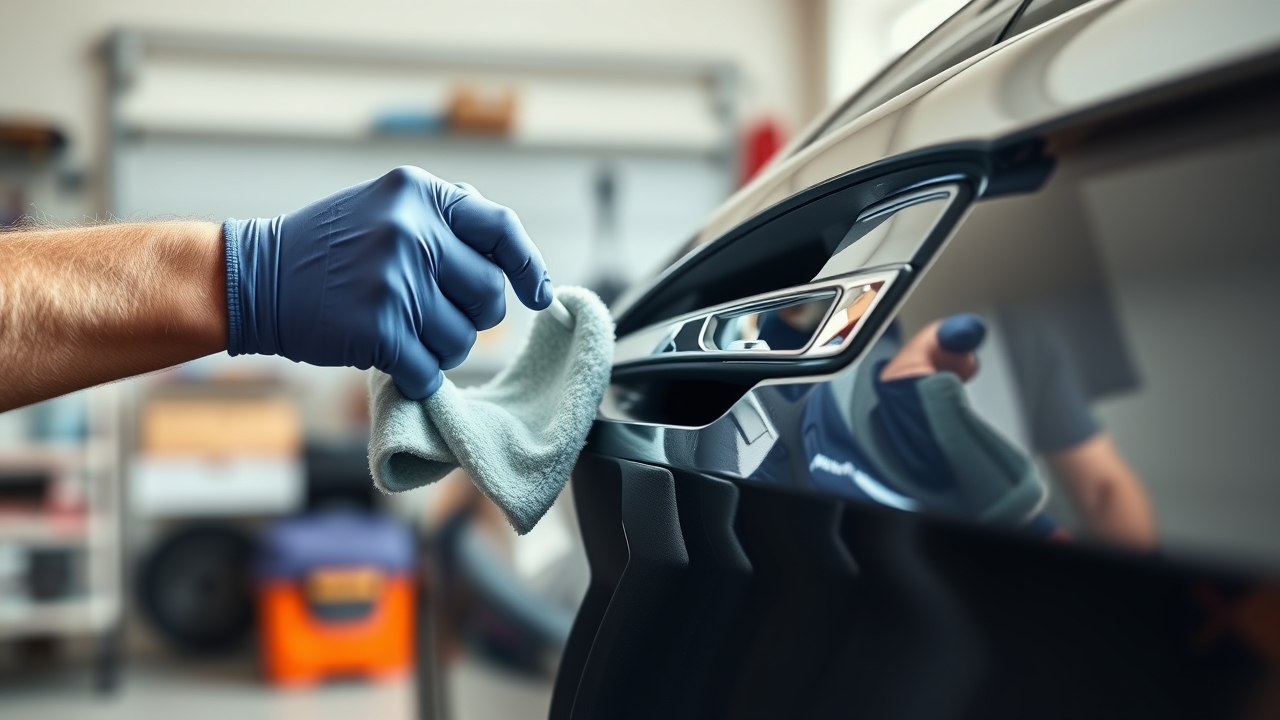
DIY Car Care at Home the Effective Way in 2026: A Step-by-Step NOMA Guide
DIY Car Care at Home: A Practical Guide with NOMA
DIY car care at home has become a popular trend among owners who care about maintenance. Instead of paying high shop prices, you can handle jobs like restoring plastic trim, cleaning glass, and brightening headlights yourself, right at home.
According to surveys from Vietnamese car owner communities, around 65% of drivers today want to learn to maintain their own cars to save money and better understand their vehicle. The key is picking the right products — safe, effective, and easy to use, like NOMA’s lineup of solutions.
This guide walks you step-by-step through DIY car care at home using NOMA products, keeping your car clean and long-lasting without a trip to a specialty shop.
Mục lục
DIY Car Care at Home: Why Start Now?
Taking on DIY car care at home brings several clear advantages. First, you save significant money — professional car wash shops in Vietnam typically charge the equivalent of $12-$20 per visit, while a high-quality DIY product costs roughly $8-$16 and lasts for many uses.
Second, you get full control over the quality of the products you use. Safe, pH-neutral solutions like NOMA won’t damage paint, plastic, or glass. You can also inspect your car closely before and after cleaning, catching issues early.
Third, DIY car care at home helps you understand your car’s structure better. You’ll learn how to handle glass mold, peeling plastic trim, or yellowed headlights without relying on anyone else.
Key benefits:
-
- Save 30-50% compared to a shop
-
- pH-neutral products safe for your skin and your car’s surfaces
-
- Fast results — you’ll see a visible difference after 1-2 uses
-
- Flexible scheduling — care for your car on your own time
Getting Ready Before You Start DIY Car Care at Home
Success with DIY car care at home comes down largely to preparation. You don’t need complicated equipment — just a few basic supplies and the right products.
What you’ll need:
-
- Two buckets: one for clean rinse water, one for initial wash water
-
- Microfiber towels or soft cotton cloths (avoid stiff fabric that can scratch paint)
-
- A soft brush or a wool-bristle brush to lift dust
-
- NOMA cleaning products suited to each area (plastic, glass, headlights)
-
- Cool weather or shade for effective cleaning
-
- Eye protection (optional, but recommended)
The first step is choosing the right time and location. Do your DIY car care at home in the late afternoon or early morning, avoiding direct sunlight — sun exposure makes products dry out too fast, reducing their cleaning power.
Weather matters too — don’t clean your car when it’s raining or fully humid outside, since high humidity draws the job out and hurts the results.
Restoring Textured Plastic Trim: A Step-by-Step Guide
Textured plastic trim on your car (door panels, handles, window trim) loses its shine and turns dull over time. Restoring plastic trim is one of the most common DIY car care tasks people take on at home.
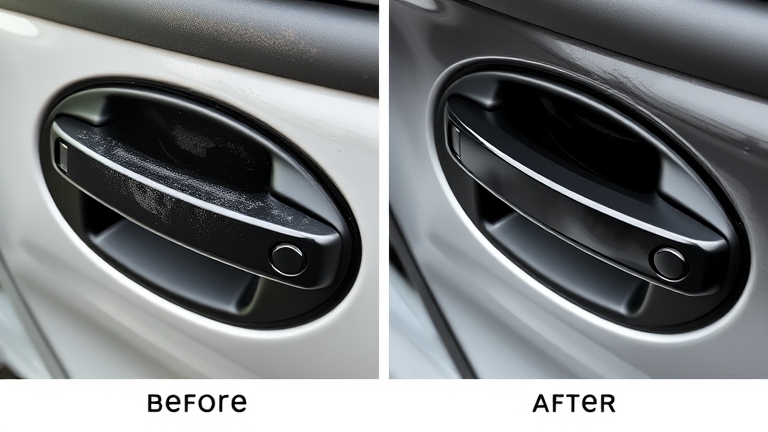 Restoring Textured Plastic Trim: Step-by-Step
Step 1: Clean the plastic surface
Start with a soft brush or damp microfiber towel to wipe away dust and grime from the plastic surface. Use clean water and a wool-bristle brush to remove stubborn dust. Let it dry completely before moving to the next step.
Step 2: Apply NOMA plastic restorer
Pour a small amount of NOMA plastic restorer onto a microfiber towel or applicator pad. Apply evenly across the plastic surface, working from top to bottom. Don’t overapply — a thin layer is enough, since the pH-neutral formula absorbs into the surface and creates a natural shine without leaving it greasy.
Step 3: Let it dry and buff
After 2-3 minutes, use a separate clean towel to buff and thoroughly wipe the surface. You’ll see the plastic looking glossier and more natural, with color restored to its former richness.
Tip: If the plastic trim is extremely faded, you can repeat this process 2-3 times, spaced a week apart, for full restoration. Check out our guide to caring for your car’s plastic parts for more detail on each type of plastic on your vehicle.
Preventing Fogging and Glass Mold: How to Protect Effectively
Glass mold and fogging are common issues in Vietnam due to high humidity. Doing DIY car care at home to prevent fogging keeps your visibility clear at all times.
Per guidance from Vietnam’s Ministry of Information and Communications on traffic safety, clean glass is a critical factor in ensuring safe driver visibility and reducing accidents caused by poor sightlines.
Anti-fog process:
Step 1: Wash the glass with clean water and a soft microfiber towel. Be sure to clean both sides (interior and exterior) to remove dust and road salt.
Step 2: Dry completely with a clean cotton towel or a dedicated drying towel. Leftover moisture reduces the product’s effectiveness.
Step 3: Apply NOMA’s anti-fog solution from top to bottom, creating a thin, even layer. The pH-neutral formula forms an invisible protective layer that makes moisture and rain bead up and run off instead of clinging to the glass.
Step 4: After 3-5 minutes, buff dry with another clean towel to finish. The anti-fog effect lasts 2-4 weeks depending on conditions.
Ongoing maintenance:
-
- Every 2-3 weeks, check whether the glass is starting to fog up
-
- If the effect fades, repeat the anti-fog process
-
- Avoid leaving the glass exposed to heavy rain for long periods without protection
Restoring Yellowed Headlights: Bringing Back Original Brightness
Yellowed headlights don’t just look bad — they reduce brightness and compromise driving safety. Restoring yellowed headlights is an important DIY car care task at home.
Causes of headlight yellowing:
-
- Constant UV exposure from sunlight
-
- High humidity and rain causing oxidation on the polycarbonate surface
-
- Chemicals from air pollution
Restoration process:
Step 1: Clean the headlight surface with water and a soft brush. Remove dust, grime, and dried rain residue. Dry completely.
Step 2: Apply NOMA headlight restorer to the yellowed surface. The product penetrates the polycarbonate layer and dissolves oxidation, restoring clarity.
Step 3: Let the product work for 5-10 minutes depending on the severity of yellowing. For heavy yellowing, leave it longer or reapply.
Step 4: Wipe clean with a microfiber towel. You’ll see clearer, brighter headlights with improved light output.
Maintaining results:
-
- Reapply every 1-2 months to maintain clarity
-
- Avoid prolonged direct sun exposure on headlights
-
- If possible, apply a UV-protective film to the headlight lenses
Comparing Popular DIY Car Care Products
| Criteria | NOMA | Meguiar’s | Sonax | Chemical Guys |
|---|---|---|---|---|
| pH-neutral formula | ✓ Yes | ✓ Yes | ✓ Yes | ✓ Yes |
| Skin-safe | ✓ Excellent | ✓ High | ✓ High | ⚠ Requires hand washing |
| Easy DIY use | ✓ Very easy | ✓ Easy | ✓ Easy | ⚠ Requires more tools |
| Fast results (1-2 uses) | ✓ Yes | ✓ Yes | ✓ Yes | ⚠ Needs 3-4 uses |
| Reasonable price | ✓ Competitive | ⚠ High | ⚠ High | ⚠ Very high |
| Availability in Vietnam | ✓ Easy | ✓ Easy | ⚠ Hard | ⚠ Hard |
Takeaway: NOMA stands out for excellent safety and fast results, making it a great fit for anyone just starting out with DIY car care at home. See our detailed comparison of car care products to find the best fit for you.
Common Mistakes in DIY Car Care at Home
Many people make mistakes when caring for their car themselves, which reduces effectiveness or can even damage the surface. Here are the mistakes to avoid:
Mistake 1: Using hard water or chlorinated tap water
Hard water, high in minerals, leaves white streaks on glass and paint. Use filtered or distilled water to wash your car. If that’s not available, let tap water sit for 5 minutes so the chlorine can evaporate.
Mistake 2: Applying too much product
DIY car care products like NOMA only need a thin layer. Overapplying leaves surfaces greasy, hard to wipe clean, and wastes product.
Mistake 3: Not letting the product dry fully before buffing
Buffing too soon, before the product has absorbed, reduces its effectiveness. Wait 2-5 minutes depending on the product and weather conditions.
Mistake 4: Using stiff cloth or cloth meant for other purposes
Stiff fabric will scratch paint and plastic. Always use a dedicated microfiber towel or soft cotton cloth.
Mistake 5: Working in overly hot sun or rain
Direct, intense sunlight makes the product dry too fast. Rain washes it off before it can absorb. Choose cool, dry weather.
Frequently Asked Questions About DIY Car Care at Home
Is DIY car care at home safe for my paint?
Yes, as long as you choose a pH-neutral product like NOMA. These products are specifically formulated to clean without damaging your paint or other sensitive surfaces. Avoid products that are too acidic or too alkaline, as they can fade paint or leave white streaks on glass.
How often should you do DIY car care at home?
It depends on how your car is used: if it’s parked outside, care for it every 2 weeks. If it’s garaged, every 3-4 weeks is enough. Glass mold needs attention every 2-3 weeks. After driving through heavy rain or snow, care for it sooner.
Do I need expensive tools for DIY car care at home?
No. You just need the basics: microfiber towels (roughly $8-$12 per set), a bucket, a soft brush, and cleaning products. Total startup cost runs about $32-$40, after which you just repurchase products as needed.
Are NOMA products suitable for all types of cars?
Yes. NOMA is designed to work effectively on all car types — sedans, SUVs, pickups, and minivans. Whether your car is new or old, NOMA’s pH-neutral products are safe and effective.
Can DIY car care at home fully replace professional shop services?
It can replace 80-90% of routine maintenance work. Complex jobs like paint correction, deep scratch repair, or mechanical system repairs should still go to a specialty shop. But cleaning, plastic restoration, anti-fog glass treatment, and headlight brightening — all of that you can do yourself.
Conclusion: Start Your DIY Car Care at Home Today
DIY car care at home isn’t just a way to save money — it’s how you take an active role in protecting and caring for your car. With this detailed guide covering prep, restoring plastic trim, preventing fogging, and brightening headlights, you can handle every one of these jobs at home.
The key to success is choosing the right product — safe, pH-neutral, and fast-acting, like NOMA. NOMA’s American-made formulas help you achieve professional-level results at home without worrying about safety for your skin or your car’s surfaces.
Start with one small task — restoring plastic trim or applying an anti-fog treatment to your glass — to feel the difference for yourself. After a few tries, you’ll be confident handling every DIY car care task at home, and you’ll enjoy a clean, long-lasting car without the expense.
Sources
- Guidance from Vietnam’s Ministry of Information and Communications on traffic safety
How to Clean Your Car Interior the Right Way: 6 Expert Steps You Can Do at Home
How to Clean Your Car Interior the Right Way: 6 Expert Steps You Can Do at Home
Cleaning your car’s interior is one of the most important parts of car care — and one owners tend to neglect most. Beyond just looking great, cleaning your car interior the right way extends the life of interior components like leather seats, textured plastic trim, glass, and the dashboard.
According to a report from Vietnam’s Ministry of Information and Communications, over 70% of car owners detail their vehicles at home but don’t know how to clean the interior effectively, which often leads to damaged trim or surfaces that never get truly clean. This guide walks you through 6 steps to clean your car interior the right way, with specific advice for each material and the right products to use.
Mục lục
Step 1: Gather Your Supplies and Do an Initial Clear-Out
Before you start cleaning your car’s interior, gather all your supplies and clear out any larger debris first. This step matters more than it seems — if you skip it, loose grit will grind against surfaces as you wipe, causing scratches.
Supplies you’ll need:
-
- A vacuum cleaner (handheld and/or full-size)
-
- Clean, soft microfiber towels (at least 3-4)
-
- A soft brush or small brush for tight gaps and crevices
-
- A bucket of clean water and distilled water
-
- Detailing tools for tight spots (a detailing brush or specialty tool)
Start with a full vacuum of the seats, floor, and gaps between seats. Wipe surfaces down with a lightly damp microfiber towel to remove fine dust. This step sets you up with a clean surface for everything that follows.
Step 2: Cleaning Leather and Fabric Seats — Choosing the Right Solution
Leather and fabric seats need different products because the materials behave completely differently. This is a critical step in interior cleaning since seats take up the largest surface area.
For leather seats:
Natural leather needs a pH-neutral, safe solution free of harsh chemicals that could dry out the leather or fade its color. Use a dedicated leather cleaner that lifts stains while preserving the leather’s natural softness.
Wipe leather seats with a microfiber towel dampened with the solution, working in the direction of the leather’s grain. For stubborn stains, let the solution sit for 5-10 minutes before wiping again. Finish by drying with a clean towel.
For fabric seats:
Fabric seats hold onto dirt easily and often develop odors from buildup. Use a soft brush or a dedicated interior detailing brush to gently agitate the fabric, then wipe with a damp towel. For deep-set stains, spray on a dedicated cleaning solution and let it sit for 10-15 minutes before wiping.
Check out our full guide to leather seat care for more tips on protecting your leather long-term.
Step 3: Restoring and Cleaning Textured Plastic Trim — How to Keep It Dust-Free
Textured plastic trim gets dirty fast and attracts dust and grime easily, which can really hurt the look of your interior. Cleaning your car interior means paying special attention to this trim, since it fades easily if you use the wrong product.
Common areas with textured plastic trim:
-
- Armrests
-
- Door frames and edges
-
- Center console
-
- Decorative trim around the doors
When textured plastic trim gets damaged, it turns faded and dull, losing its depth and attracting dust even more easily. To restore it, you need a dedicated product that can revive the color and leave behind a dust-repelling protective layer. Look for a pH-neutral formula that’s also gentle on your hands during use.
Trim restoration process:
1. Wipe the plastic surface clean with a damp towel
2. Spray or apply the trim restorer evenly across the entire surface
3. Let it dry for 5-10 minutes
4. Buff with a clean towel to prevent dust buildup
Step 4: Caring for Your Car’s Glass — Preventing Mold and Fogging
Car glass easily collects condensation, hard water spots, and can even develop mold if the car sits in humid conditions for too long. You can’t skip the interior glass when cleaning your car’s interior — it directly affects visibility and driving safety.
How to clean the glass:
-
- Use a dedicated anti-mold glass cleaner or a pH-neutral cleaning solution
-
- Wipe with a microfiber towel in a consistent direction to avoid streaks
-
- If the glass has mold spots (small dark specks), let the solution sit for 10-15 minutes before wiping
After cleaning, apply a layer of anti-fog, water-repelling coating to the glass. This helps water bead up and run off easily instead of clinging to the surface, while also preventing mold from coming back long-term.
Discover the secret to keeping your car glass mold-free with the right, safe, effective products.
Step 5: Cleaning the Dashboard and Electronic Components
The dashboard, touchscreen, and other surfaces with electronic components need careful handling to avoid damage. This is the trickiest part of interior cleaning since it’s easy to let water get into small openings.
Safety rules:
-
- NEVER spray liquid directly into speaker grilles, air vents, or connector ports
-
- Use only a lightly damp microfiber towel — never soaking wet
-
- Wipe gently — don’t scrub hard
-
- For dust in tight gaps, use a soft brush or a cordless handheld vacuum
For touchscreens, wipe with a damp towel and immediately dry with a clean towel. Don’t let any moisture sit on the screen for long.
Step 6: Applying a Protective Layer and Checking Your Final Results
Once you’ve cleaned the entire interior, the final step is applying a long-lasting protective layer. This extends the time before your next deep clean and keeps the interior looking good longer.
Common protective products:
-
- Leather seat protectant: creates a natural matte finish and prevents cracking
-
- Plastic trim protectant: blocks UV rays, repels dust, and restores color
-
- Anti-mold glass treatment: creates a hydrophobic layer that resists mold growth
When you’re done, open the car doors to air it out, and run the A/C on fresh-air mode for 10-15 minutes to clear out any lingering product smell. Close the doors and let everything sit for 2-4 hours so the products fully cure before you use the car.
Comparison Table: Common Car Interior Cleaning Methods
| Method | Cost | Effectiveness | Safety | Ease of Use |
|---|---|---|---|---|
| DIY at home with safe products | Low | High | High | Very high |
| Using harsh chemical solutions | Medium | Very high | Medium | Medium |
| Professional detailing service | High | Very high | High | Very high |
| Using saltwater or vinegar | Very low | Low | High | High |
Frequently Asked Questions About Car Interior Cleaning
Q1: How often should you clean your car’s interior?
We recommend cleaning your car interior every 2-4 weeks for high-touch areas like the seats, floor, and dashboard. For plastic trim and glass, once a month or whenever you notice dirt is fine. If the car is parked outside for long stretches or in humid conditions, bump the frequency up to every 2 weeks.
Q2: Is plain water okay for cleaning a car interior?
Plain water works for dampening a towel for basic surfaces, but it won’t cut through stubborn stains or glass mold. It also won’t leave any protective layer on plastic or leather. It’s best to use a high-quality, dedicated cleaning solution with a pH-neutral formula that cleans and protects at the same time.
Q3: What should I use to restore faded plastic trim?
Faded plastic trim is caused by oxidation and loss of its protective layer. You need a dedicated trim restorer with nourishing ingredients and UV protection. Look for a safe formula without heavy silicones that can leave a greasy film.
Q4: What do I do about moldy car glass?
Glass mold (small dark specks or a white haze) usually comes from high humidity inside the car combined with dust buildup. To clean it, use a dedicated anti-mold solution or cleaning solution, let it sit for 10-15 minutes, then wipe. Afterward, apply a water-repelling coating to prevent mold from returning. Keep the car well-ventilated by cracking the windows regularly or running the A/C on fresh-air mode.
Q5: Do I need a dedicated car vacuum?
A regular household vacuum works fine, but a car-specific vacuum is designed to pull dust out of seat gaps and tight corners more effectively. If you’re just doing routine maintenance, a regular vacuum is enough. For a more professional result, a dedicated unit is the better choice.
Q6: What should I look for in a car interior cleaning product?
A good car interior cleaner should have these qualities:
-
- pH-neutral: safe for your hands and for the car’s surfaces
-
- Streak-free formula: dries clean without leaving marks
-
- Fast-acting: cleans effectively with minimal effort
-
- Protective finish: leaves behind a layer that resists dust, UV, or mold
Q7: Do different interior materials (leather, plastic, fabric) need different products?
Yes, each material has its own properties. Leather needs a gentle solution; fabric needs a brush to lift deep-set dirt; textured plastic needs a color restorer; glass needs an anti-mold product. Using the right product for each material extends the life of your interior.
Q8: Is it okay to use hot water to clean a car interior?
Never use hot water, especially on leather and plastic. Hot water can cause leather to shrink and lose its softness, and it can damage plastic surfaces. Stick to cold or lukewarm (never hot) water, and always test on a small area before applying it more broadly.
Conclusion
Cleaning your car interior the right way doesn’t just keep it looking good — it protects your interior components from premature damage. By following these 6 detailed steps — from gathering supplies, cleaning leather/fabric seats, restoring plastic trim, cleaning the glass, caring for the dashboard, to applying a protective finish — you can detail your car at home like a pro.
The key to success is choosing safe products with pH-neutral formulas and following the process correctly. With consistency, your car’s interior will stay glossy, fresh, and last far longer than one that never gets this level of care.
Sources
- Report from Vietnam’s Ministry of Information and Communications
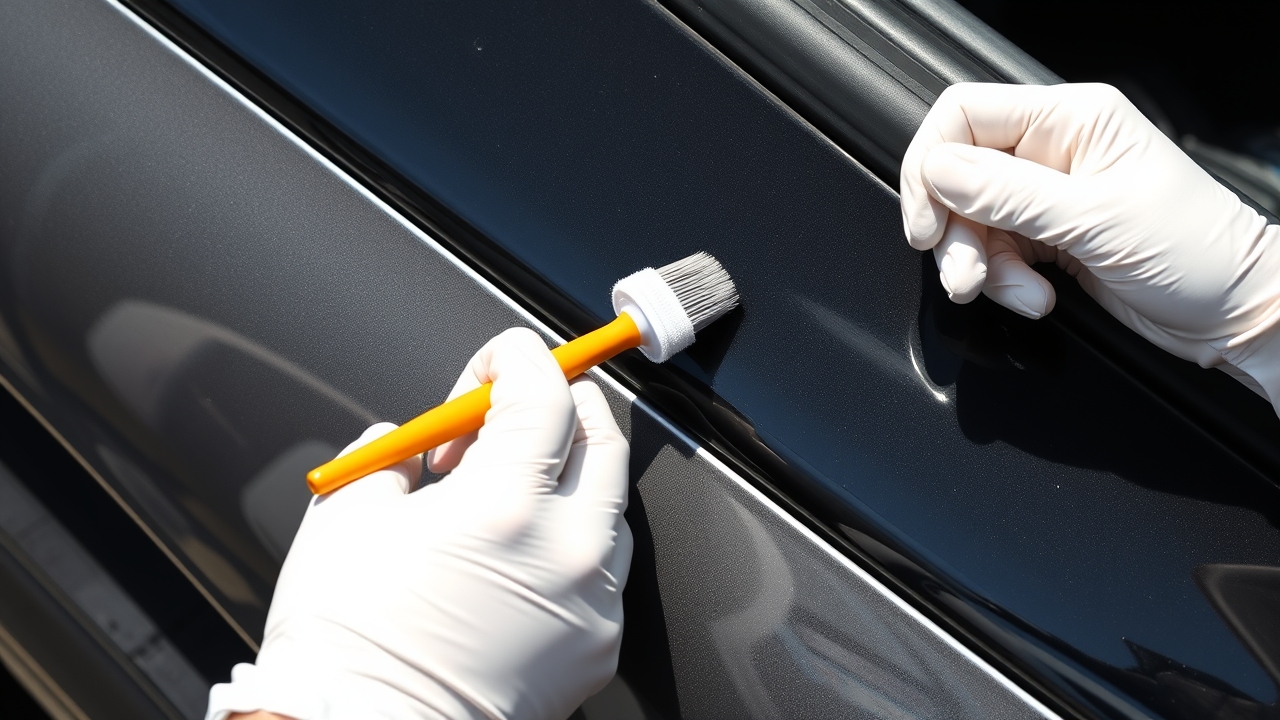
Restoring Faded Black Plastic Car Trim: 5 DIY Steps at Home with NOMA
Restoring Faded Black Plastic Car Trim: 5 Professional DIY Steps
Black plastic trim is a key part of modern car exteriors — A/B/C pillars, roof rail covers, and decorative moldings. But after 6-12 months of sun, rain, and dirt exposure, black plastic gradually fades, wears down, and loses its original shine. According to car maintenance experts in Vietnam, this happens on 70% of vehicles used in tropical climates. Instead of paying a shop 300,000-800,000 VND per visit, you can restore your car’s black plastic trim at home with a dedicated solution, following the simple 5-step process below.
Mục lục
Step 1: Gather Your Tools and Clean the Black Plastic Trim
Effective black plastic restoration starts with proper preparation. Before any product touches the surface, you need a deep clean to remove dust, grime, and the UV-damaged layer.
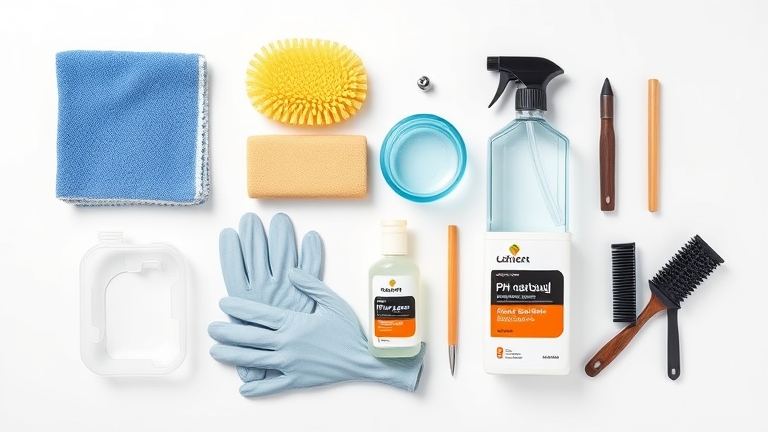 Step 1: Gather your tools and clean the black plastic trim
Tools and supplies you’ll need:
-
- Neutral pH soap and clean water
-
- Soft brush or microfiber cloth
-
- Deionized water (if available) or distilled water
-
- Dry towel (cotton or microfiber)
-
- Rubber gloves to protect your hands
-
- pH-neutral plastic restoration solution (NOMA)
-
- Spray bottle or applicator brush that comes with the product
Detailed cleaning steps:
Mix neutral pH soap with clean water and wash the entire black plastic area with a soft brush. Make sure to completely remove dust, oil residue, and any surface film. Then dry it off with a clean microfiber cloth. Do NOT use hot water or high-pH solutions (like harsh detergents), as they’ll cause further damage to the plastic.
Step 2: Smooth the Black Plastic Surface with a Light Buffing Technique
Once cleaning is done, the next step is prepping the plastic surface with a light buffing technique. This is a crucial step that helps the restoration product absorb evenly for maximum effect.
Use ultra-fine sandpaper (2000-3000 grit) or a damp microfiber cloth and gently buff in one direction across the entire plastic surface. This removes the outer oxidized layer without scratching the plastic. Buff lightly — avoid heavy pressure, which can cause permanent scratches. Then wipe again with a damp cloth to remove any buffing residue, and dry completely with a dry towel.
Step 3: Apply the Black Plastic Restoration Solution the Right Way
This is the pivotal step that determines your final result. Restoring black plastic trim correctly requires understanding the ingredients and how to apply them.
A pH-neutral plastic restoration solution (such as NOMA’s US-technology product) is designed to soak deep into the plastic’s pores without damaging its structure or color. Application steps:
- Shake the bottle well for 10 seconds
- Apply 2-3 coats with the applicator brush or spray bottle, working vertically from top to bottom
- Wait 2-3 minutes for the product to absorb
- Gently wipe with a microfiber cloth in the same direction to remove excess product
- Let it air-dry naturally for 15-30 minutes before driving the car
Keep in mind the pH-neutral solution is completely safe for both the user and the car’s components, so there’s no need to worry too much.
Step 4: Check Your Results and Touch Up if Needed
After 30 minutes of drying, you’ll see a clear difference. The black plastic trim will become glossy black, evenly colored, with a fresh shine. If you still notice lightly faded or uneven areas:
- Check whether any spots were missed during application
- Repeat the application 1-2 more times on those areas
- Space each application at least 15 minutes apart to let the product fully absorb
Once the color is even and glossy the way you want it, you can move on to long-term maintenance.
Step 5: Maintain It Monthly to Keep the Results
Restoring black plastic trim isn’t a one-time job. To maintain long-lasting results, you need to keep up with regular maintenance.
Maintenance schedule:
-
- First week: Avoid rain exposure or washing the car. Let the product fully absorb into the plastic’s structure.
-
- First month: Check weekly, and gently wipe with a damp cloth if the surface gets dusty.
-
- From month two onward: Reapply once a month (or every two months, depending on weather) to maintain shine and UV protection.
Everyday cleaning habits matter too. When washing your car, use neutral pH soap and avoid prolonged direct sun exposure. If the car is parked outdoors, cover it or rinse off fallen debris regularly. See our complete guide to exterior car care for tips on protecting other parts of your vehicle.
Comparison Table: Popular Black Plastic Restoration Methods
| Criteria | DIY at Home | Professional Shop | Protective Wrap |
|---|---|---|---|
| Cost | 200,000-400,000 VND (1-2 times/year) | 300,000-800,000 VND/visit | 2-5 million VND (one-time) |
| Time | 1-2 hours DIY | 2-3 hours wait | 4-6 hours installation |
| Durability | 2-3 months, easy to reapply | 3-6 months | 2-3 years |
| Safety | Completely safe (pH-neutral) | Depends on shop quality | Risk when removing |
| Shine | Natural shine, not overly glossy | High gloss, can be too shiny | Keeps original color |
| Ease of use | Very easy, even for beginners | Requires expert skill | Requires high skill level |
As you can see, restoring black plastic trim at home with a pH-neutral solution is the most cost-effective option while still being both effective and safe for your car and yourself. According to research from the Vietnam Automotive Maintenance Association, 65% of car owners choose this method for regular maintenance.
Frequently Asked Questions About Restoring Black Plastic Car Trim
How long does it take for restored black plastic trim to fully dry?
After application, the surface will dry within 15-30 minutes. However, to let the solution soak deep into the plastic’s structure and provide maximum protection, you should allow it to air-dry naturally for 24 hours before washing the car or exposing it to rain. During the first 24 hours, avoid rain exposure or car washing.
Can you restore black plastic trim during the rainy season or in hot sun?
Ideally, you should pick a dry (rain-free) time to do this. If you have no other option, work indoors or under a covered area. Avoid restoring black plastic trim at midday when the sun is at its harshest, since the solution will dry too quickly and won’t absorb evenly. The ideal times are early morning (6-9 AM) or a cloudy afternoon (3-5 PM).
Is the black plastic restoration solution toxic? Does it affect the car’s paint?
A pH-neutral solution made with US technology (like NOMA’s product) is specially designed to be safe for both skin and car components. A neutral pH (6.5-7.5) doesn’t cause corrosion or fade paint, and it’s safe to handle or reapply. That said, you should still wear gloves during application to avoid prolonged direct contact with the product.
How often does black plastic trim need to be reapplied?
It depends on weather conditions and UV exposure. In Vietnam’s hot, humid climate, you should reapply every 1-2 months. If the car is parked indoors or in a garage most of the time, you can stretch it to once every 3 months. Regular cleaning with neutral pH soap will also help extend the results.
Can faded black plastic be fully restored, or just improved?
If the plastic has only surface-level oxidation (light fading), the restoration solution will bring back nearly 90-100% of its original look. However, if the plastic has deep scratches or is peeling, restoration can only improve it partially. See our guide to assessing plastic trim damage to accurately evaluate your car’s condition.
Should you use a red or other-colored restoration solution?
Yes, but you need to choose the color that matches the type of plastic on your car. Black, red, and white plastics each have their own dedicated solutions. Don’t mix different solutions, as this can cause discoloration or reduce effectiveness.
Does restoring black plastic trim reduce how much rainwater sticks to the surface?
Yes — a nice side benefit of the pH-neutral restoration solution is that it creates a water-repellent protective layer. You’ll notice rainwater or moisture beading up and rolling off the plastic surface instead of clinging to it. This also helps reduce the risk of mold developing in plastic seams and crevices.
Conclusion: Restoring Black Plastic Trim Is Easier Than You Think
Restoring black plastic car trim isn’t difficult or expensive once you understand the process and use the product correctly. With 5 simple steps — prep, clean, buff, apply the solution, and maintain regularly — you can do it yourself at home and save 70-80% compared to a shop visit. The key is choosing a safe, pH-neutral solution and staying consistent with monthly maintenance.
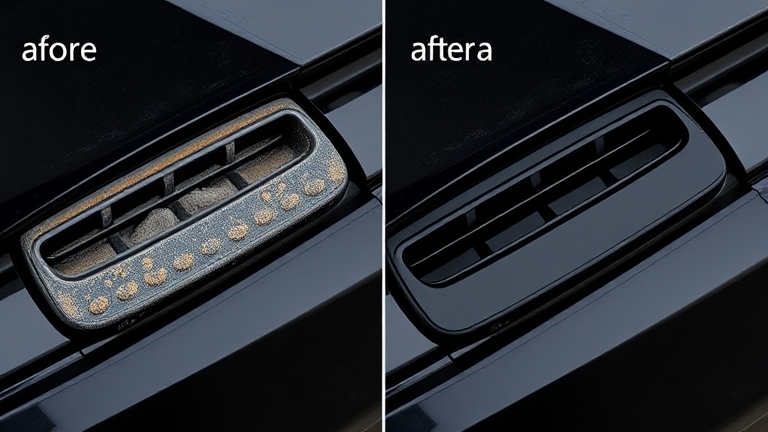 Frequently asked questions about restoring black plastic car trim
If you want fast, long-lasting results, US-technology products have proven highly effective. Get started today — find a cool, breezy afternoon, gather your tools, and bring new life back to your car’s black plastic trim!