
Professional Leather Car Seat Cleaning — A Step-by-Step Process

Professional Leather Car Seat Cleaning — A Step-by-Step Process
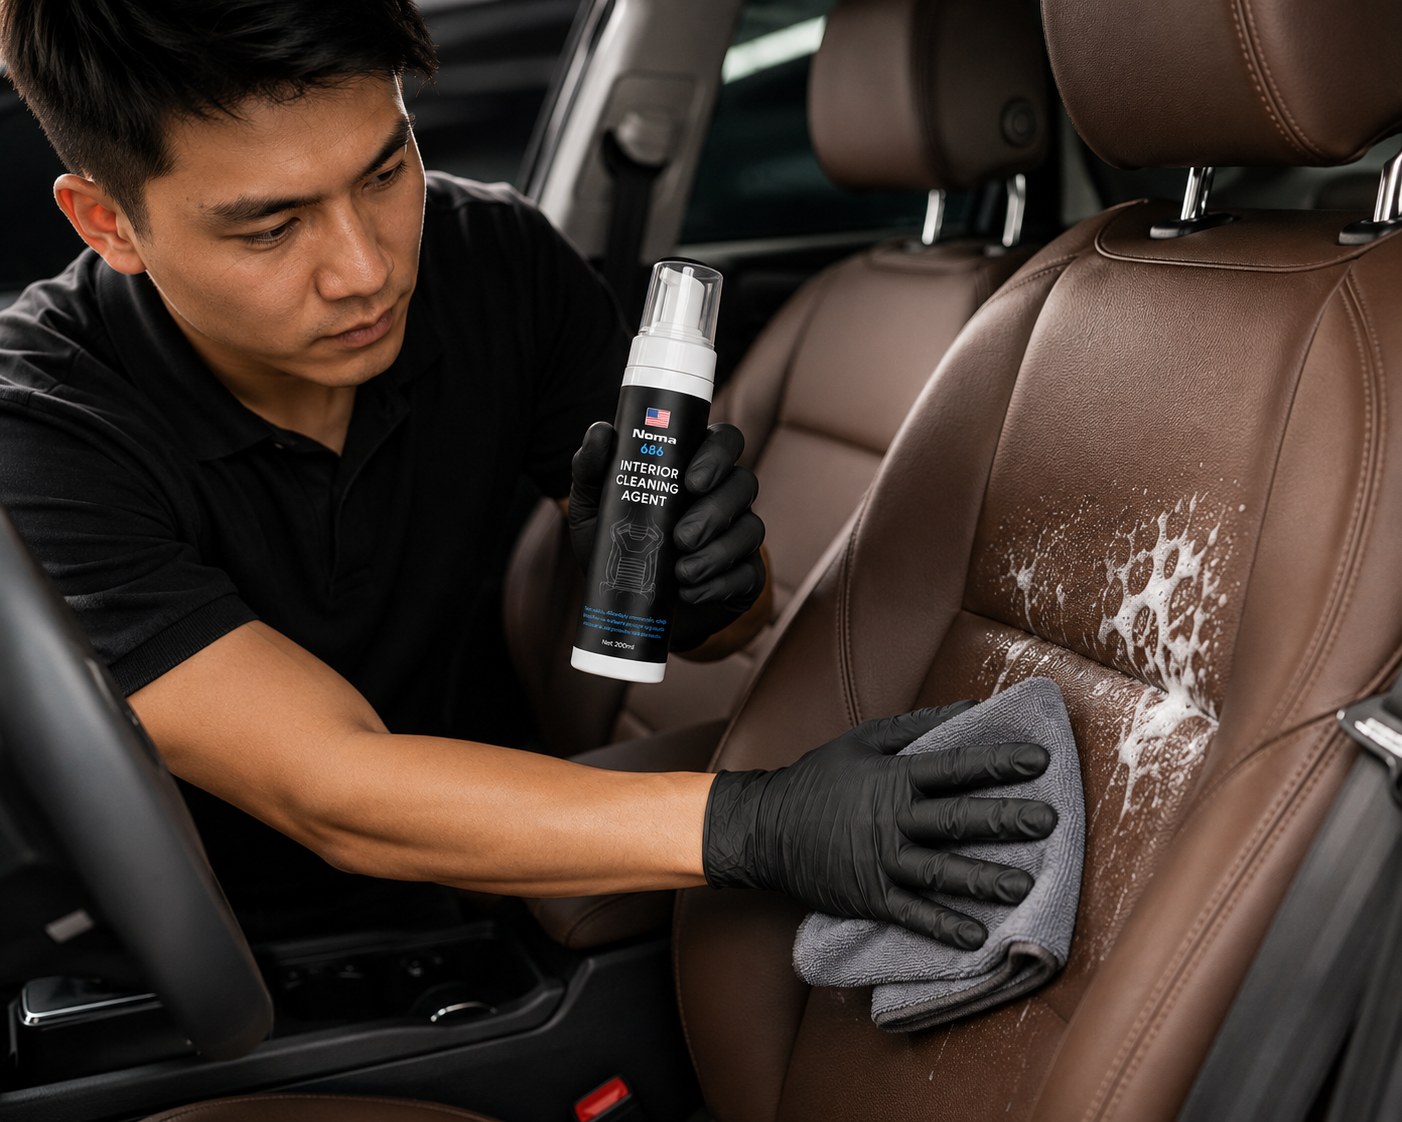
Leather seats are a real highlight of any car’s interior, but they’re also prone to dirt, fading, and cracking without the right care. Cleaning your leather car seats properly extends the life of the leather, keeps that upscale look intact, and helps protect your car’s resale value. A professional leather seat cleaning process comes down to four main steps: prep, cleaning, conditioning, and ongoing maintenance.
According to industry reports on vehicle interior condition, more than 70% of car owners don’t know how to properly clean leather car seats, which leads to premature wear and damage. With a product like NOMA 686 — a dedicated leather seat cleaning & conditioning kit — you can follow a professional detailing process at home without a trip to the shop.
Prepping and Assessing Your Leather Seats Before Cleaning
Prep is the step that determines how well the rest of the cleaning process goes. Start by checking the current condition of the seats carefully: is there dust and grime, mold, oil stains, or stubborn dirt buildup?
If the seats are heavily soiled, vacuum them first with a strong vacuum to remove dust, crumbs, and loose particles. Pay close attention to the tight gaps along the seams.
Set up your workspace inside the car — open the doors for airflow and avoid direct sunlight, since UV rays dry out leather. Gather clean microfiber cloths, a dedicated soft brush, and your main product, NOMA 686 — a leather cleaning & conditioning kit that includes both a cleaning solution and a conditioning cream.
A spray bottle of clean water also comes in handy for an initial rinse. The ideal water temperature is around 77–86°F (25–30°C) — avoid water that’s too hot, since it damages the leather’s natural protective finish.
The Right Way to Clean Your Leather Car Seats
Cleaning is the most important step in the process — this is where you remove built-up grime, oils, and dead skin cells that accumulate over time.
Step 1: Mix a cleaning solution using NOMA 686 according to the bottle’s instructions (typically diluted 1:5 or 1:10 with water, depending on how dirty the seats are). This is a gentle foaming formula that won’t damage leather the way harsh cleaners can.
Step 2: Apply the solution to one section of the seat at a time, then use a soft brush — not too stiff, to avoid scratching the leather — and gently scrub from top to bottom. Give stubborn stains extra time, but keep your touch light.
Step 3: Once you’ve finished scrubbing, use a damp (not soaking wet) microfiber cloth to wipe away the foam. Wipe gently in one direction — going back and forth pushes dirt deeper into the leather’s pores.
Step 4: Repeat the process for the remaining sections of the seat. If the seats are especially dirty, you can run through the cleaning steps twice.
Finally, use a clean, dry towel to blot the leather completely dry. Don’t move on to conditioning while the seat is still damp — it reduces how well the conditioning cream absorbs.
Conditioning and Restoring Softness to Your Leather Seats
Conditioning is what keeps your leather car seats soft, glossy, and protected against UV rays and shifting humidity.
NOMA 686 includes a dedicated leather conditioning cream formulated with moisturizing and protective ingredients. Start by taking a small amount of cream on your fingertip — not too much, or the leather will feel greasy — and spreading it evenly across the seat surface.
Use your fingers or a soft foam applicator to work it in with small circular motions until the cream fully absorbs. It typically takes 5–10 minutes to fully soak in, depending on how dry the leather is.
Pay extra attention to tight seams and folds in the seat — these areas dry out fastest, so they need more thorough conditioning. Avoid over-applying cream to any one spot, since that creates uneven patches.
Once you’re done conditioning, let the seat air-dry naturally for about 30 minutes before sitting on it or closing the car doors. It’s best to condition in the evening or overnight so the cream has enough time to fully absorb.
Ongoing Maintenance: Caring for Your Leather Seats Every Week
Regular upkeep is what keeps your leather seats soft and glossy over the long haul. You don’t need to run the full cleaning process every week — instead, stick to small weekly tasks.
Weekly: Lightly vacuum the entire seat and wipe it dry with a microfiber cloth. For small spots, dampen a cloth with a bit of diluted cleaning solution (weaker than your full cleaning mix) and spot-clean.
Monthly (every 4 weeks): Do a light conditioning pass — just work NOMA 686‘s conditioning cream into any dry spots without doing a full clean. This helps maintain moisture and shine.
Quarterly (every 3 months): Run the full leather seat cleaning process described above — complete cleaning and conditioning. This is the ideal maintenance cycle for leather seats, especially in hot, humid climates with strong UV exposure.
During humid or rainy stretches, add an extra maintenance session mid-quarter, since higher humidity speeds up mold growth. Always leave the car doors open for 10–15 minutes after each cleaning session to air out any leftover moisture.
For more on caring for the rest of your interior, check out our multi-purpose interior cleaning guide.
Comparing Leather Car Seat Cleaning Methods
| Criteria | At-Home Cleaning with NOMA 686 | Cold Water + Soap | Professional Detail Shop | No Cleaning |
|---|---|---|---|---|
| Cost | Affordable per quarter | Cheapest per session, but far less effective | Highest cost per visit | $0 — but leather deteriorates |
| Time | 45–60 min for the whole car | 20–30 min | 2–3 hrs plus travel time | — |
| Cleanliness | 95% (removes deep grime) | 60% (surface only) | 99% (professional equipment) | 0% |
| Post-Clean Protection | Yes (dedicated conditioning cream) | No (leather dries out) | Yes (full protection) | No |
| Convenience | High (done at home) | High | Low (requires an appointment) | — |
| Leather Safety | High (gentle formula) | Medium | High | Low (leather deteriorates) |
Cleaning your leather car seats at home with NOMA 686 delivers the best results in terms of cost, convenience, and long-term leather protection. You stay in control of the quality, you can redo any spot you’re not happy with, and you build up skill that makes every session better than the last.
Common Mistakes to Avoid When Cleaning Leather Car Seats
Mistake 1: Using water that’s too hot or too cold. Hot water damages the leather’s protective finish, while very cold water stiffens the leather and makes it harder for conditioner to absorb.
Mistake 2: Using a brush that’s too stiff or scrubbing too hard. A lot of people assume harder scrubbing means cleaner results, but in reality it scratches the leather’s surface, and those scratches attract more dirt over time.
Mistake 3: Not rinsing off all the cleaning foam. Leftover foam residue dries the leather out and can lead to cracking within a few days.
Mistake 4: Using too much conditioning cream. The leather ends up greasy, dulled, and prone to attracting dust. Rule of thumb: a pea-sized amount of cream is enough for one seat.
Mistake 5: Cleaning repeatedly without letting the seat fully dry in between. If you’re doing two cleaning passes in one day, let the seat air-dry naturally — at least 1 hour — before starting the second pass.
Frequently Asked Questions About Leather Car Seat Cleaning
How often should I clean my leather car seats?
You should do a full seat cleaning once per quarter (every 3 months). If your seats get dirty often or you’re in a dusty environment, you can bump that up to twice per quarter. Weekly upkeep just needs vacuuming and a wipe-down with a microfiber cloth. Using NOMA 686 ensures your seats get thoroughly cleaned and properly conditioned.
My leather seats feel damp and smell musty — what should I do?
That’s a sign of mold. Clean the seats right away with a stronger cleaning solution (higher concentration) and leave the car doors open for 30–45 minutes to air out. If the smell persists, try spraying an odor eliminator on the seats or leaving activated charcoal in the car overnight. To prevent it from coming back, always air out the car after every cleaning session.
My leather seats are cracking in patches — can they be saved?
If the cracking is minor (just a slight sheen loss on the surface), thorough cleaning plus conditioning will improve it. But if the cracking is extensive or the leather is tearing, you’ll need professional leather restoration or reupholstering — that’s shop-level work. Prevention is the better strategy: clean and condition your leather seats on a regular schedule.
Can I use the same routine I’d use on my home sofa?
No. Leather car seats deal with high heat, UV exposure, and constantly shifting humidity — completely different conditions from an indoor sofa. Sofa conditioners may not be compatible with automotive leather and can leave it dull or greasy. Stick with a dedicated product like NOMA 686 for safe, effective results.
Should I clean my leather seats before or after washing the car?
Wash the car first (to rinse off dust and road salt), then let it dry completely before cleaning the leather seats. If the seats are still damp from rain or a car wash, the conditioning cream won’t bond well and will just get wiped away.
Why use NOMA 686 instead of another leather seat cleaner?
NOMA 686 is a complete leather cleaning & conditioning kit — both the cleaning solution and the conditioning cream are formulated to professional detailing standards. It’s built specifically for automotive leather, easy to use, gentle on leather, reasonably priced, and delivers longer-lasting results than generic products.
Conclusion
Professional leather car seat cleaning isn’t complicated once you understand the process: prep, clean, condition, and maintain on a regular schedule. With NOMA 686 — a dedicated leather seat cleaning & conditioning kit — you can run a shop-quality car care routine right at home, save on detailing costs, and keep your leather seats looking their best.
Start with one full cleaning session this quarter, then keep up with weekly and monthly maintenance. After 6 months, you’ll notice seats that are glossier and softer, and a car that holds its value better. Try this process today — professional-level leather care that anyone can do at home.
Sources
- Industry reports on vehicle interior condition
Related Reading
- Multi-purpose interior cleaning guide

Cleaning Leather Car Seats: NOMA 692 vs. NOMA 686 — Choosing the Right One
Cleaning Leather Car Seats: NOMA 692 vs. NOMA 686 — Choosing the Right One
Leather seats are a standout feature of your car’s interior, but they’re also prone to staining, discoloration, and wear if not cared for properly. Cleaning leather car seats isn’t just about wiping away dirt — it also means conditioning and protecting the leather from UV damage.
There are plenty of products on the market, but which one is right for you? NOMA offers two main solutions: NOMA 692 (a dedicated cleaner) and NOMA 686 (a complete cleaning & conditioning kit). This article breaks down the difference between the two, the strengths of each, and how to choose the right one for your needs.
What Are NOMA 692 and NOMA 686?
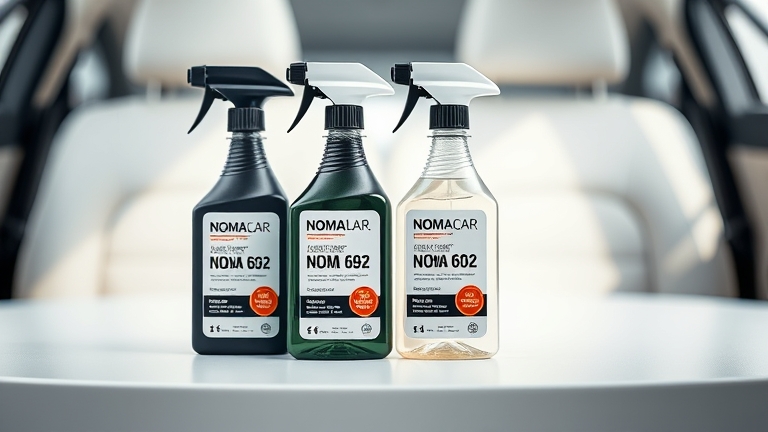
NOMA 692 is a dedicated cleaner for leather and fabric seats. Its formula focuses on lifting dirt, grease, and stains from the seat surface, restoring the material’s natural color without damaging the leather.
 What Are NOMA 692 and NOMA 686?
It’s designed for anyone who wants a thorough clean, especially when seats are stained from food, dirt, or old marks that have set in over time.
NOMA 686 is a complete leather seat cleaning and conditioning kit, made up of two separate products: one cleaner and one conditioner/protectant. This kit provides a full solution from cleaning through conditioning, keeping leather seats soft, glossy, and protected for the long term.
It’s built for anyone who wants to care for their leather seats with a full professional-style routine — both the cleaning step and the long-term conditioning step.
Comparing Ingredients and Function in Detail
Primary function of each product
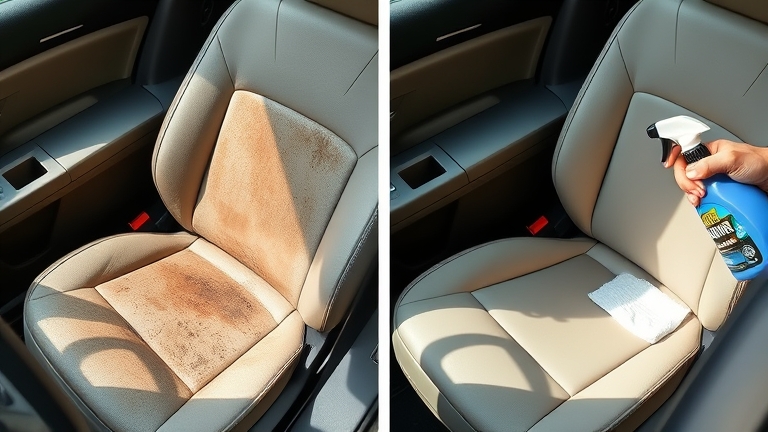
NOMA 692 is focused purely on deep cleaning and doesn’t include a conditioning step. This is ideal if you already have a separate conditioner or just need routine seat cleaning.
 Comparing Ingredients and Function in Detail
NOMA 686 combines cleaning + conditioning, letting you complete a full care routine with a single kit. This is a major advantage in convenience and formula consistency.
Based on real-world use in professional detail shops (see our full interior care guide), pairing cleaning with an immediate conditioning step tends to deliver the best results in the least time.
Safety and ingredients
NOMA 692’s formula is optimized to lift dirt effectively without damaging genuine leather. That said, you should wear gloves and avoid contact with skin and eyes during use, as the cleaning formula can irritate skin with prolonged direct contact.
NOMA 686’s conditioning step is formulated to be gentler on skin, though washing your hands after use is still recommended.
Neither product is harmful to leather when used as directed. NOMA products are officially imported, with a publicly available GHS-compliant MSDS.
Detailed Comparison: NOMA 692 vs. NOMA 686
| Criteria | NOMA 692 | NOMA 686 |
|---|---|---|
| Primary function | Cleans leather/fabric seats | Cleaning + conditioning kit for leather seats |
| Format | Single product | 2-product kit |
| Process | 1 step | 2 steps (clean → condition) |
| Best for seat type | Leather, fabric, cloth | Leather (primarily) |
| Convenience | Good if you just need cleaning | Complete, from cleaning to protection |
| Long-term value | Good when paired with a separate conditioner | Optimal — all-in-one |
| Skin safety | Gloves recommended | Gentler on skin |
| Results | Immediately clean and glossy | Clean, soft, and glossy |
Real-World Use Cases
When should you choose NOMA 692?
Choose NOMA 692 if you:
 Detailed Comparison: NOMA 692 vs. NOMA 686
- Just need routine seat cleaning without added conditioning.
- Already own a leather conditioner.
- Want a lower-cost option by buying a single product.
- Run a detail shop with its own separate conditioning process.
- Have seats with heavy staining (dirt, food stains) that need deep cleaning.
For example: your car has a coffee stain on the seat, or the seats are dusty after a long road trip. NOMA 692 will clean it effectively in a single step.
When should you choose NOMA 686?
Choose NOMA 686 if you:
- Want a complete leather seat care routine (cleaning + conditioning).
- Consider your leather seats a priority and want long-term protection.
- Prefer the convenience of an all-in-one kit (no need to source a separate conditioner).
- Run a shop or detail business that wants to offer a premium interior care service.
- Want your leather seats to stay soft and never dry out or crack over time.
For example: you handle DIY car care every month and want your leather seats to always stay in top condition. NOMA 686 gives you everything you need, from cleaning to protection, saving you the trouble of sourcing another product.
How to Use Each Product Correctly
Cleaning process with NOMA 692
Step 1: Vacuum the seats thoroughly before applying any product.
Step 2: Put on protective gloves, since NOMA 692 can irritate skin with prolonged contact.
Step 3: Spray NOMA 692 onto the seat, focusing on stained areas. Let it dwell for 1–2 minutes.
Step 4: Wipe with a soft microfiber cloth using light, circular motions.
Step 5: Wipe with a damp cloth, then dry with a soft towel.
Result: Clean, bright seats, ready for conditioning if needed.
Full care process with NOMA 686
Steps 1–5: Follow the NOMA 692 instructions above using the cleaning product from the kit.
Step 6: Once the seat is completely dry, spray on the conditioning product from the NOMA 686 kit.
Step 7: Wipe evenly with a clean microfiber cloth.
Step 8: Let it air-dry naturally for 10–15 minutes before using the car.
Result: Clean, soft, glossy seats, protected from dust and UV rays.
Following a professional interior care routine like this every 2–3 months helps keep leather seats in their best possible condition.
Common Questions About Cleaning Leather Car Seats
Why do leather seats dry out and crack?
Leather dries out without regular conditioning, especially in areas with direct sun exposure. UV rays strip moisture from the leather, causing it to become dry, stiff, and eventually crack over time.
Besides conditioning, park out of direct sunlight when possible and use a sunshade to help protect your seats.
Is cleaning leather car seats difficult?
Not if you use the right products the right way. NOMA 692 and NOMA 686 are designed for DIY use at home, with no special skills required.
Simply follow the instructions, use a clean microfiber cloth, and avoid direct skin contact with the cleaning product.
Can I use NOMA 692 on fabric seats?
Yes. NOMA 692 works well on both leather and fabric. For fabric seats, cleaning alone is usually enough, and you don’t necessarily need the full NOMA 686 kit, since its conditioning step is formulated specifically for leather.
If your fabric seats need long-term protection, look for a dedicated fabric protectant, or check our fabric seat care guide.
Conclusion: Which Leather Seat Cleaning Product Should You Choose?
NOMA 692 is a great fit if you just need a quick, low-cost clean, or already have a separate conditioner.
 Conclusion: Which Leather Seat Cleaning Product Should You Choose?
NOMA 686 is the better fit if you want a complete leather seat care routine, long-term protection, and the convenience of an all-in-one kit.
Both are professional-grade solutions for cleaning leather car seats, and both are designed by NOMA to be easy for anyone to use DIY at home. Choose based on what your seats need, and you’ll see clear results after your very first use.
If you still have questions, browse more NOMA leather seat care products or contact customer support for personalized advice.
5 Steps to Restore Yellowed Headlights with NOMA 620 — Real, Visible Results
5 Steps to Restore Yellowed Headlights with NOMA 620 — Real, Visible Results
Yellowed, foggy headlights are a common problem on cars after 5–7 years of use. The main culprits are UV rays, heat, and humidity, which oxidize the polycarbonate outer layer of the headlight lens. According to reports from professional detailing shops, roughly 70% of car owners handle this at home themselves rather than pay the higher cost of a dealership visit.
NOMA 620 is a dedicated product for restoring yellowed, foggy headlights without removing the housing or using complex equipment. The restoration process takes just 30–45 minutes, with visible results after the very first use. This article walks you through a detailed 5-step process, from prep to checking your results, so you can achieve professional-level headlight care at home.
Step 1: Prep and Choose the Right Headlight Restoration Product
Before you start restoring yellowed headlights, gather your tools and choose the right product. NOMA 620 is a top pick for headlight restoration thanks to a formula built specifically for yellowing and haze.
Tools you’ll need:
- Clean microfiber towels (2–3)
- Clean water or distilled water
- A small container or tray
- A soft brush or boar-hair brush (optional)
- Protective gloves (NOMA 620 can be irritating to skin)
About NOMA 620:
NOMA 620 is developed to professional detailing standards, with active ingredients that trigger a reverse-oxidation reaction to strip away the oxidized layer on the outside of the headlight. When used correctly, the product does not harm the underlying polycarbonate material.
⚠️ Safety warning: NOMA 620 can be irritating to skin and mucous membranes. Always wear gloves when using it, avoid contact with eyes, and rinse immediately with clean water if any product gets on your skin.
You can also explore NOMA’s full lineup of car care products to plan out a longer-term maintenance routine for your vehicle.
Step 2: Clean and Dry the Headlights Before Restoration
Thorough cleaning is essential to ensure NOMA 620 performs at its best when restoring yellowed headlights. Any leftover dust, grime, or salt residue will affect your final results.
Detailed cleaning steps:
- Wash the headlights with clean water and a mild soap to remove surface dust and grime
- Dry completely with a clean microfiber towel
- Wait 2–3 minutes to let the headlights dry fully before applying NOMA 620
- If the headlight surface is still damp, restoration results will be noticeably weaker
Some car owners use distilled water or a dedicated glass cleaner for an extra-thorough clean, though plain water is usually sufficient. Once dry, you’re ready for the next step.
Step 3: Apply NOMA 620 to Restore Yellowed Headlights
This is the step that determines your restoration results. Applying the product correctly ensures the active ingredients in NOMA 620 make even contact across the whole surface for maximum effect.
How to apply NOMA 620:
- Shake the NOMA 620 bottle thoroughly for 15–20 seconds to ensure the active ingredients are well mixed
- Pour a small amount (about 5–10 ml) into a tray or small container
- Dip a soft brush or microfiber cloth into the solution
- Apply NOMA 620 evenly across the entire yellowed headlight surface
- Work it in with light, circular motions to avoid damaging the polycarbonate
- Let the product sit for 10–15 minutes (this dwell time is critical)
After 10–15 minutes, gently wipe with a clean microfiber towel to lift away the now-loosened oxidized layer. Keep your motions light to avoid scratching the headlight surface.
Step 4: Check Your Results and Repeat If Needed
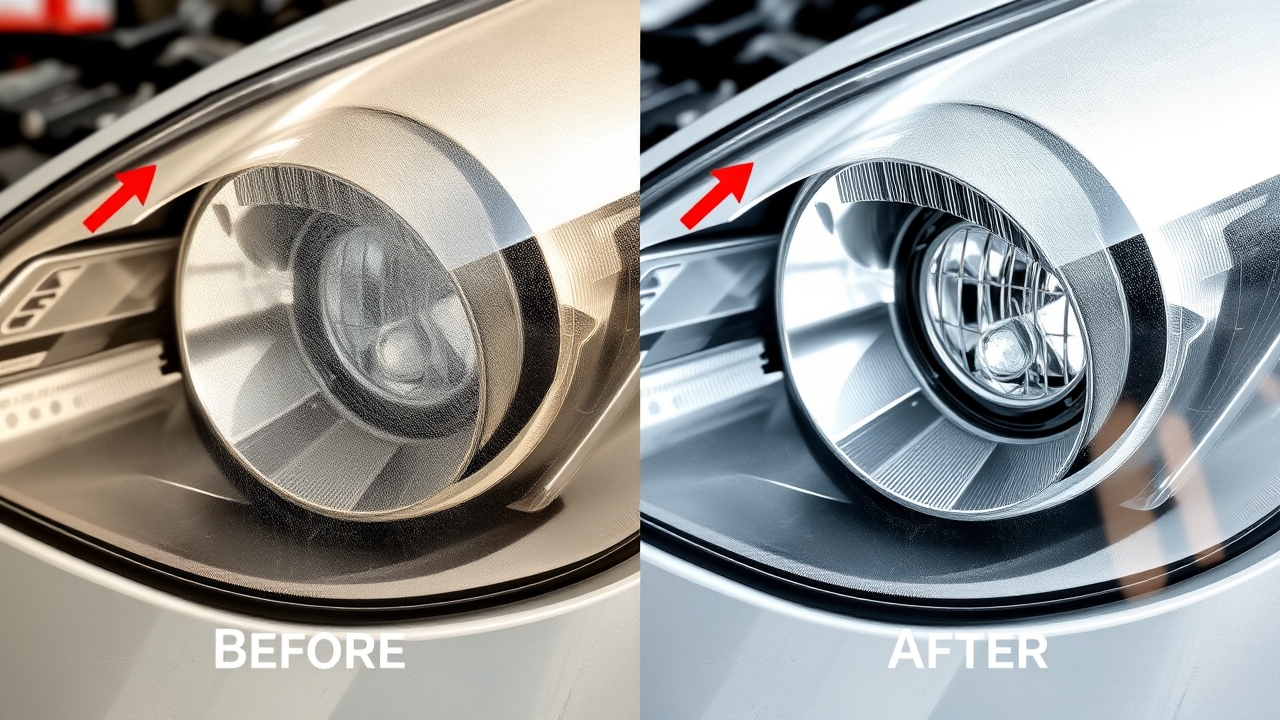
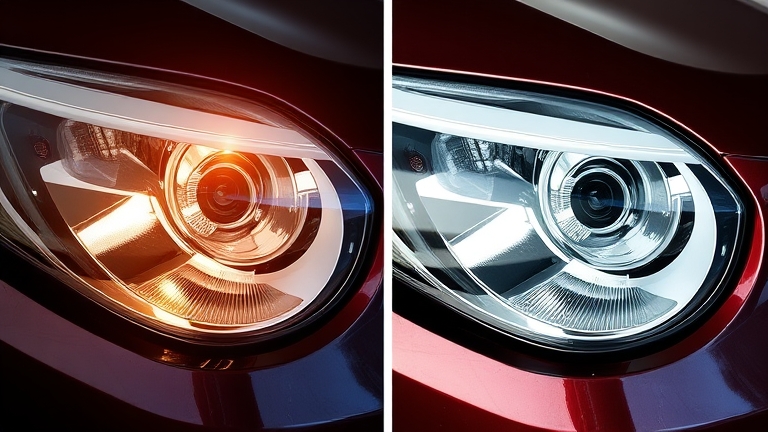
Once wiped clean, you’ll notice a clear difference right away. The headlight will look brighter, with noticeably less yellowing and haze. Depending on how bad the original yellowing was, you may need to repeat the process.
How to check your results:
- Rinse off all remaining NOMA 620 with clean water
- Dry with a microfiber towel
- Inspect the headlight in natural daylight, and check its nighttime beam performance
- Compare before-and-after photos to clearly see the improvement
If the headlight is still noticeably yellowed, you can repeat the process one or two more times. For very severe yellowing, you may need 3–4 applications of NOMA 620, spaced 2–3 days apart to give the polycarbonate time to recover.
| Yellowing Level | Applications of NOMA 620 Needed | Time to Complete | Expected Result |
|---|---|---|---|
| Mild (10–20%) | 1 application | 45 minutes | 90–95% clarity restored |
| Moderate (30–50%) | 2 applications | 2–3 days | 80–90% clarity restored |
| Severe (>50%) | 3–4 applications | 1–2 weeks | 70–85% clarity restored |
Step 5: Maintain and Protect Your Headlights After Restoration
After restoring your yellowed headlights, ongoing maintenance is key to making the results last. Keep your headlights clean and limit their long-term exposure to UV rays.
 Step 5: Maintain and Protect Your Headlights After Restoration
Headlight maintenance steps:
- Wash your headlights regularly whenever you wash the car (at least once a week)
- Use clean water and a soft microfiber towel to avoid scratching
- Dry immediately after washing to prevent water spots
- Park in a garage or under cover when possible to reduce UV exposure
- Apply NOMA 922 (nano glass coating) to the headlights after restoration to add an extra layer of oxidation protection
NOMA 922 nano glass coating helps shield your headlights from environmental damage. The NOMA 922 usage guide has more details on how to pair these two products.
With regular maintenance, your headlights will stay bright and optically clear for much longer, reducing how often you’ll need to restore them again.
Frequently Asked Questions About Restoring Yellowed Headlights
Is NOMA 620 safe on polycarbonate?
Yes, NOMA 620 is formulated to be safe on polycarbonate when used according to the instructions. The active ingredients only target the outer oxidized layer without damaging the headlight’s underlying structure. That said, it’s important not to let the product sit too long, and always wear gloves to protect your skin. For more protective products, check out NOMA’s full car care lineup.
How long do headlight restoration results last?
How long results last depends on your driving conditions and how well you maintain your headlights afterward. If you wash your car regularly, park under cover, and apply a protective nano coating, results can last 6–12 months. Cars in regions with extreme sun or rain exposure may need restoration again after just 3–6 months. Regular maintenance helps extend the time between restorations.
Do I need to remove the headlight housing to restore it?
No. NOMA 620 is designed to be used directly on the headlight while it’s still mounted on the car — no disassembly required. Removing the headlight housing can be complicated, time-consuming, and risks damaging other components. On-car restoration with NOMA 620 is simpler, safer, and just as effective.
Is headlight restoration expensive?
Restoring your headlights at home with NOMA 620 is far more affordable than a professional shop visit. NOMA 620 is inexpensive, and a single bottle can restore both front headlights. A professional shop restoration can cost significantly more, while doing it yourself only costs the price of the product.
Can NOMA 620 be used on other types of vehicles?
Yes, NOMA 620 works on most types of vehicles: sedans, SUVs, pickups, and minivans. As long as the headlight lens is made of polycarbonate, you can use NOMA 620 to restore yellowed headlights. For classic cars or specialty headlight lenses, check the material first before applying.
Conclusion: Restoring Yellowed Headlights Doesn’t Have to Be Difficult
Restoring yellowed headlights is something any car owner can do at home with NOMA 620. Follow the detailed 5-step process above and you’ll get professional-level results without an expensive shop visit. Professional-grade car care at home isn’t difficult — you just need the right products and some basic know-how.
Start restoring your car’s yellowed headlights today with NOMA 620, and you’ll see your car looking bright and new again.
5 Steps to Long-Lasting Black Trim Restoration with NOMA 250
5 Steps to Long-Lasting Black Trim Restoration with NOMA 250
Black plastic on tires, body trim, or interior parts tends to fade and look worn after just a few months of everyday use. DIY car-care products are earning more trust from owners every year, and restoring black trim isn’t hard once you follow the right process with the right product. NOMA 250 is formulated to restore deep, rich color to textured and faded black plastic, with results that last longer than a quick wipe-on shine. This article walks through the 5-step expert process for black trim restoration, from prep work to the final protective step.
Step 1: Prep Your Work Area and Assess the Plastic’s Condition
Before diving into black trim restoration, spend 10-15 minutes prepping. Work in a shaded or covered area — avoid direct, harsh sunlight, since you don’t want the product drying too fast. You’ll need:
- 3-4 clean, lint-free microfiber towels
- Cool water or a mild cleaning solution
- NOMA 250 and an applicator pad
- Protective gloves (NOMA 250 contains conditioning agents, so gloves keep your hands clean)
Assess the current condition of the plastic: is it just faded, chalky, or coated in surface dust? If it’s only surface grime, a simple wipe-down may show a visible improvement on its own. If the plastic is genuinely faded or has lost its color, the restoration step will bring back that deep, rich black.
Step 2: Deep-Clean the Plastic Before Restoring
Cleaning is the foundation of effective black trim restoration. Dust, residue from old products, or everyday grime will get in the way of proper color restoration if you don’t clean thoroughly first — that’s why this step can’t be skipped. Use clean water and a soft cloth to wipe the plastic surface down thoroughly.
Step 3: Measure the Right Amount of NOMA 250 and Apply Evenly
NOMA 250 is designed to go on in a thin coat that’s still enough to fully restore color. Estimate how much product you need based on the surface area:
- All four tires: 0.5-0.7 fl oz (15-20 ml) per tire (roughly half a capful)
- Body trim, mirrors: 0.3-0.5 fl oz (10-15 ml) depending on the area
- Dashboard or interior trim: a small amount, 0.2-0.3 fl oz (5-10 ml)
Where and how you spray matters for even black trim restoration. Spray from top to bottom, holding the bottle 6-8 inches (15-20cm) away, and move your hand slowly and steadily to build a thin, even coat. Avoid spraying too much product in one spot — it’ll leave dark, uneven patches.
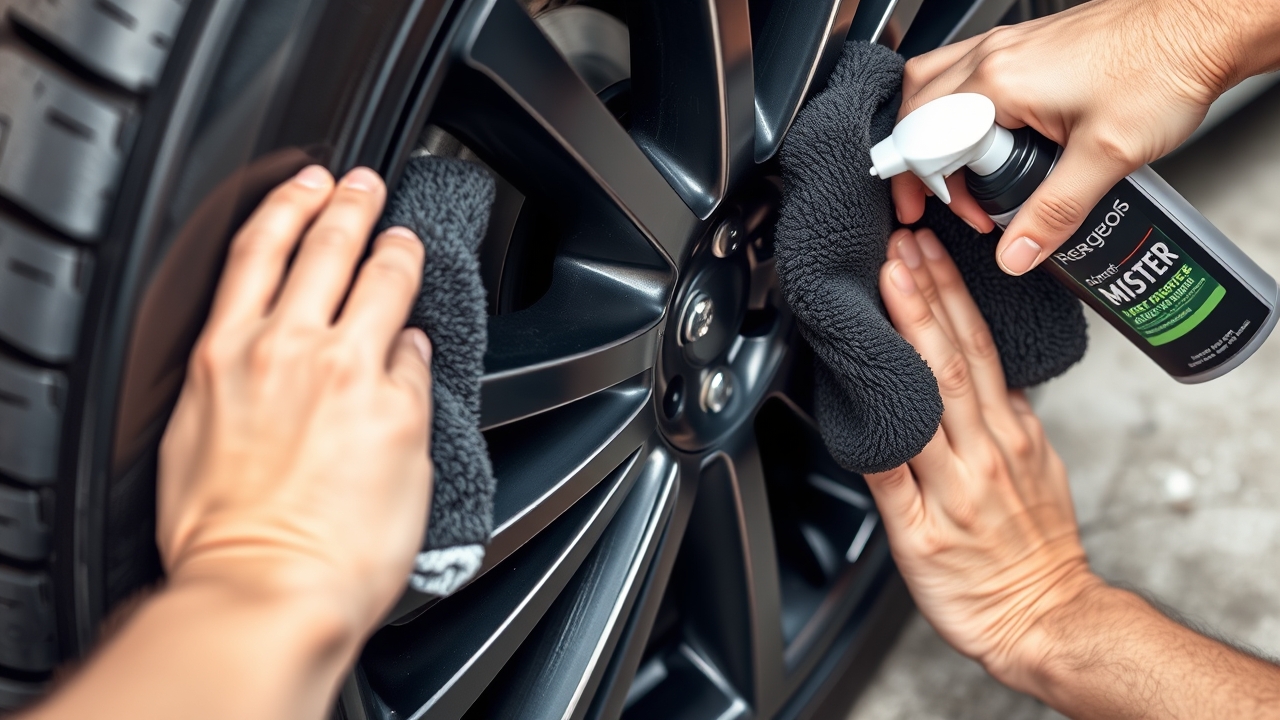
If you’re not confident with the spray, use NOMA 250’s applicator pad to apply it by hand instead — this gives you better control, especially on small or detailed parts.
Step 4: Let It Air-Dry and Check Your Results
After applying, let it sit for 5-10 minutes so NOMA 250 can absorb and partially dry. Drying time varies with temperature and humidity. Avoid driving or letting dust settle on the plastic during this window.
Check your results: the tires or trim should look deep black and glossy. Most of the time, color is fully restored after just one application. If it still looks like it needs more depth, you can apply a second light coat after 15 minutes, but one application is usually enough.
According to car-care community forums, users typically see clear results after the first application, with the effect lasting 2-4 weeks under normal maintenance conditions.
Step 5: Protect the Results with Ongoing Maintenance
Black trim restoration will gradually fade without a follow-up protection routine — this is what actually determines how long the results last. After NOMA 250 has fully dried (30-60 minutes), you should:
- Avoid strong wind, rain, or harsh direct sun for the first 24 hours so the protective layer can set
- Wipe gently with a soft cloth weekly to remove surface dust
- After 2-3 weeks, if you notice any fading, reapply NOMA 250 to maintain the protection
Frequently Asked Questions About Black Trim Restoration
How long does black trim restoration actually last?
Results from NOMA 250 typically last 2-4 weeks depending on conditions (sun exposure, humidity, how often you wash your car). With good upkeep — gentle wiping, avoiding constant direct sun — results can last up to 6 weeks. That’s exactly why Step 5 (ongoing protection) matters so much for keeping that deep color around.
Can I use NOMA 250 on both tires and body plastic?
Yes. NOMA 250 is built for all types of textured plastic (tires, bumper trim, weatherstripping, dashboard). Just be sure to clean each part separately beforehand, and spray carefully to avoid overspray onto paint or other surfaces.
How soon can I drive after applying NOMA 250?
Give it 30-60 minutes to dry and set before driving. If you’re in a hurry, you can drive slowly after 15-20 minutes, avoiding high speeds that kick up dust and wind.
Why does black trim still fade quickly even after restoration?
Trim fades quickly for two reasons: (1) no protective follow-up after restoring it, and (2) frequent exposure to harsh sun or strong wind. The fix is regular maintenance (reapply every 2-3 weeks) and parking out of direct sunlight when you can.
Is NOMA 250 safe on all types of plastic?
NOMA 250 is designed for textured (matte) and faded plastic. Avoid spraying it on glossy or sensor-based components (sensors, cameras) to prevent damage. If it gets on paint, wipe it off right away with a soft cloth and water.
What if I apply too much NOMA 250 — is there a fix?
If you’ve applied too much (leaving dark, uneven patches), the only fix is to wipe it clean with a soft cloth, let it dry, then reapply from scratch using a moderate amount. Or wait about a week for it to fade naturally, then reapply.
Conclusion: Black Trim Restoration Is a Basic Skill Every Car Owner Should Know
Black trim restoration isn’t difficult or expensive once you understand these 5 steps. From prep, to cleaning, to even application, to drying, to ongoing protection — every step serves a clear purpose. NOMA 250 is the ideal choice because it’s formulated to American car-care standards, delivers fast results, and is easy to reapply whenever you need it. You don’t have to wait for a trip to the detail shop or spend a lot of money to get glossy black tires and trim — just 30 minutes, a bottle of NOMA 250, and your own two hands. Start today, and keep it up regularly to keep your car looking like new.
Related Reading
- How to use NOMA 692 for interior leather cleaning
Faded Black Trim: Why It Happens and How to Fix It with NOMA 250

Faded Black Trim: Why It Happens and How to Fix It with NOMA 250
Black plastic trim on your car (trunk trim, air vents, door moldings, exterior dash trim) gradually fading and dulling over time is something almost every DIY car owner deals with. It’s not just dirt — it’s caused by oxidation, UV exposure, and environmental humidity. Understanding why black trim fades helps you choose the right fix and protect it for the long haul. This article walks through the causes, the warning signs of damage, and how to restore faded black trim using NOMA 250 — an effective black trim restoration solution that’s safe and easy to do at home.
Why Does Black Trim Fade? 3 Root Causes
Faded black trim isn’t caused by paint wearing off — it’s the plastic surface itself breaking down at a molecular level. According to detailing industry care guidance, this happens due to three main factors.
1. UV rays and oxidation
Sunlight’s UV-A and UV-B rays penetrate the plastic, breaking the carbon bonds within the polymer. At the same time, oxygen in the air chemically reacts with the plastic surface, forming a whitish, oxidized layer. This builds up over weeks and months, especially in areas exposed to direct sunlight.
If a car isn’t covered or protected, black trim will show noticeable fading within 6–12 months.
2. Moisture and rain
Rainwater and high humidity speed up oxidation, especially in tight seams and where plastic meets metal. Road salt (in coastal areas) accelerates plastic breakdown even further.
3. Dirt and pollutants
Dust, pollen, and brake dust (carbon particles) settle on the plastic surface, trap moisture, and create the conditions for mold and mildew to grow — stripping away the plastic’s natural shine.
Classifying Fade Severity — How to Tell What You’re Dealing With
Not every case of faded black trim can be fully restored — the severity of the damage determines both the method and the end result.
Level 1 — Mild fading (early stage)
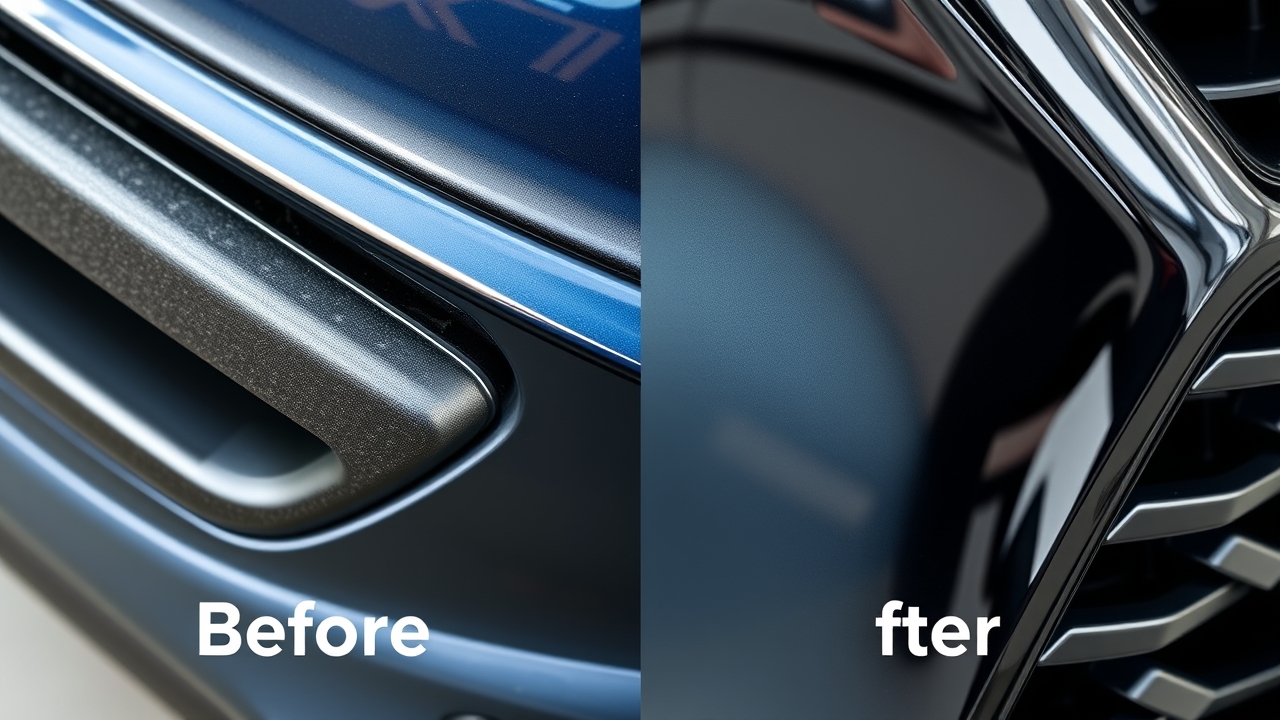
The plastic is still mostly black, but the surface looks dull and has lost its original shine. Run your hand across it and you’ll feel a fine, chalky residue (oxidized plastic dust).
This level is the easiest to restore, and products will deliver strong results.
Level 2 — Moderate fading (a few years in)
Noticeable gray-white streaks appear, with uneven coloring — areas that get more sun are more faded, while shaded spots stay darker.
Restoration is still very doable, but you’ll likely need 2–3 applications for the best results.
Level 3 — Heavy fading (over 3–5 years)
The plastic has turned almost entirely grayish-white, and the surface may be flaking. This usually signals oxidation that’s gone deep into the plastic’s structure.
Full restoration is difficult in this case — you’ll see improvement, but the trim may not return 100% to its original black.
How to Restore Faded Black Trim with NOMA 250
NOMA 250 is a dedicated restorer for oxidized, textured plastic trim, bringing back natural color and shine without needing to replace the part. Its formula, built to American standards, lets the plastic absorb protective agents beneath the surface, restoring long-lasting shine.
Step-by-step restoration process
Step 1 — Clean the surface thoroughly
Start by washing the entire plastic component with cold water and a mild soap. Use a soft brush to remove dirt and stuck-on debris.
Once washed, dry it completely with a microfiber towel or absorbent cloth. The plastic needs to be fully dry for the product to absorb properly.
Step 2 — Apply NOMA 250
Shake the NOMA 250 bottle well for 15–20 seconds. Spray a moderate amount onto the plastic surface — you don’t need much (roughly one spray per 12–16 inches of surface).
Using a microfiber cloth or a soft dedicated applicator brush, spread the product evenly in circular motions or top to bottom. Focus extra attention on the more heavily faded areas.
The product will soak into the plastic’s micro-pores, gradually reversing the oxidized structure.
Step 3 — Let it dry and let the protection set in
After wiping it in, park the car in the shade for 30–60 minutes to let NOMA 250 fully absorb into the plastic. Avoid touching the surface during this time.
For heavier fading, you can repeat the process after a week to build up more shine. Each application helps the plastic recover a little more.
Safety notes when using NOMA 250
The product can irritate skin — wear gloves while applying it. Avoid contact with eyes; if it gets in your eyes, flush immediately with clean water for 15 minutes.
Use it in a well-ventilated space, and avoid inhaling the spray directly.
Comparison Table: NOMA 250 vs. Other Methods
| Criteria | NOMA 250 | Polish + Recoat (detail shop) | Rinse with water only | Replace the part |
|---|---|---|---|---|
| Cost | $3–6 | $12–32 | Free | $40–120 |
| Time | 15–20 min | 2–4 hours | 5 min | 1–2 days |
| Works on mild fading | ✓ Good | ✓ Excellent | ✗ Temporary | ✓ Good |
| Works on heavy fading | ◐ Improves it | ✓ Good | ✗ No | ✓ Good |
| Durability | 2–4 months | 6–12 months | A few days | Long-term |
| DIY-friendly? | ✓ Yes | ✗ Needs skill | ✓ Yes | ✗ No |
| Won’t damage the plastic | ✓ Safe | ◐ Requires recoating | ✓ Safe | ✗ Loses original part |
Bottom line: NOMA 250 is the best option for car owners doing their own detailing at home — strong results, low cost, easy to apply, and no risk to the part itself. It’s especially well suited to Level 1–2 fading.
Preventing Faded Black Trim Down the Road
Once you’ve restored your trim, you’ll want to protect it to extend its lifespan and keep the fading from coming back.
Tip 1 — Wash and maintain regularly
Wash the car every 2 weeks to clear away dirt and pollutants.
Tip 2 — Keep it covered when parked
Park in a garage or use a car cover to limit direct exposure to UV rays and rain. This is the single most effective prevention method.
Tip 3 — Reapply NOMA 250 every 3 months
To keep the restored look going, repeat the NOMA 250 application every 3 months (or whenever you notice the shine starting to fade).
Frequently Asked Questions About Restoring Black Trim
Question 1: Can NOMA 250 fix black trim that’s flaking or peeling?
NOMA 250 works best on trim that’s faded from oxidation, not physical damage like cuts or impact-related flaking. If the outer layer has already peeled or there’s a deep tear, the product will improve the color but can’t fill in the physical damage. In that case, you’ll want to consider replacing the part.
Question 2: Can NOMA 250 be used on all types of black plastic trim on a car?
It works on most textured exterior black trim (trunk trim, door moldings, air vents, exterior dash trim). That said, avoid spraying it directly on glass or painted surfaces — the product is formulated specifically for plastic.
Question 3: How soon will I see results after using NOMA 250?
You’ll notice an immediate improvement (the trim looks glossy and black again right away), but the full effect becomes clear after 24–48 hours as the product fully absorbs into the plastic’s pores. For heavier fading, reapplying after 1–2 weeks will boost the results.
Question 4: Is NOMA 250 safe for the paint and glass around the trim?
Yes, NOMA 250 is developed to GHS safety standards and won’t corrode paint or glass. That said, avoid spraying it directly onto paint or glass, since it isn’t formulated for those surfaces. Use a cloth to shield nearby paint if needed.
Question 5: Should NOMA 250 be paired with other products?
Yes. After restoring black trim with NOMA 250, you can follow up with NOMA 230 (plastic gloss spray) for extra shine and protection. Don’t apply both products in the same session — let the first one dry for 24 hours before applying the next.
Question 6: How does the cost of NOMA 250 compare to a detail shop?
A bottle of NOMA 250 typically costs $3–6 and covers a full car 2–3 times over. A detail shop, by comparison, charges $12–32 for a single polish-and-recoat session. NOMA 250 saves you 70–90% on cost.
Question 7: How often does NOMA 250 need to be reapplied?
Depending on sun exposure, rain, and how well the car is maintained, NOMA 250’s effect lasts 2–4 months. For cars parked outside often, reapplying every 2–3 months keeps results looking their best. For garaged cars, you can stretch that to 4–6 months.
Conclusion: A Real Fix for Faded Black Trim
Faded black trim is a natural process driven by UV exposure, oxidation, and humidity — but it’s entirely preventable and fixable. By understanding the root causes and choosing the right method, DIY car owners can get results on par with a detail shop for a fraction of the cost.
NOMA 250 is a dedicated black trim restoration solution built to American standards, helping you bring back natural color, boost shine, and protect your trim from UV damage over the long term. Combined with regular maintenance and smart prevention, your car’s black trim will stay looking like new.
Get started today — check your car’s black trim for signs of fading, and follow this simple at-home restoration process to bring back that professional, showroom-ready look.
References
- Detailing industry car care guidance