
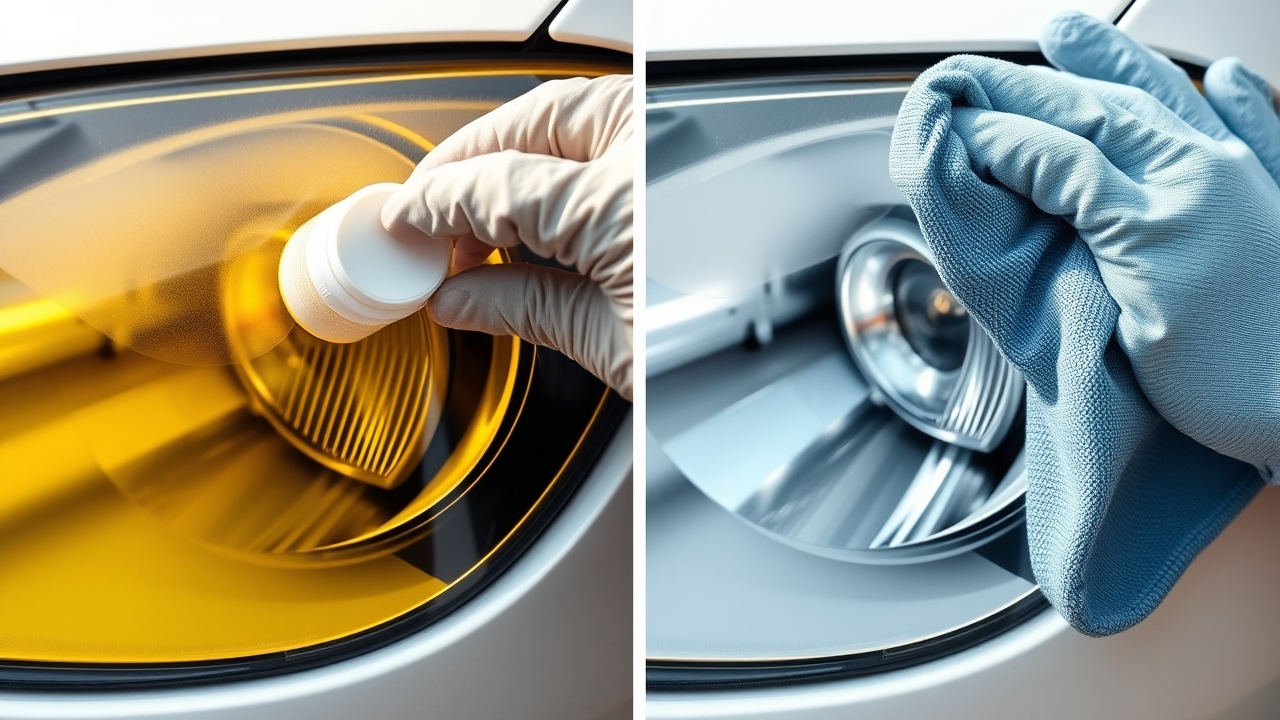
NOMA 620 – Effective At-Home Restoration for Yellowed Headlights in 2026

NOMA 620 – Effective At-Home Restoration for Yellowed Headlights in 2026
Yellowed, hazy headlights are a common problem on cars after years of use. According to traffic safety research, dim headlights are a contributing factor in more than 15% of nighttime traffic accidents. Instead of paying for a full headlight housing replacement, you can restore yellowed headlights yourself at home with just NOMA 620. This product is formulated to professional detailing standards to remove the yellowed layer, restore original brightness, and is easy for anyone to use.
This article walks through each step of using NOMA 620, compares it against popular DIY methods, and shares long-term maintenance tips to keep your headlights bright.
Why Do Headlights Turn Yellow and Hazy?
Car headlights are typically made from polycarbonate plastic. The main causes of yellowing include:
- UV rays from the sun: UV exposure penetrates the plastic, breaking down the polymer structure and creating a dull, yellowed layer. This happens continuously, especially in hot, sunny climates.
- Oxidation: Air and high humidity oxidize the plastic surface, creating a hazy film that blocks light from passing through.
- Residue from the exterior coating: As a car ages, the protective coating on the headlight can break down and leave residue on the surface.
The result is a headlight that’s no longer as bright as it once was — brightness can drop by 30-40%, which affects nighttime driving safety. Restoring yellowed headlights with NOMA 620 helps bring back that original brightness without needing a full headlight replacement.
Step-by-Step Headlight Restoration Process
NOMA 620 is a dedicated headlight restoration product, manufactured through an international OEM partner. Here’s a detailed 5-step guide to restoring your headlights at home:
Step 1: Prep Your Materials and Workspace
Before you start restoring yellowed headlights, gather the following:
- NOMA 620 (headlight restoration formula)
- Clean water and dish soap
- 2-3 microfiber cloths
- A soft brush for dusting
- Safety glasses
- Rubber or nitrile gloves (NOMA 620 can irritate skin)
Safety Warning: NOMA 620 contains a strong formula that can irritate skin. Wear gloves and avoid contact with skin and eyes. If it gets on your skin, rinse immediately with clean water. If it gets in your eyes, rinse for 15 minutes and contact a doctor.
Choose a shaded work area (out of direct sunlight), since NOMA 620 needs 15-30 minutes to absorb into the surface.
Step 2: Thoroughly Clean the Headlight Surface
This step is critical to how well your headlight restoration turns out. Wash the headlight with warm water and dish soap. Dry it completely with a microfiber cloth.
Then, use a soft brush to remove any dust or debris. The headlight needs to be fully dry before you apply NOMA 620.
Step 3: Apply NOMA 620 to the Headlight Surface
Shake the NOMA 620 bottle for 30 seconds to mix the formula evenly. Apply the product to the entire yellowed headlight surface using a microfiber cloth, working in slow circular motions without pressing too hard.
Cover the surface evenly, making sure you don’t miss any spots. The first application might not show dramatic results — that’s completely normal.
Step 4: Let the Product Absorb (Dwell Time)
After applying NOMA 620, let it absorb into the surface for 15-30 minutes. The time needed depends on how severe the yellowing is:
- Light yellowing: 15 minutes is enough
- Moderate yellowing: 20-25 minutes
- Heavy yellowing: 30 minutes
Don’t leave it on longer than 45 minutes, since it may dry out too much. You can use this waiting time to prep other parts of the car for restoration.
Step 5: Wipe Clean and Check Your Results
After the dwell time, use a microfiber cloth to wipe the headlight surface dry with slow, circular motions. Keep wiping until there’s no more residue or grime left.
Apply 2-3 rounds for the best results, waiting 15-20 minutes between each one. After 3 applications, you’ll notice a clear improvement in headlight brightness.
Comparing Effectiveness: NOMA 620 vs. Other DIY Methods
| Method | Time | Cost | Effectiveness | How Long It Lasts | DIY-Friendly |
|---|---|---|---|---|---|
| NOMA 620 restoration | 1-2 hrs | Affordable | ⭐⭐⭐⭐⭐ | 6-12 months | ✓ Very easy |
| Sanding + standard polish spray | 3-4 hrs | Low | ⭐⭐⭐ | 2-3 months | ✓ Moderate |
| Full headlight housing replacement | 1-2 hrs | High | ⭐⭐⭐⭐⭐ | 10+ years | ✗ Needs a technician |
| Protective film wrap | 2 hrs | Higher | ⭐⭐⭐⭐ | 3-5 years | ✓ Moderate |
| DIY UV resin coating | 4-5 hrs | Moderate | ⭐⭐⭐⭐ | 5-7 years | ✓ Difficult |
Looking at the comparison, NOMA 620 is the most well-rounded solution: least time invested, low cost, strong results, and easy enough for anyone to do. According to detailing experts, restoring yellowed headlights with a dedicated product delivers more durable results than basic sanding-and-spray methods.
Headlight Maintenance Tips After Restoration
Once you’ve successfully restored your yellowed headlights, keep up with maintenance to make the results last:
- Wash headlights regularly: Every 2 weeks, gently rinse with clean water and soap to remove dust and grime.
- Apply NOMA 922 nano glass coating: After restoring, you can apply NOMA 922 (water-repellent nano glass coating) to the headlight surface to add a protective layer against UV and oxidation, extending results by an extra 2-3 months.
- Avoid road salt and harsh chemical cleaners: Acidic rain and road salt (in coastal areas) can damage a restored headlight surface. Rinse it off promptly after exposure to rain or salt.
- Park in the shade: Direct sunlight is the top cause of yellowing coming back. Park in a garage or shaded spot whenever possible.
With proper maintenance, headlight restoration results can last 6-12 months. After that, you’ll just need to reapply NOMA 620 once or twice to maintain that brightness.
Frequently Asked Questions About Headlight Restoration
Is NOMA 620 safe to use?
NOMA 620 is manufactured through an international OEM partner and comes with a publicly available MSDS (safety data sheet) that meets GHS standards. The product is safe when used as directed: wear gloves, avoid skin and eye contact, and work in a well-ventilated area. It doesn’t damage the headlight — it only removes the yellowed layer.
How soon will I see results restoring yellowed headlights?
After your first application of NOMA 620, you’ll notice improvement within 15-30 minutes. For the best results, apply 2-3 times, spaced about 20 minutes apart. The entire restoration process takes 1-2 hours depending on how severe the yellowing is.
Can I restore headlights on a rainy day?
It’s not recommended. Rainwater will dilute NOMA 620 and reduce its effectiveness. Choose a sunny or overcast (rain-free) day, and work in a shaded spot so the product can absorb into the headlight surface properly.
Should I apply NOMA 922 nano glass coating after restoring?
It’s not required, but it’s a good idea. NOMA 922 (water-repellent nano glass coating) adds a protective layer that resists UV and oxidation, extending your restoration results by an extra 2-3 months.
Can NOMA 620 remove deep yellowing completely?
NOMA 620 works very well on light to moderate yellowing (under 50% affected). For heavy yellowing (over 80% affected), you may need more applications (4-5 times) or light sanding beforehand. If the yellowing is extremely deep, a full headlight replacement is the safest option.
How often should I restore my headlights?
Depending on your driving and parking conditions, NOMA 620‘s results last 6-12 months. You can restore your headlights every 6 months to keep brightness at its best, or whenever you notice yellowing starting to return.
Conclusion: Restoring Yellowed Headlights Made Easy With NOMA 620
Restoring yellowed headlights doesn’t require a full replacement or a trip to a professional shop — you can do it yourself at home in 1-2 hours with just NOMA 620. It’s effective, safe when used as directed, and costs just a fraction of a full headlight replacement.
The key to success is thorough prep, cleaning the headlight surface before applying the product, and being patient while it absorbs. Apply 2-3 times, about 20 minutes apart, for the best results. Afterward, keep up with maintenance — gentle washing, avoiding sun exposure, and applying NOMA 922 nano glass coating — to make the results last.
If you want to restore your headlights’ brightness at home effectively, NOMA 620 is a reliable solution trusted by both detailing professionals and DIY car owners alike. Give it a try today.
Related Reading
- Guide to applying NOMA 922 water-repellent nano glass coating
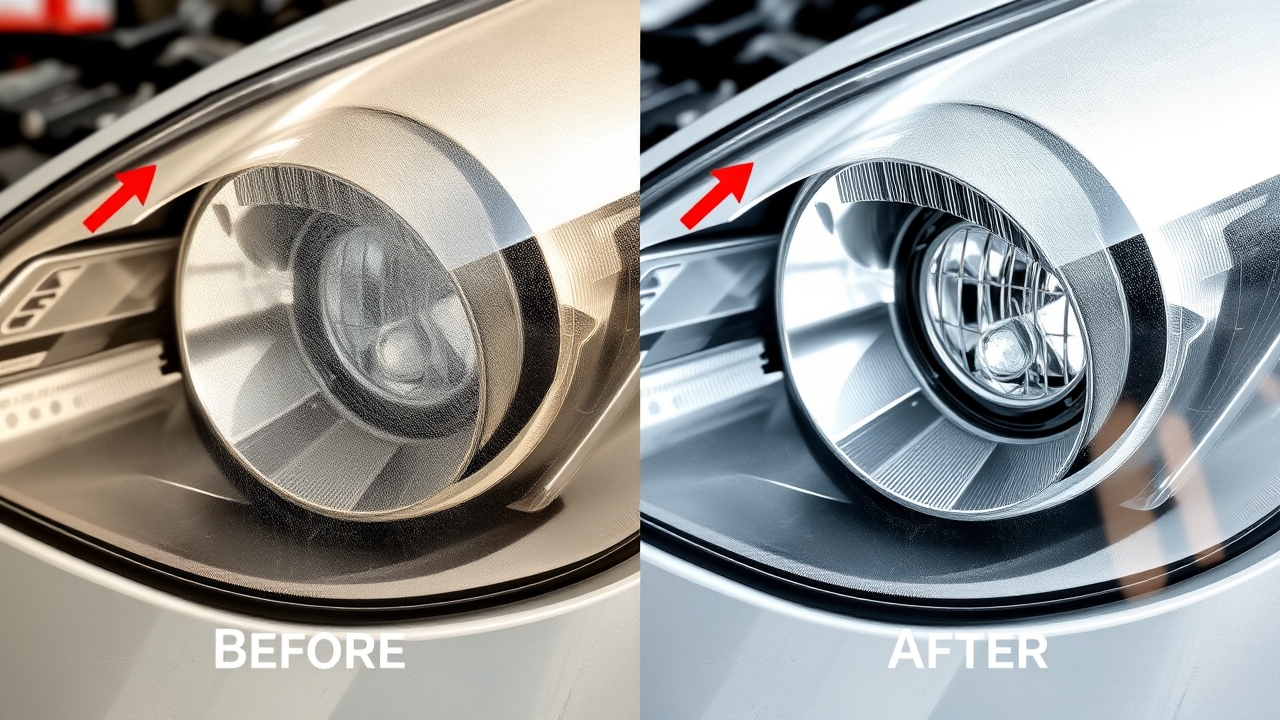
5 Steps to Restore Yellowed Headlights with NOMA 620 — Real, Visible Results
5 Steps to Restore Yellowed Headlights with NOMA 620 — Real, Visible Results
Yellowed, foggy headlights are a common problem on cars after 5–7 years of use. The main culprits are UV rays, heat, and humidity, which oxidize the polycarbonate outer layer of the headlight lens. According to reports from professional detailing shops, roughly 70% of car owners handle this at home themselves rather than pay the higher cost of a dealership visit.
NOMA 620 is a dedicated product for restoring yellowed, foggy headlights without removing the housing or using complex equipment. The restoration process takes just 30–45 minutes, with visible results after the very first use. This article walks you through a detailed 5-step process, from prep to checking your results, so you can achieve professional-level headlight care at home.
Step 1: Prep and Choose the Right Headlight Restoration Product
Before you start restoring yellowed headlights, gather your tools and choose the right product. NOMA 620 is a top pick for headlight restoration thanks to a formula built specifically for yellowing and haze.
Tools you’ll need:
- Clean microfiber towels (2–3)
- Clean water or distilled water
- A small container or tray
- A soft brush or boar-hair brush (optional)
- Protective gloves (NOMA 620 can be irritating to skin)
About NOMA 620:
NOMA 620 is developed to professional detailing standards, with active ingredients that trigger a reverse-oxidation reaction to strip away the oxidized layer on the outside of the headlight. When used correctly, the product does not harm the underlying polycarbonate material.
⚠️ Safety warning: NOMA 620 can be irritating to skin and mucous membranes. Always wear gloves when using it, avoid contact with eyes, and rinse immediately with clean water if any product gets on your skin.
You can also explore NOMA’s full lineup of car care products to plan out a longer-term maintenance routine for your vehicle.
Step 2: Clean and Dry the Headlights Before Restoration
Thorough cleaning is essential to ensure NOMA 620 performs at its best when restoring yellowed headlights. Any leftover dust, grime, or salt residue will affect your final results.
Detailed cleaning steps:
- Wash the headlights with clean water and a mild soap to remove surface dust and grime
- Dry completely with a clean microfiber towel
- Wait 2–3 minutes to let the headlights dry fully before applying NOMA 620
- If the headlight surface is still damp, restoration results will be noticeably weaker
Some car owners use distilled water or a dedicated glass cleaner for an extra-thorough clean, though plain water is usually sufficient. Once dry, you’re ready for the next step.
Step 3: Apply NOMA 620 to Restore Yellowed Headlights
This is the step that determines your restoration results. Applying the product correctly ensures the active ingredients in NOMA 620 make even contact across the whole surface for maximum effect.
How to apply NOMA 620:
- Shake the NOMA 620 bottle thoroughly for 15–20 seconds to ensure the active ingredients are well mixed
- Pour a small amount (about 5–10 ml) into a tray or small container
- Dip a soft brush or microfiber cloth into the solution
- Apply NOMA 620 evenly across the entire yellowed headlight surface
- Work it in with light, circular motions to avoid damaging the polycarbonate
- Let the product sit for 10–15 minutes (this dwell time is critical)
After 10–15 minutes, gently wipe with a clean microfiber towel to lift away the now-loosened oxidized layer. Keep your motions light to avoid scratching the headlight surface.
Step 4: Check Your Results and Repeat If Needed
Once wiped clean, you’ll notice a clear difference right away. The headlight will look brighter, with noticeably less yellowing and haze. Depending on how bad the original yellowing was, you may need to repeat the process.
How to check your results:
- Rinse off all remaining NOMA 620 with clean water
- Dry with a microfiber towel
- Inspect the headlight in natural daylight, and check its nighttime beam performance
- Compare before-and-after photos to clearly see the improvement
If the headlight is still noticeably yellowed, you can repeat the process one or two more times. For very severe yellowing, you may need 3–4 applications of NOMA 620, spaced 2–3 days apart to give the polycarbonate time to recover.
| Yellowing Level | Applications of NOMA 620 Needed | Time to Complete | Expected Result |
|---|---|---|---|
| Mild (10–20%) | 1 application | 45 minutes | 90–95% clarity restored |
| Moderate (30–50%) | 2 applications | 2–3 days | 80–90% clarity restored |
| Severe (>50%) | 3–4 applications | 1–2 weeks | 70–85% clarity restored |
Step 5: Maintain and Protect Your Headlights After Restoration
After restoring your yellowed headlights, ongoing maintenance is key to making the results last. Keep your headlights clean and limit their long-term exposure to UV rays.
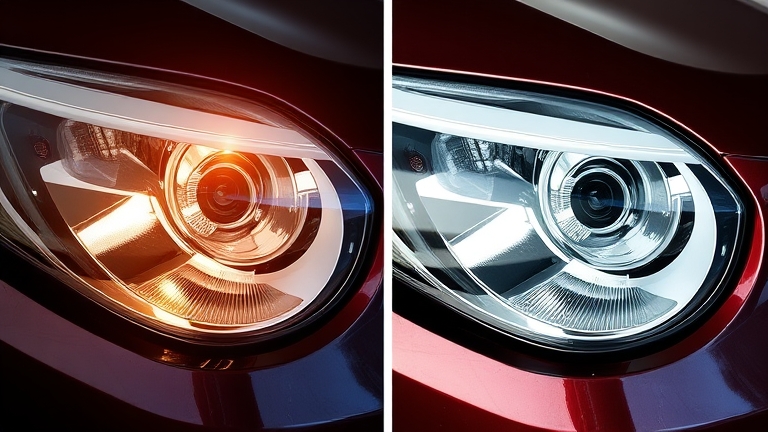 Step 5: Maintain and Protect Your Headlights After Restoration
Headlight maintenance steps:
- Wash your headlights regularly whenever you wash the car (at least once a week)
- Use clean water and a soft microfiber towel to avoid scratching
- Dry immediately after washing to prevent water spots
- Park in a garage or under cover when possible to reduce UV exposure
- Apply NOMA 922 (nano glass coating) to the headlights after restoration to add an extra layer of oxidation protection
NOMA 922 nano glass coating helps shield your headlights from environmental damage. The NOMA 922 usage guide has more details on how to pair these two products.
With regular maintenance, your headlights will stay bright and optically clear for much longer, reducing how often you’ll need to restore them again.
Frequently Asked Questions About Restoring Yellowed Headlights
Is NOMA 620 safe on polycarbonate?
Yes, NOMA 620 is formulated to be safe on polycarbonate when used according to the instructions. The active ingredients only target the outer oxidized layer without damaging the headlight’s underlying structure. That said, it’s important not to let the product sit too long, and always wear gloves to protect your skin. For more protective products, check out NOMA’s full car care lineup.
How long do headlight restoration results last?
How long results last depends on your driving conditions and how well you maintain your headlights afterward. If you wash your car regularly, park under cover, and apply a protective nano coating, results can last 6–12 months. Cars in regions with extreme sun or rain exposure may need restoration again after just 3–6 months. Regular maintenance helps extend the time between restorations.
Do I need to remove the headlight housing to restore it?
No. NOMA 620 is designed to be used directly on the headlight while it’s still mounted on the car — no disassembly required. Removing the headlight housing can be complicated, time-consuming, and risks damaging other components. On-car restoration with NOMA 620 is simpler, safer, and just as effective.
Is headlight restoration expensive?
Restoring your headlights at home with NOMA 620 is far more affordable than a professional shop visit. NOMA 620 is inexpensive, and a single bottle can restore both front headlights. A professional shop restoration can cost significantly more, while doing it yourself only costs the price of the product.
Can NOMA 620 be used on other types of vehicles?
Yes, NOMA 620 works on most types of vehicles: sedans, SUVs, pickups, and minivans. As long as the headlight lens is made of polycarbonate, you can use NOMA 620 to restore yellowed headlights. For classic cars or specialty headlight lenses, check the material first before applying.
Conclusion: Restoring Yellowed Headlights Doesn’t Have to Be Difficult
Restoring yellowed headlights is something any car owner can do at home with NOMA 620. Follow the detailed 5-step process above and you’ll get professional-level results without an expensive shop visit. Professional-grade car care at home isn’t difficult — you just need the right products and some basic know-how.
Start restoring your car’s yellowed headlights today with NOMA 620, and you’ll see your car looking bright and new again.
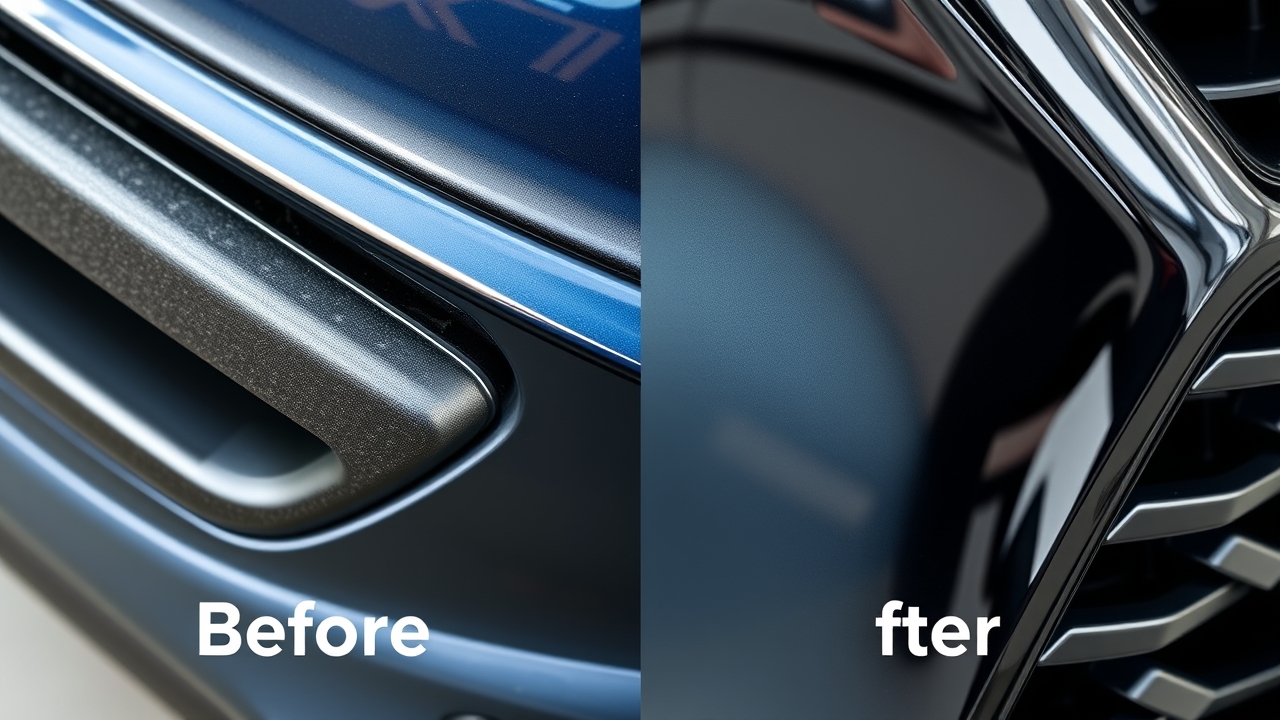
Faded Black Trim: Why It Happens and How to Fix It with NOMA 250

Faded Black Trim: Why It Happens and How to Fix It with NOMA 250
Black plastic trim on your car (trunk trim, air vents, door moldings, exterior dash trim) gradually fading and dulling over time is something almost every DIY car owner deals with. It’s not just dirt — it’s caused by oxidation, UV exposure, and environmental humidity. Understanding why black trim fades helps you choose the right fix and protect it for the long haul. This article walks through the causes, the warning signs of damage, and how to restore faded black trim using NOMA 250 — an effective black trim restoration solution that’s safe and easy to do at home.
Why Does Black Trim Fade? 3 Root Causes
Faded black trim isn’t caused by paint wearing off — it’s the plastic surface itself breaking down at a molecular level. According to detailing industry care guidance, this happens due to three main factors.
1. UV rays and oxidation
Sunlight’s UV-A and UV-B rays penetrate the plastic, breaking the carbon bonds within the polymer. At the same time, oxygen in the air chemically reacts with the plastic surface, forming a whitish, oxidized layer. This builds up over weeks and months, especially in areas exposed to direct sunlight.
If a car isn’t covered or protected, black trim will show noticeable fading within 6–12 months.
2. Moisture and rain
Rainwater and high humidity speed up oxidation, especially in tight seams and where plastic meets metal. Road salt (in coastal areas) accelerates plastic breakdown even further.
3. Dirt and pollutants
Dust, pollen, and brake dust (carbon particles) settle on the plastic surface, trap moisture, and create the conditions for mold and mildew to grow — stripping away the plastic’s natural shine.
Classifying Fade Severity — How to Tell What You’re Dealing With
Not every case of faded black trim can be fully restored — the severity of the damage determines both the method and the end result.
Level 1 — Mild fading (early stage)
The plastic is still mostly black, but the surface looks dull and has lost its original shine. Run your hand across it and you’ll feel a fine, chalky residue (oxidized plastic dust).
This level is the easiest to restore, and products will deliver strong results.
Level 2 — Moderate fading (a few years in)
Noticeable gray-white streaks appear, with uneven coloring — areas that get more sun are more faded, while shaded spots stay darker.
Restoration is still very doable, but you’ll likely need 2–3 applications for the best results.
Level 3 — Heavy fading (over 3–5 years)
The plastic has turned almost entirely grayish-white, and the surface may be flaking. This usually signals oxidation that’s gone deep into the plastic’s structure.
Full restoration is difficult in this case — you’ll see improvement, but the trim may not return 100% to its original black.
How to Restore Faded Black Trim with NOMA 250
NOMA 250 is a dedicated restorer for oxidized, textured plastic trim, bringing back natural color and shine without needing to replace the part. Its formula, built to American standards, lets the plastic absorb protective agents beneath the surface, restoring long-lasting shine.
Step-by-step restoration process
Step 1 — Clean the surface thoroughly
Start by washing the entire plastic component with cold water and a mild soap. Use a soft brush to remove dirt and stuck-on debris.
Once washed, dry it completely with a microfiber towel or absorbent cloth. The plastic needs to be fully dry for the product to absorb properly.
Step 2 — Apply NOMA 250
Shake the NOMA 250 bottle well for 15–20 seconds. Spray a moderate amount onto the plastic surface — you don’t need much (roughly one spray per 12–16 inches of surface).
Using a microfiber cloth or a soft dedicated applicator brush, spread the product evenly in circular motions or top to bottom. Focus extra attention on the more heavily faded areas.
The product will soak into the plastic’s micro-pores, gradually reversing the oxidized structure.
Step 3 — Let it dry and let the protection set in
After wiping it in, park the car in the shade for 30–60 minutes to let NOMA 250 fully absorb into the plastic. Avoid touching the surface during this time.
For heavier fading, you can repeat the process after a week to build up more shine. Each application helps the plastic recover a little more.
Safety notes when using NOMA 250
The product can irritate skin — wear gloves while applying it. Avoid contact with eyes; if it gets in your eyes, flush immediately with clean water for 15 minutes.
Use it in a well-ventilated space, and avoid inhaling the spray directly.
Comparison Table: NOMA 250 vs. Other Methods
| Criteria | NOMA 250 | Polish + Recoat (detail shop) | Rinse with water only | Replace the part |
|---|---|---|---|---|
| Cost | $3–6 | $12–32 | Free | $40–120 |
| Time | 15–20 min | 2–4 hours | 5 min | 1–2 days |
| Works on mild fading | ✓ Good | ✓ Excellent | ✗ Temporary | ✓ Good |
| Works on heavy fading | ◐ Improves it | ✓ Good | ✗ No | ✓ Good |
| Durability | 2–4 months | 6–12 months | A few days | Long-term |
| DIY-friendly? | ✓ Yes | ✗ Needs skill | ✓ Yes | ✗ No |
| Won’t damage the plastic | ✓ Safe | ◐ Requires recoating | ✓ Safe | ✗ Loses original part |
Bottom line: NOMA 250 is the best option for car owners doing their own detailing at home — strong results, low cost, easy to apply, and no risk to the part itself. It’s especially well suited to Level 1–2 fading.
Preventing Faded Black Trim Down the Road
Once you’ve restored your trim, you’ll want to protect it to extend its lifespan and keep the fading from coming back.
Tip 1 — Wash and maintain regularly
Wash the car every 2 weeks to clear away dirt and pollutants.
Tip 2 — Keep it covered when parked
Park in a garage or use a car cover to limit direct exposure to UV rays and rain. This is the single most effective prevention method.
Tip 3 — Reapply NOMA 250 every 3 months
To keep the restored look going, repeat the NOMA 250 application every 3 months (or whenever you notice the shine starting to fade).
Frequently Asked Questions About Restoring Black Trim
Question 1: Can NOMA 250 fix black trim that’s flaking or peeling?
NOMA 250 works best on trim that’s faded from oxidation, not physical damage like cuts or impact-related flaking. If the outer layer has already peeled or there’s a deep tear, the product will improve the color but can’t fill in the physical damage. In that case, you’ll want to consider replacing the part.
Question 2: Can NOMA 250 be used on all types of black plastic trim on a car?
It works on most textured exterior black trim (trunk trim, door moldings, air vents, exterior dash trim). That said, avoid spraying it directly on glass or painted surfaces — the product is formulated specifically for plastic.
Question 3: How soon will I see results after using NOMA 250?
You’ll notice an immediate improvement (the trim looks glossy and black again right away), but the full effect becomes clear after 24–48 hours as the product fully absorbs into the plastic’s pores. For heavier fading, reapplying after 1–2 weeks will boost the results.
Question 4: Is NOMA 250 safe for the paint and glass around the trim?
Yes, NOMA 250 is developed to GHS safety standards and won’t corrode paint or glass. That said, avoid spraying it directly onto paint or glass, since it isn’t formulated for those surfaces. Use a cloth to shield nearby paint if needed.
Question 5: Should NOMA 250 be paired with other products?
Yes. After restoring black trim with NOMA 250, you can follow up with NOMA 230 (plastic gloss spray) for extra shine and protection. Don’t apply both products in the same session — let the first one dry for 24 hours before applying the next.
Question 6: How does the cost of NOMA 250 compare to a detail shop?
A bottle of NOMA 250 typically costs $3–6 and covers a full car 2–3 times over. A detail shop, by comparison, charges $12–32 for a single polish-and-recoat session. NOMA 250 saves you 70–90% on cost.
Question 7: How often does NOMA 250 need to be reapplied?
Depending on sun exposure, rain, and how well the car is maintained, NOMA 250’s effect lasts 2–4 months. For cars parked outside often, reapplying every 2–3 months keeps results looking their best. For garaged cars, you can stretch that to 4–6 months.
Conclusion: A Real Fix for Faded Black Trim
Faded black trim is a natural process driven by UV exposure, oxidation, and humidity — but it’s entirely preventable and fixable. By understanding the root causes and choosing the right method, DIY car owners can get results on par with a detail shop for a fraction of the cost.
NOMA 250 is a dedicated black trim restoration solution built to American standards, helping you bring back natural color, boost shine, and protect your trim from UV damage over the long term. Combined with regular maintenance and smart prevention, your car’s black trim will stay looking like new.
Get started today — check your car’s black trim for signs of fading, and follow this simple at-home restoration process to bring back that professional, showroom-ready look.
References
- Detailing industry car care guidance