
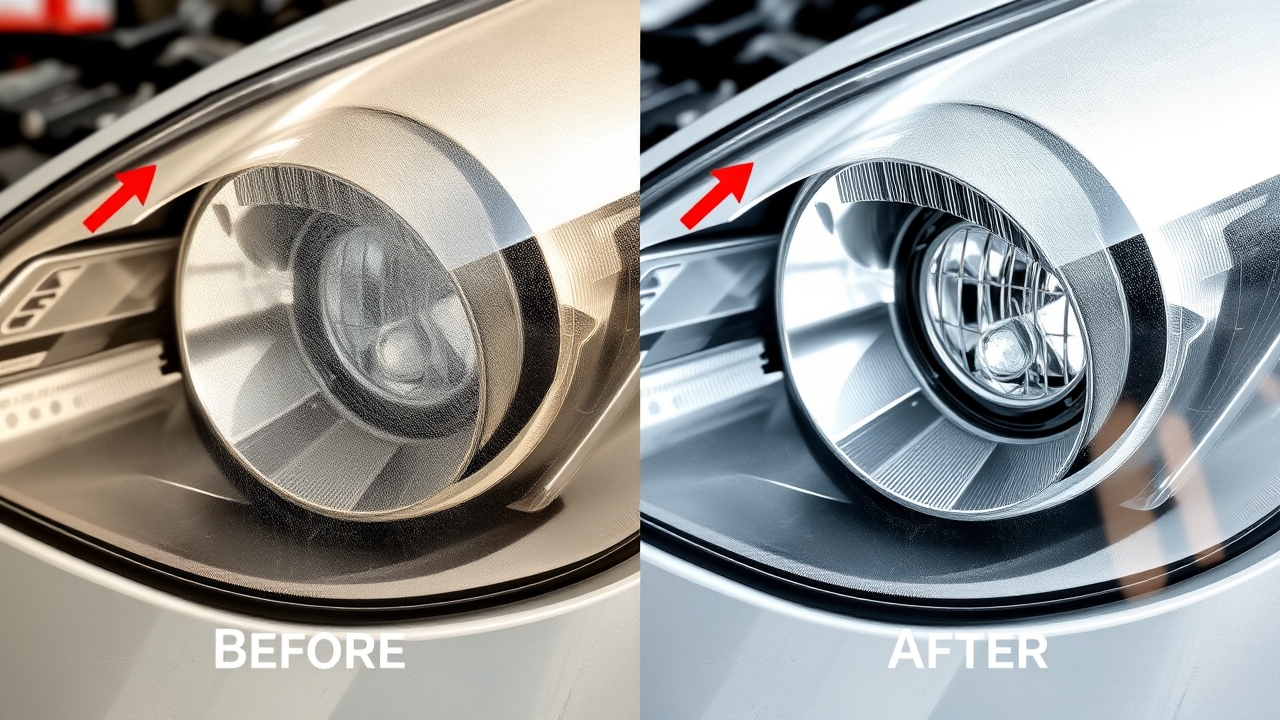
5 Steps to Restore Yellowed Headlights with NOMA 620 — Real, Visible Results

5 Steps to Restore Yellowed Headlights with NOMA 620 — Real, Visible Results
Yellowed, foggy headlights are a common problem on cars after 5–7 years of use. The main culprits are UV rays, heat, and humidity, which oxidize the polycarbonate outer layer of the headlight lens. According to reports from professional detailing shops, roughly 70% of car owners handle this at home themselves rather than pay the higher cost of a dealership visit.
NOMA 620 is a dedicated product for restoring yellowed, foggy headlights without removing the housing or using complex equipment. The restoration process takes just 30–45 minutes, with visible results after the very first use. This article walks you through a detailed 5-step process, from prep to checking your results, so you can achieve professional-level headlight care at home.
Step 1: Prep and Choose the Right Headlight Restoration Product
Before you start restoring yellowed headlights, gather your tools and choose the right product. NOMA 620 is a top pick for headlight restoration thanks to a formula built specifically for yellowing and haze.
Tools you’ll need:
- Clean microfiber towels (2–3)
- Clean water or distilled water
- A small container or tray
- A soft brush or boar-hair brush (optional)
- Protective gloves (NOMA 620 can be irritating to skin)
About NOMA 620:
NOMA 620 is developed to professional detailing standards, with active ingredients that trigger a reverse-oxidation reaction to strip away the oxidized layer on the outside of the headlight. When used correctly, the product does not harm the underlying polycarbonate material.
⚠️ Safety warning: NOMA 620 can be irritating to skin and mucous membranes. Always wear gloves when using it, avoid contact with eyes, and rinse immediately with clean water if any product gets on your skin.
You can also explore NOMA’s full lineup of car care products to plan out a longer-term maintenance routine for your vehicle.
Step 2: Clean and Dry the Headlights Before Restoration
Thorough cleaning is essential to ensure NOMA 620 performs at its best when restoring yellowed headlights. Any leftover dust, grime, or salt residue will affect your final results.
Detailed cleaning steps:
- Wash the headlights with clean water and a mild soap to remove surface dust and grime
- Dry completely with a clean microfiber towel
- Wait 2–3 minutes to let the headlights dry fully before applying NOMA 620
- If the headlight surface is still damp, restoration results will be noticeably weaker
Some car owners use distilled water or a dedicated glass cleaner for an extra-thorough clean, though plain water is usually sufficient. Once dry, you’re ready for the next step.
Step 3: Apply NOMA 620 to Restore Yellowed Headlights
This is the step that determines your restoration results. Applying the product correctly ensures the active ingredients in NOMA 620 make even contact across the whole surface for maximum effect.
How to apply NOMA 620:
- Shake the NOMA 620 bottle thoroughly for 15–20 seconds to ensure the active ingredients are well mixed
- Pour a small amount (about 5–10 ml) into a tray or small container
- Dip a soft brush or microfiber cloth into the solution
- Apply NOMA 620 evenly across the entire yellowed headlight surface
- Work it in with light, circular motions to avoid damaging the polycarbonate
- Let the product sit for 10–15 minutes (this dwell time is critical)
After 10–15 minutes, gently wipe with a clean microfiber towel to lift away the now-loosened oxidized layer. Keep your motions light to avoid scratching the headlight surface.
Step 4: Check Your Results and Repeat If Needed
Once wiped clean, you’ll notice a clear difference right away. The headlight will look brighter, with noticeably less yellowing and haze. Depending on how bad the original yellowing was, you may need to repeat the process.
How to check your results:
- Rinse off all remaining NOMA 620 with clean water
- Dry with a microfiber towel
- Inspect the headlight in natural daylight, and check its nighttime beam performance
- Compare before-and-after photos to clearly see the improvement
If the headlight is still noticeably yellowed, you can repeat the process one or two more times. For very severe yellowing, you may need 3–4 applications of NOMA 620, spaced 2–3 days apart to give the polycarbonate time to recover.
| Yellowing Level | Applications of NOMA 620 Needed | Time to Complete | Expected Result |
|---|---|---|---|
| Mild (10–20%) | 1 application | 45 minutes | 90–95% clarity restored |
| Moderate (30–50%) | 2 applications | 2–3 days | 80–90% clarity restored |
| Severe (>50%) | 3–4 applications | 1–2 weeks | 70–85% clarity restored |
Step 5: Maintain and Protect Your Headlights After Restoration
After restoring your yellowed headlights, ongoing maintenance is key to making the results last. Keep your headlights clean and limit their long-term exposure to UV rays.
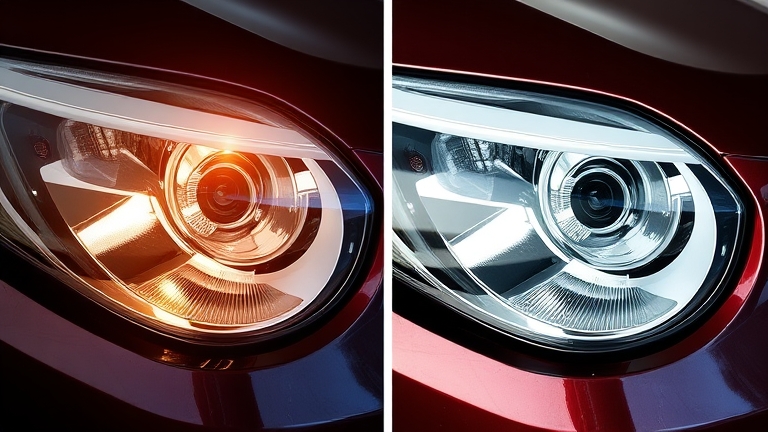 Step 5: Maintain and Protect Your Headlights After Restoration
Headlight maintenance steps:
- Wash your headlights regularly whenever you wash the car (at least once a week)
- Use clean water and a soft microfiber towel to avoid scratching
- Dry immediately after washing to prevent water spots
- Park in a garage or under cover when possible to reduce UV exposure
- Apply NOMA 922 (nano glass coating) to the headlights after restoration to add an extra layer of oxidation protection
NOMA 922 nano glass coating helps shield your headlights from environmental damage. The NOMA 922 usage guide has more details on how to pair these two products.
With regular maintenance, your headlights will stay bright and optically clear for much longer, reducing how often you’ll need to restore them again.
Frequently Asked Questions About Restoring Yellowed Headlights
Is NOMA 620 safe on polycarbonate?
Yes, NOMA 620 is formulated to be safe on polycarbonate when used according to the instructions. The active ingredients only target the outer oxidized layer without damaging the headlight’s underlying structure. That said, it’s important not to let the product sit too long, and always wear gloves to protect your skin. For more protective products, check out NOMA’s full car care lineup.
How long do headlight restoration results last?
How long results last depends on your driving conditions and how well you maintain your headlights afterward. If you wash your car regularly, park under cover, and apply a protective nano coating, results can last 6–12 months. Cars in regions with extreme sun or rain exposure may need restoration again after just 3–6 months. Regular maintenance helps extend the time between restorations.
Do I need to remove the headlight housing to restore it?
No. NOMA 620 is designed to be used directly on the headlight while it’s still mounted on the car — no disassembly required. Removing the headlight housing can be complicated, time-consuming, and risks damaging other components. On-car restoration with NOMA 620 is simpler, safer, and just as effective.
Is headlight restoration expensive?
Restoring your headlights at home with NOMA 620 is far more affordable than a professional shop visit. NOMA 620 is inexpensive, and a single bottle can restore both front headlights. A professional shop restoration can cost significantly more, while doing it yourself only costs the price of the product.
Can NOMA 620 be used on other types of vehicles?
Yes, NOMA 620 works on most types of vehicles: sedans, SUVs, pickups, and minivans. As long as the headlight lens is made of polycarbonate, you can use NOMA 620 to restore yellowed headlights. For classic cars or specialty headlight lenses, check the material first before applying.
Conclusion: Restoring Yellowed Headlights Doesn’t Have to Be Difficult
Restoring yellowed headlights is something any car owner can do at home with NOMA 620. Follow the detailed 5-step process above and you’ll get professional-level results without an expensive shop visit. Professional-grade car care at home isn’t difficult — you just need the right products and some basic know-how.
Start restoring your car’s yellowed headlights today with NOMA 620, and you’ll see your car looking bright and new again.
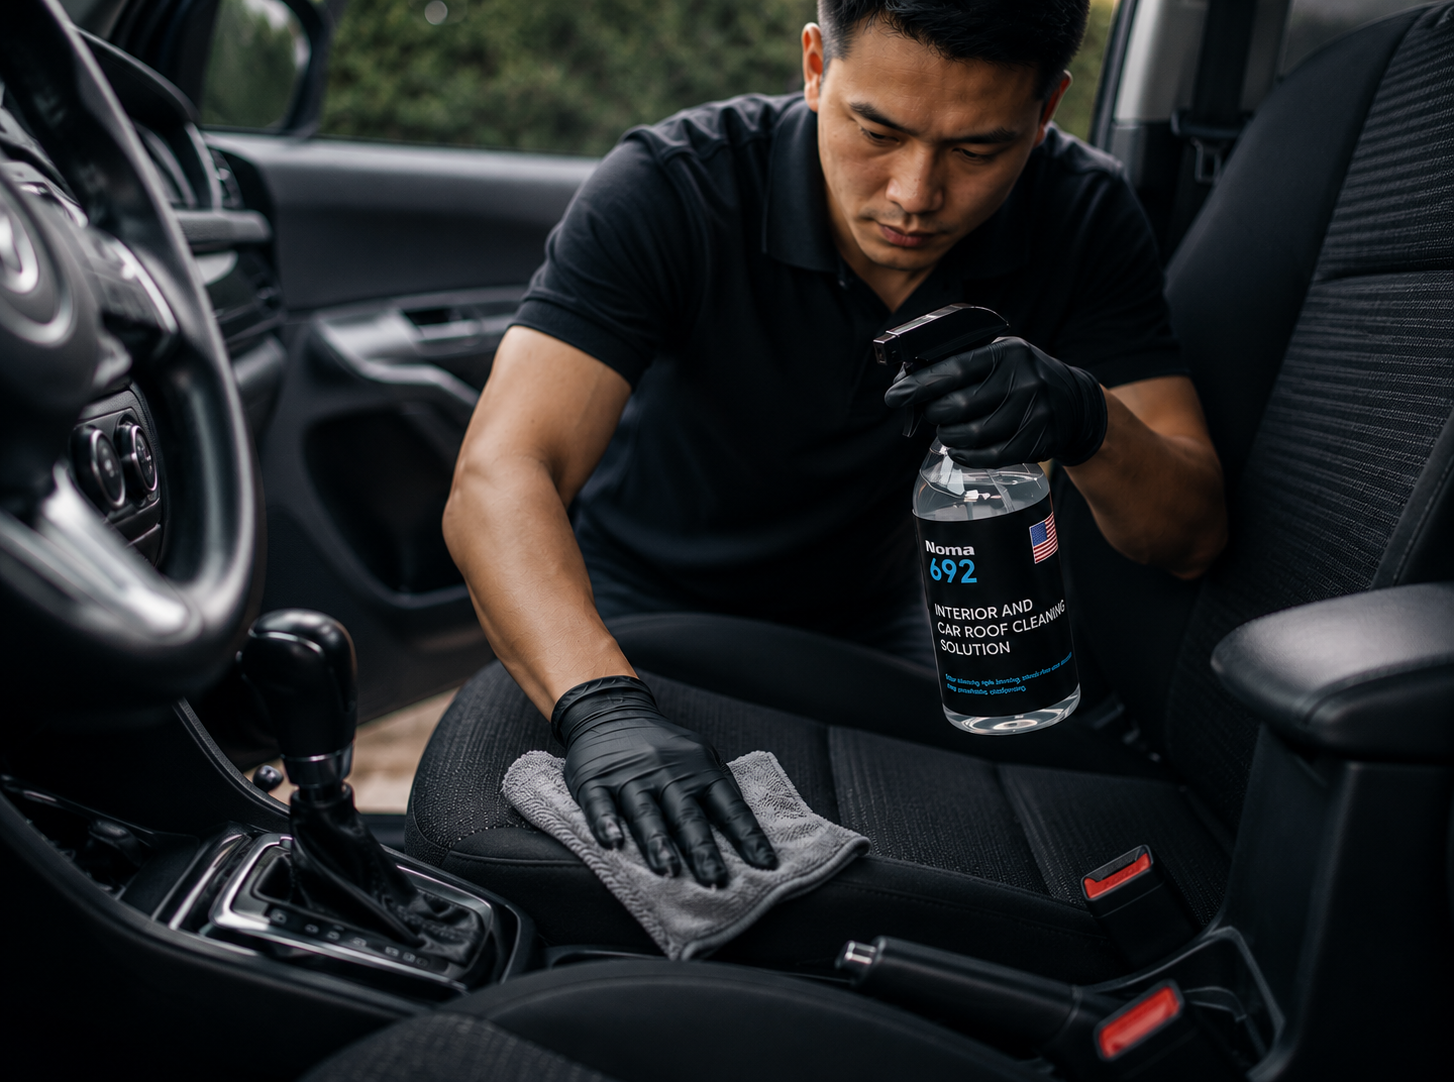
Effective Car Interior Cleaning with NOMA 692: A Step-by-Step Guide for 2026
Effective Car Interior Cleaning — A Step-by-Step Guide for 2026
Cleaning your car’s interior is one of the most important parts of car care, yet it’s the one most owners skip. Industry health reports show a car’s interior can harbor dozens of types of harmful bacteria if it isn’t cleaned regularly. The good news: cleaning your car’s interior doesn’t have to be complicated — you can do it yourself at home with the right product and the right process. NOMA 692, a dedicated cleaner for leather and fabric seats, is the ideal solution for keeping your interior clean and glossy without a trip to the detail shop.
This guide walks through everything from the basics to using NOMA 692 for professional-level results.
Why Interior Cleaning Actually Matters
Cleaning your car’s interior isn’t just about looks — it directly affects your health and your car’s resale value. Interior surfaces, especially leather and fabric seats, get dirty fast from daily exposure to sweat, dust, and other grime.
When your interior doesn’t get cleaned properly, built-up grime can cause:
• Leather losing its shine and softness
• Unpleasant odors that make every drive less pleasant
• Bacteria growth that can affect the health of everyone in the car
• A lower resale value when it’s time to sell
Cleaning your interior the right way keeps it looking newer for longer and extends the lifespan of your leather and fabric components.
Step-by-Step Interior Cleaning Process
For the best results, follow a clear, repeatable process. Here are the detailed steps you can do yourself at home:
Step 1: Vacuum
The first and most important step is removing loose dust from the seats and other interior surfaces. Use a compact vacuum with an attachment designed for interior detailing.
Be sure to vacuum thoroughly in these spots:
• Seats (both the seat cushion and the seat back)
• The floor, especially corners where dust collects
• The gaps between seats
• The footwell area
This vacuuming step removes larger dust particles, which keeps your cleaning product from getting dirty too fast when you use it in the next step.
Step 2: Dampen and Spray the Cleaning Product
Once you’ve vacuumed, it’s time for a dedicated cleaning product. NOMA 692 is purpose-built for cleaning leather and fabric seats, lifting stubborn stains that vacuuming alone can’t touch.
How to use it:
• Spray NOMA 692 onto the area you’re cleaning
• Let it sit for 2–3 minutes so the formula can penetrate and loosen the dirt
• Don’t let the product dry completely on the surface
Check out our full usage guide for NOMA products to get the best results.
Step 3: Scrub and Clean
After it’s had time to sit, use a soft brush or a microfiber towel to gently scrub in the direction of the leather or fabric grain.
Keep in mind:
• Scrub gently — you don’t need much force, since NOMA 692 already did the heavy lifting
• Scrub in one direction to avoid tiny scratches or scuffing
• Pay extra attention to stubborn spots, which may need a couple of extra passes
Step 4: Rinse with Water
Once you’ve finished scrubbing, rinse off any remaining product with clean water. Use a damp cloth or a spray bottle filled with water.
• Mist clean water over the surface
• Wipe it down with a clean microfiber towel
• If needed, repeat this 2–3 times until there’s no more foam or product residue
Step 5: Dry
The job isn’t truly done until the interior is completely dry. Open the car doors and let it air-dry for at least 30–60 minutes, or use an ultra-absorbent towel to speed things up.
Spots that stay damp longest:
• The seams between seat panels
• Underneath the seat
• Inside the seat frame
Make sure these areas dry completely too, to avoid musty odors and bacteria growth.
Comparing Interior Cleaning Methods
| Method | Effectiveness | Cost | Time | Ease of Use |
|---|---|---|---|---|
| Vacuum + Water Only | Low | Very low | 30 min | Very easy |
| Using NOMA 692 | High | Low | 60 min | Easy |
| Professional Detail Shop | Very high | High | 2–3 hrs | No effort needed |
| Interior Steam Cleaning Machine | Medium | Very high | 90 min | Difficult |
As the table shows, using NOMA 692 strikes the best balance between effectiveness, cost, and ease of use. You get near-professional results at a fraction of the cost.
Tips for Using NOMA 692
To get the best results with NOMA 692, keep these key points in mind:
Check your seat material first — NOMA 692 is formulated specifically for genuine leather and fabric, but it’s still worth checking your vehicle’s material label to confirm.
Don’t let the product dry on the surface too long — this can leave white marks or cause irritation. Rinse it off within 5–10 minutes.
Use clean water to rinse — cold or lukewarm water both work fine. Avoid water that’s too hot, since it can damage the leather’s surface.
Keep the area well-ventilated — crack the car doors while cleaning and after rinsing to let moisture escape and help the interior dry faster.
Check out our complete interior care guide for more helpful tips.
Frequently Asked Questions About Cleaning Your Car’s Interior
How often should I clean my car’s interior?
It depends on how much you drive and your car’s condition, but a good baseline is cleaning your interior at least every 2–4 weeks. If you drive frequently or often carry kids or pets, clean more often. Regular cleaning keeps your interior looking and performing its best.
Is NOMA 692 safe for all types of leather?
NOMA 692 is formulated specifically for genuine leather and fabric. It’s safe when used correctly and rinsed off completely. That said, wear gloves to avoid direct contact with the product, and avoid spraying it near your eyes.
Can I use hot water to rinse off NOMA 692?
Use lukewarm or cold water instead. Water that’s too hot can damage the leather’s surface, especially if it’s been treated or has a delicate finish. Lukewarm water (around 86–104°F/30–40°C) is ideal.
What should I do if NOMA 692 accidentally gets in my eyes?
Flush immediately with clean water for 15–20 minutes. If irritation persists or feels severe, see a doctor right away. While using the product, avoid spraying too close to your face or more than necessary.
How do I avoid white marks after using NOMA 692?
White marks usually show up when the product isn’t rinsed off completely. Make sure to rinse 2–3 times with clean water and dry thoroughly. Also, don’t let the product sit and dry on the surface too long before rinsing.
Should I apply a protectant after cleaning the interior?
Yes — after cleaning, you can apply a protectant or conditioner to help results last longer. Just make sure the interior is completely dry before applying it.
Conclusion
Cleaning your car’s interior doesn’t have to be complicated or expensive. With the right product like NOMA 692 and a proper cleaning process, you can take care of your interior yourself at home. Just follow the steps — vacuum, spray, scrub, rinse, and dry — and you’ll have an interior that looks showroom-fresh.
This is American-standard car care — something anyone can do at home. Start today and keep your car looking clean and fresh.
References
- Automotive interior health and hygiene reports
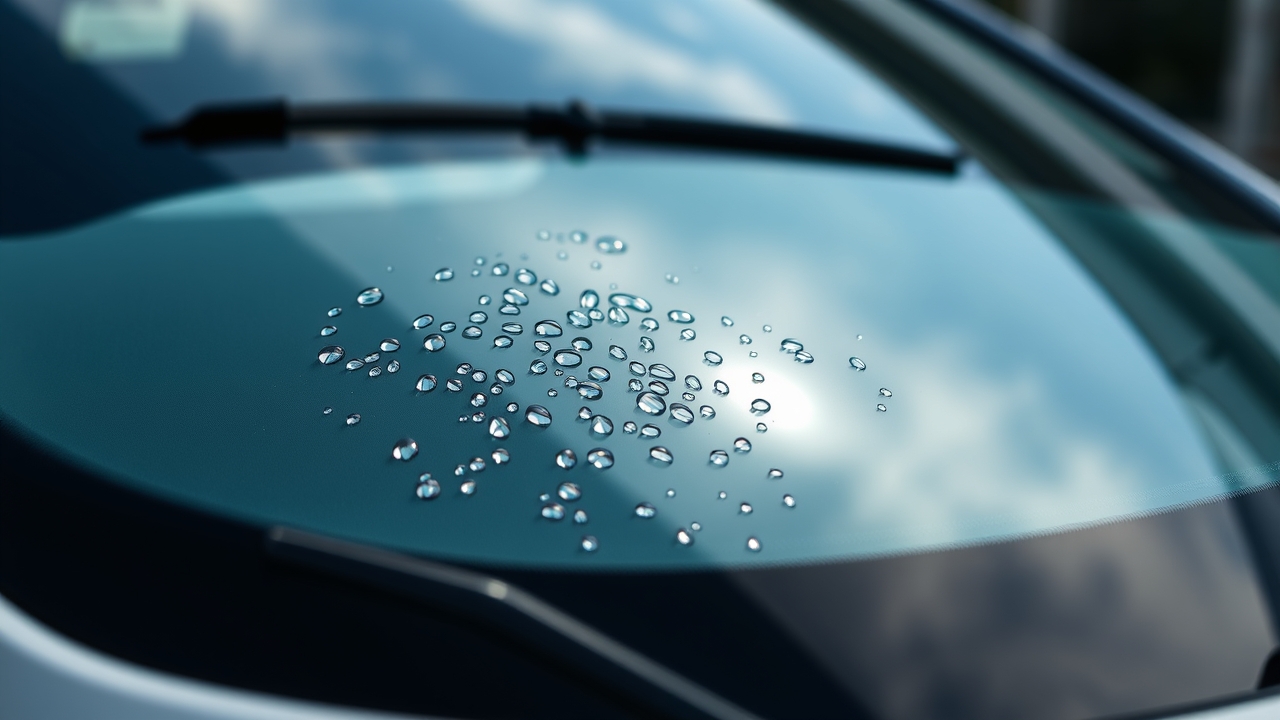
How to Apply Water-Repellent Glass Coating the Right Way with NOMA 911: A 5-Step Guide

How to Apply Water-Repellent Glass Coating the Right Way with NOMA 911
Applying a water-repellent coating to your car’s glass is one of the most important maintenance steps any car owner should do every month. Rain, morning dew, and ambient moisture leave behind stubborn spots that are hard to wipe away and can seriously affect visibility and driving safety. NOMA 911 is a specialized glass stain remover and water-repellent coating built on American technology with a pH-neutral formula that’s completely safe to use.
This guide walks you through 5 detailed steps to properly apply a water-repellent glass coating, so you can easily do it yourself at home without any specialized equipment.
Why does water-repellent glass coating matter?
A water-repellent glass coating forms a protective layer on the surface of your windshield, keeping rain and other contaminants from sticking. According to traffic safety experts, clear visibility is the single biggest factor in reducing road accidents.
When you apply a water-repellent coating to your car’s glass, you’re not just improving visibility — you’re also:
- Cutting down on how often you need to wipe your windshield while driving
- Protecting the glass from yellowing and long-term buildup of grime
- Extending the life of the glass surface
- Helping your wipers work more effectively
NOMA 911 is specifically formulated to tackle these issues quickly and safely.
Prepping the glass surface before applying a water-repellent coating
The first and most important step is getting the glass surface completely clean. Skip this step and the coating won’t bond evenly, which will significantly reduce its effectiveness.
Prep steps:
- Wash the glass thoroughly: Use clean water and a soft microfiber cloth to clean the entire windshield, rear window, and side windows.
- Dry it completely: Use a clean cotton towel or absorbent cloth to dry the glass fully — no water or moisture should remain.
- Remove any stains first: If the glass has yellowing or stubborn buildup, use NOMA 911 once as a stain remover before applying the water-repellent coating.
It’s critical that the glass is completely dry. Any leftover moisture will cause the coating to peel or fail to form an even protective layer.
Removing stains with NOMA 911 before applying the water-repellent coating
Besides its water-repellent coating function, NOMA 911 is also highly effective at removing stains from glass. This is an essential prep step if your windows have yellowed or have dried-on water spots.
Stain removal process:
- Apply a small amount of NOMA 911: Pour it onto a cotton towel or soft sponge — a little goes a long way, so don’t overdo it.
- Gently rub the glass surface: Use even circular or side-to-side motions, focusing on the most stained or dirtiest areas.
- Let it sit for 1-2 minutes: This gives the solution time to soak in for more effective stain removal.
- Wipe clean with a fresh towel: Use a new cotton towel or microfiber cloth to wipe away the product.
- Check your results: If stains remain, repeat the process one or two more times.
Thanks to NOMA 911’s pH-neutral formula, you can rest assured it’s a completely safe water-repellent solution for both your glass and your hands.
How to apply the water-repellent protective layer to your glass
Once you’ve finished removing stains, it’s time to apply the water-repellent coating. This step determines the final effectiveness of your water-repellent glass coating.
How to apply the coating:
- Use the right amount of product: Pour NOMA 911 onto a towel or sponge — about 2-3 ml is enough to cover the entire windshield.
- Coat the glass in small sections: Divide the windshield into zones (left, center, right) and coat each one individually for even coverage.
- Use small circular motions: Move the towel in small circles to spread the product evenly across the glass. No need to apply heavy pressure.
- Let it air-dry for 3-5 minutes: Let the solution settle naturally onto the surface to form a smooth, even coating.
- Do a final wipe-down: Use a clean, dry towel to gently buff the entire windshield, giving it a glossy finish and completing the coating.
Pro tip: If you’re applying the coating outdoors, pick a time when it’s not raining or in direct sunlight, so the coating can dry evenly for maximum effectiveness.
NOMA 911 vs. other water-repellent glass coating products
| Criteria | NOMA 911 | 3M | Liqui Moly |
|---|---|---|---|
| Manufacturing technology | USA, pH-neutral | USA, high pH | Germany, variable pH |
| Completely safe to use | ✓ Yes | ✓ Yes | ✓ Yes |
| Easy to use at home | ✓ Very easy | ◐ Moderate | ◐ Moderate |
| Fast results | ✓ 3-5 minutes | ◐ 10 minutes | ◐ 10-15 minutes |
| Stain removal protection | ✓ Yes | ✓ Yes | ◐ Weak |
| Coating lifespan | 3-4 months | 2-3 months | 3-4 months |
| Price | ✓ Affordable | ✗ Expensive | ◐ Moderate |
Looking at the comparison, NOMA 911 stands out for being completely safe and delivering fast results — a great fit for owners who want to take care of their car at home without needing professional expertise.
Maintaining your water-repellent glass coating every month
A water-repellent glass coating isn’t a one-and-done job — it needs regular upkeep. Most coatings lose effectiveness after 3-4 months, or even sooner if you live somewhere with heavy rainfall.
How to maintain it:
- Check it once a month: Splash water onto clean glass (after washing the car) and watch whether it beads up into round droplets. If the water spreads out instead, the coating has weakened.
- Reapply periodically: Once you notice reduced effectiveness, reapply NOMA 911. Reapplication only takes 10-15 minutes and doesn’t require redoing the stain-removal step.
- Wash with clean water: Avoid car wash soaps with harsh chemicals, as they can weaken the coating.
- Reapply more often if needed: If you drive frequently in the rain or live in an area with heavy morning dew, you may need to reapply every 2 months.
Check out our other glass maintenance guides for more care tips.
Frequently asked questions about water-repellent glass coating
Do I need special tools to apply a water-repellent glass coating?
Nope. NOMA 911 is designed to be used with basic tools like a cotton towel, microfiber cloth, or soft sponge. You can do the whole process at home without any specialized equipment.
Is the water-repellent coating safe for your skin?
Yes. NOMA 911 is built on American technology with a pH-neutral formula that’s completely safe for skin contact. If it gets on your hands, just rinse with clean water.
How long does the water-repellent coating last?
Depending on weather conditions and usage, the coating typically lasts 3-4 months. If you drive frequently in the rain, you may need to reapply sooner. You can check whether the coating is still working by splashing water on the glass and watching how it reacts.
Can you coat the windshield in front of the driver?
Yes, but avoid applying a thick layer on the driver’s windshield, as it can affect visibility and reduce wiper performance. Apply a light coat and make sure it’s fully dry before driving.
Does NOMA 911 remove old stains?
Yes. NOMA 911 removes stains from car glass effectively, especially newer or moderate stains. For older stains (a month or more), you can repeat the process 2-3 times for the best results.
Should you coat the inside of the glass too?
Yes, it’s a good idea to coat the interior glass, especially the side windows, to prevent fogging that can obstruct your view. The rear interior glass can get a lighter coat since visibility there matters less.
Does this product contain any harsh chemicals?
No. NOMA 911 uses a proprietary pH-neutral formula that’s completely safe. That said, avoid mixing it with other products to ensure safety and maximum effectiveness.
Conclusion: Water-repellent glass coating made easy with NOMA 911
Applying a water-repellent glass coating doesn’t have to be difficult or require special expertise. With NOMA 911 and the 5 detailed steps above, you can take care of your car’s glass yourself at home, cut down on maintenance costs, and still get great results.
NOMA 911 stands out thanks to its American manufacturing technology, pH-neutral formula that’s completely safe, ease of use, and fast results. Each month, just 15-20 minutes of your time to check and reapply the coating keeps your visibility clear and your driving safe.
Start taking care of your car’s glass today and experience the difference a water-repellent coating makes!
References
- Traffic safety expert reports
Related articles
- Car glass maintenance guide
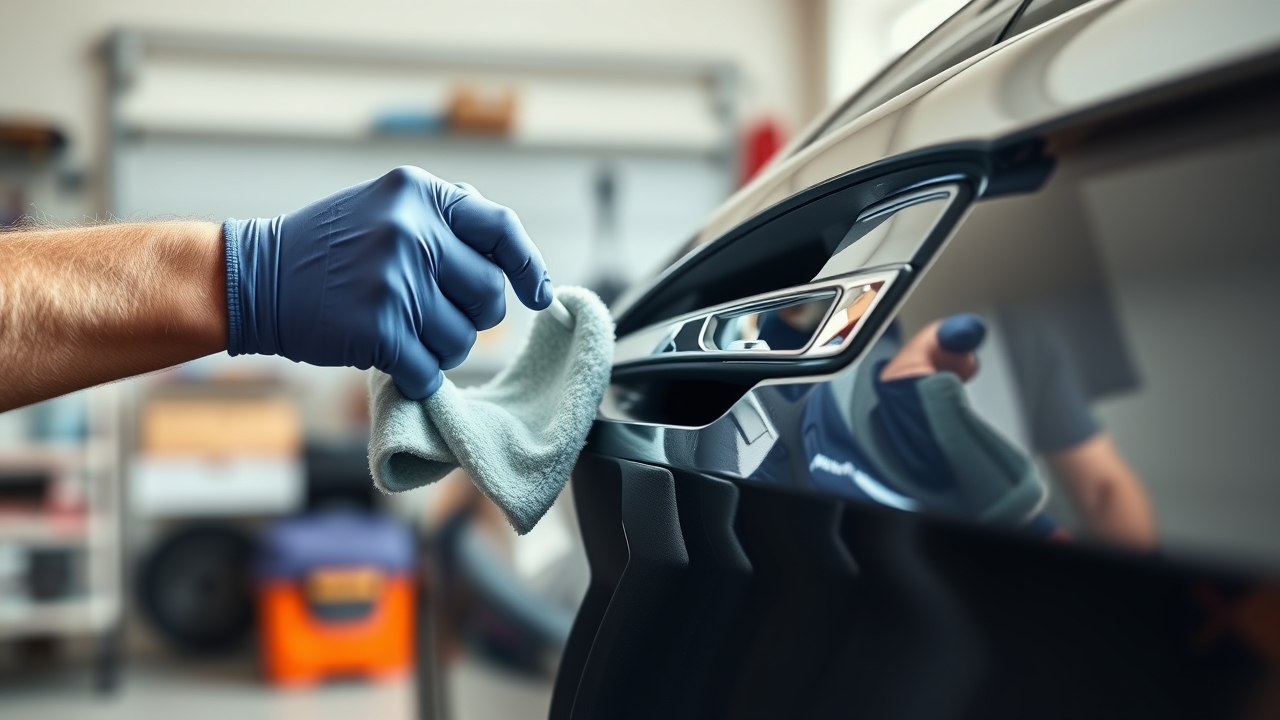
DIY Car Care at Home the Effective Way in 2026: A Step-by-Step NOMA Guide
DIY Car Care at Home: A Practical Guide with NOMA
DIY car care at home has become a popular trend among owners who care about maintenance. Instead of paying high shop prices, you can handle jobs like restoring plastic trim, cleaning glass, and brightening headlights yourself, right at home.
According to surveys from Vietnamese car owner communities, around 65% of drivers today want to learn to maintain their own cars to save money and better understand their vehicle. The key is picking the right products — safe, effective, and easy to use, like NOMA’s lineup of solutions.
This guide walks you step-by-step through DIY car care at home using NOMA products, keeping your car clean and long-lasting without a trip to a specialty shop.
DIY Car Care at Home: Why Start Now?
Taking on DIY car care at home brings several clear advantages. First, you save significant money — professional car wash shops in Vietnam typically charge the equivalent of $12-$20 per visit, while a high-quality DIY product costs roughly $8-$16 and lasts for many uses.
Second, you get full control over the quality of the products you use. Safe, pH-neutral solutions like NOMA won’t damage paint, plastic, or glass. You can also inspect your car closely before and after cleaning, catching issues early.
Third, DIY car care at home helps you understand your car’s structure better. You’ll learn how to handle glass mold, peeling plastic trim, or yellowed headlights without relying on anyone else.
Key benefits:
-
- Save 30-50% compared to a shop
-
- pH-neutral products safe for your skin and your car’s surfaces
-
- Fast results — you’ll see a visible difference after 1-2 uses
-
- Flexible scheduling — care for your car on your own time
Getting Ready Before You Start DIY Car Care at Home
Success with DIY car care at home comes down largely to preparation. You don’t need complicated equipment — just a few basic supplies and the right products.
What you’ll need:
-
- Two buckets: one for clean rinse water, one for initial wash water
-
- Microfiber towels or soft cotton cloths (avoid stiff fabric that can scratch paint)
-
- A soft brush or a wool-bristle brush to lift dust
-
- NOMA cleaning products suited to each area (plastic, glass, headlights)
-
- Cool weather or shade for effective cleaning
-
- Eye protection (optional, but recommended)
The first step is choosing the right time and location. Do your DIY car care at home in the late afternoon or early morning, avoiding direct sunlight — sun exposure makes products dry out too fast, reducing their cleaning power.
Weather matters too — don’t clean your car when it’s raining or fully humid outside, since high humidity draws the job out and hurts the results.
Restoring Textured Plastic Trim: A Step-by-Step Guide
Textured plastic trim on your car (door panels, handles, window trim) loses its shine and turns dull over time. Restoring plastic trim is one of the most common DIY car care tasks people take on at home.
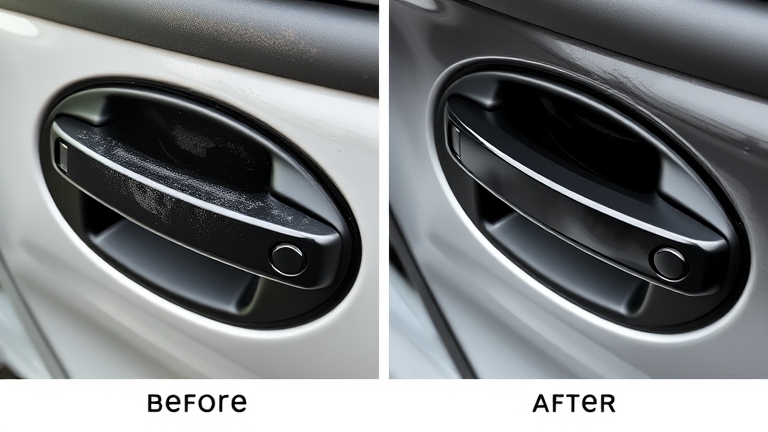 Restoring Textured Plastic Trim: Step-by-Step
Step 1: Clean the plastic surface
Start with a soft brush or damp microfiber towel to wipe away dust and grime from the plastic surface. Use clean water and a wool-bristle brush to remove stubborn dust. Let it dry completely before moving to the next step.
Step 2: Apply NOMA plastic restorer
Pour a small amount of NOMA plastic restorer onto a microfiber towel or applicator pad. Apply evenly across the plastic surface, working from top to bottom. Don’t overapply — a thin layer is enough, since the pH-neutral formula absorbs into the surface and creates a natural shine without leaving it greasy.
Step 3: Let it dry and buff
After 2-3 minutes, use a separate clean towel to buff and thoroughly wipe the surface. You’ll see the plastic looking glossier and more natural, with color restored to its former richness.
Tip: If the plastic trim is extremely faded, you can repeat this process 2-3 times, spaced a week apart, for full restoration. Check out our guide to caring for your car’s plastic parts for more detail on each type of plastic on your vehicle.
Preventing Fogging and Glass Mold: How to Protect Effectively
Glass mold and fogging are common issues in Vietnam due to high humidity. Doing DIY car care at home to prevent fogging keeps your visibility clear at all times.
Per guidance from Vietnam’s Ministry of Information and Communications on traffic safety, clean glass is a critical factor in ensuring safe driver visibility and reducing accidents caused by poor sightlines.
Anti-fog process:
Step 1: Wash the glass with clean water and a soft microfiber towel. Be sure to clean both sides (interior and exterior) to remove dust and road salt.
Step 2: Dry completely with a clean cotton towel or a dedicated drying towel. Leftover moisture reduces the product’s effectiveness.
Step 3: Apply NOMA’s anti-fog solution from top to bottom, creating a thin, even layer. The pH-neutral formula forms an invisible protective layer that makes moisture and rain bead up and run off instead of clinging to the glass.
Step 4: After 3-5 minutes, buff dry with another clean towel to finish. The anti-fog effect lasts 2-4 weeks depending on conditions.
Ongoing maintenance:
-
- Every 2-3 weeks, check whether the glass is starting to fog up
-
- If the effect fades, repeat the anti-fog process
-
- Avoid leaving the glass exposed to heavy rain for long periods without protection
Restoring Yellowed Headlights: Bringing Back Original Brightness
Yellowed headlights don’t just look bad — they reduce brightness and compromise driving safety. Restoring yellowed headlights is an important DIY car care task at home.
Causes of headlight yellowing:
-
- Constant UV exposure from sunlight
-
- High humidity and rain causing oxidation on the polycarbonate surface
-
- Chemicals from air pollution
Restoration process:
Step 1: Clean the headlight surface with water and a soft brush. Remove dust, grime, and dried rain residue. Dry completely.
Step 2: Apply NOMA headlight restorer to the yellowed surface. The product penetrates the polycarbonate layer and dissolves oxidation, restoring clarity.
Step 3: Let the product work for 5-10 minutes depending on the severity of yellowing. For heavy yellowing, leave it longer or reapply.
Step 4: Wipe clean with a microfiber towel. You’ll see clearer, brighter headlights with improved light output.
Maintaining results:
-
- Reapply every 1-2 months to maintain clarity
-
- Avoid prolonged direct sun exposure on headlights
-
- If possible, apply a UV-protective film to the headlight lenses
Comparing Popular DIY Car Care Products
| Criteria | NOMA | Meguiar’s | Sonax | Chemical Guys |
|---|---|---|---|---|
| pH-neutral formula | ✓ Yes | ✓ Yes | ✓ Yes | ✓ Yes |
| Skin-safe | ✓ Excellent | ✓ High | ✓ High | ⚠ Requires hand washing |
| Easy DIY use | ✓ Very easy | ✓ Easy | ✓ Easy | ⚠ Requires more tools |
| Fast results (1-2 uses) | ✓ Yes | ✓ Yes | ✓ Yes | ⚠ Needs 3-4 uses |
| Reasonable price | ✓ Competitive | ⚠ High | ⚠ High | ⚠ Very high |
| Availability in Vietnam | ✓ Easy | ✓ Easy | ⚠ Hard | ⚠ Hard |
Takeaway: NOMA stands out for excellent safety and fast results, making it a great fit for anyone just starting out with DIY car care at home. See our detailed comparison of car care products to find the best fit for you.
Common Mistakes in DIY Car Care at Home
Many people make mistakes when caring for their car themselves, which reduces effectiveness or can even damage the surface. Here are the mistakes to avoid:
Mistake 1: Using hard water or chlorinated tap water
Hard water, high in minerals, leaves white streaks on glass and paint. Use filtered or distilled water to wash your car. If that’s not available, let tap water sit for 5 minutes so the chlorine can evaporate.
Mistake 2: Applying too much product
DIY car care products like NOMA only need a thin layer. Overapplying leaves surfaces greasy, hard to wipe clean, and wastes product.
Mistake 3: Not letting the product dry fully before buffing
Buffing too soon, before the product has absorbed, reduces its effectiveness. Wait 2-5 minutes depending on the product and weather conditions.
Mistake 4: Using stiff cloth or cloth meant for other purposes
Stiff fabric will scratch paint and plastic. Always use a dedicated microfiber towel or soft cotton cloth.
Mistake 5: Working in overly hot sun or rain
Direct, intense sunlight makes the product dry too fast. Rain washes it off before it can absorb. Choose cool, dry weather.
Frequently Asked Questions About DIY Car Care at Home
Is DIY car care at home safe for my paint?
Yes, as long as you choose a pH-neutral product like NOMA. These products are specifically formulated to clean without damaging your paint or other sensitive surfaces. Avoid products that are too acidic or too alkaline, as they can fade paint or leave white streaks on glass.
How often should you do DIY car care at home?
It depends on how your car is used: if it’s parked outside, care for it every 2 weeks. If it’s garaged, every 3-4 weeks is enough. Glass mold needs attention every 2-3 weeks. After driving through heavy rain or snow, care for it sooner.
Do I need expensive tools for DIY car care at home?
No. You just need the basics: microfiber towels (roughly $8-$12 per set), a bucket, a soft brush, and cleaning products. Total startup cost runs about $32-$40, after which you just repurchase products as needed.
Are NOMA products suitable for all types of cars?
Yes. NOMA is designed to work effectively on all car types — sedans, SUVs, pickups, and minivans. Whether your car is new or old, NOMA’s pH-neutral products are safe and effective.
Can DIY car care at home fully replace professional shop services?
It can replace 80-90% of routine maintenance work. Complex jobs like paint correction, deep scratch repair, or mechanical system repairs should still go to a specialty shop. But cleaning, plastic restoration, anti-fog glass treatment, and headlight brightening — all of that you can do yourself.
Conclusion: Start Your DIY Car Care at Home Today
DIY car care at home isn’t just a way to save money — it’s how you take an active role in protecting and caring for your car. With this detailed guide covering prep, restoring plastic trim, preventing fogging, and brightening headlights, you can handle every one of these jobs at home.
The key to success is choosing the right product — safe, pH-neutral, and fast-acting, like NOMA. NOMA’s American-made formulas help you achieve professional-level results at home without worrying about safety for your skin or your car’s surfaces.
Start with one small task — restoring plastic trim or applying an anti-fog treatment to your glass — to feel the difference for yourself. After a few tries, you’ll be confident handling every DIY car care task at home, and you’ll enjoy a clean, long-lasting car without the expense.
Sources
- Guidance from Vietnam’s Ministry of Information and Communications on traffic safety
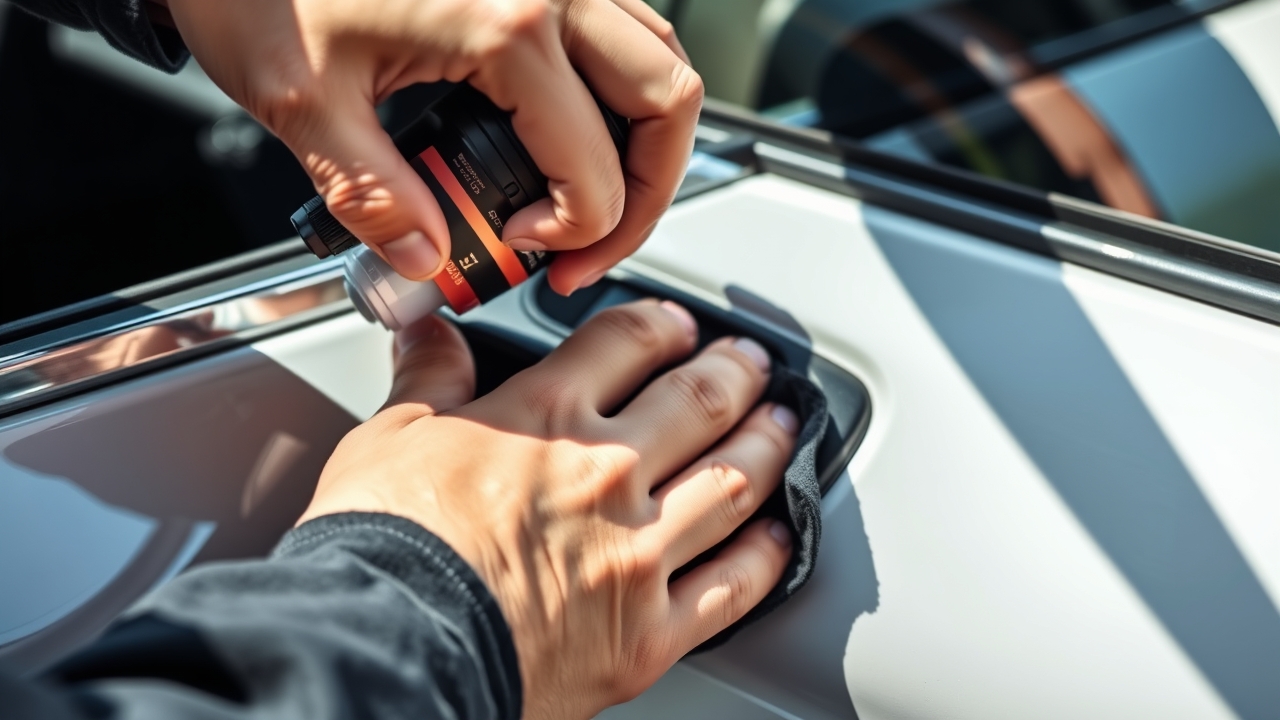
Restoring Faded Black Plastic Trim on Your Car: A Detailed Guide with NOMA 250
Restoring Faded Black Plastic Trim on Your Car: A Detailed Guide with NOMA 250
Black plastic trim on a car — door handles, window surrounds, mirror housings, or rear bumpers — tends to fade and turn a chalky gray over time. This happens due to UV exposure, rain, sun, and stubborn grime that builds up over the months. To restore faded black plastic trim effectively, you need a dedicated solution that’s safe for your car.
NOMA 250 is a US-technology car care product designed specifically to restore faded textured/black plastic trim. With its pH-neutral formula, it’s completely safe for your car’s surfaces and your skin, and it delivers fast results without any professional equipment.
This article walks you through, step by step, how to use NOMA 250 to restore faded black plastic trim and get the best, longest-lasting results.
Why Does Black Plastic Trim Fade, and How Do You Fix It?
Black plastic trim on cars is usually coated or molded from polypropylene compounds. According to a report from Vietnam’s Ministry of Information and Communications, UV rays from the sun are the primary cause of color degradation in plastic materials, leading to fading.
When plastic fades, the surface loses its natural sheen and starts to look worn and aged. This doesn’t just hurt the car’s looks — it makes the whole vehicle appear lower quality than it actually is.
Few people realize that restoring faded black plastic trim isn’t hard at all if you have the right product. You don’t need to visit a garage — you can do it yourself at home with NOMA 250 in about 15-20 minutes.
Alongside NOMA 250, you might also want to check out other car paint care products for complete protection of your vehicle.
Prepping Before You Restore Faded Black Plastic Trim
The first step to getting great results when restoring faded black plastic trim is thorough preparation. This is the prerequisite that determines the success of the entire process.
Tools and materials you’ll need:
- A bottle of NOMA 250 (plastic restoration solution)
- Clean, lint-free cotton cloths
- Water for rinsing (cold or warm)
- Mild soap or car cleaning solution
- Soft brush (optional, for cleaning the surface)
- Dry towel
- Protective gloves (recommended)
First, thoroughly clean the black plastic area you plan to restore. Wash it well with water and soap, and dry it completely before you start.
It’s essential that the surface is completely dry. If it’s still damp, NOMA 250 won’t bond properly with the plastic, which will affect how well it restores the faded black plastic trim.
Pick a suitable time to do this work. Avoid restoring black plastic trim in harsh sun or right before rain, as this will affect your results.
Step-by-Step Guide: Using NOMA 250 to Restore Faded Black Plastic Trim
Once you’ve finished prepping, start the process of restoring faded black plastic trim with NOMA 250. This is the most important stage, and it calls for focus and patience.
Step 1: Check and shake the product well
First, shake the bottle of NOMA 250 for about 30 seconds to blend the ingredients evenly. This is crucial to make sure the formula works at its best when restoring faded black plastic trim.
Open the cap and make sure the product hasn’t separated or changed color. If you notice anything unusual, check the manufacturing date.
Step 2: Apply NOMA 250 to a cloth
Set aside 1-2 clean cotton cloths for applying NOMA 250. You don’t need much product — just enough to dampen the cloth is plenty.
Make sure the cloth isn’t too wet, since the product could run onto areas you don’t want to treat when restoring faded black plastic trim.
Step 3: Rub the product in circular motions
Start rubbing NOMA 250 onto the faded black plastic surface using slow, even circular motions. Use moderate pressure — not too hard, to avoid streaking.
For black plastic trim, work slowly so the product soaks deep into the surface. Keep rubbing for 2-3 minutes on each small section.
Step 4: Let the product air-dry naturally
After applying, let NOMA 250 dry naturally for 10-15 minutes. Don’t wipe it off right away — the product needs time to form a protective layer on the plastic surface.
You’ll notice the black plastic surface gradually becoming glossier, with the color returning to nearly like new.
Step 5: Gently wipe to finish
Once it’s dry, use a clean cloth to gently wipe away any excess product. Use light, circular wiping motions to avoid streaks.
The end result will be fully restored black plastic trim, looking glossy and like new.
Comparison Table: NOMA 250 vs. Other Black Plastic Restoration Solutions
| Criteria | noma 250 | typical competitors | commercial solutions |
|---|---|---|---|
| Manufacturing technology | US technology | Unclear origin | Asian technology |
| Safe, pH-neutral | ✓ Yes | ⚠ Not specified | ⚠ Can cause damage |
| Drying time | 10-15 minutes | 20-30 minutes | 15-25 minutes |
| Long-lasting effect | ✓ High, 2-3 months | – Low, 3-4 weeks | – Average, 1-2 months |
| Easy to use at home | ✓ Very easy | ⚠ Needs instructions | ✓ Easy |
| Price | ✓ Reasonable | – Usually cheaper | ✓ Average |
The table above clearly shows that NOMA 250 stands out for safety and long-lasting results when restoring faded black plastic trim.
Tips for Protecting Your Results After Restoring Black Plastic Trim
Once you’ve successfully restored your faded black plastic trim, you need to protect the results so they last as long as possible.
Avoid direct sunlight for the first 24 hours. If possible, park the car in a garage or covered area so NOMA 250 can dry completely and form a solid protective layer.
Clean regularly with mild soap. Give it a gentle wash once a week with warm water and car soap. Avoid harsh chemicals or acidic cleaners, as they’ll strip away the restoration effect on the black plastic.
Add extra protection with a dedicated product. You can also look into exterior car protection products to boost the durability of your restored black plastic trim.
Repeat the process periodically. Depending on weather conditions and usage, you should repeat the black plastic restoration process every 2-3 months to maintain the best results.
Frequently Asked Questions About Restoring Black Plastic Trim
Is restoring black plastic trim safe for my car’s paint?
Yes, NOMA 250 is completely safe for your car’s paint. This US-technology product is formulated with a special pH-neutral formula that won’t corrode or darken the paint surface. It only acts on the plastic surface and doesn’t affect the surrounding paint.
How long does restored black plastic trim last?
If you restore your black plastic trim correctly with NOMA 250 and protect it consistently, the results will last 2-3 months. In harsh conditions (intense sun, heavy rain), you may need to repeat the process sooner. Regular protection will extend the life of the restoration.
Do I need special tools to restore black plastic trim?
No, you just need basic items like cotton cloths, water, and mild soap. NOMA 250 is designed to be easy to use at home without professional equipment or complex techniques.
Does restoring black plastic trim help increase a car’s resale value?
To some extent, yes. A clean car with glossy-looking black plastic trim makes a much better impression. While it won’t directly raise the sale price, it makes the car look fresher and higher quality, which positively influences a buyer’s decision if you’re looking to sell.
Is NOMA 250 suitable for all types of black plastic?
Yes, NOMA 250 was developed to restore faded textured/black plastic on any part of the car: doors, window trim, mirrors, bumpers, or other plastic components. The product works well on all common polypropylene plastics.
Conclusion
Restoring faded black plastic trim isn’t difficult at all if you have the right product and method. NOMA 250, with its advanced US technology, safe pH-neutral formula, and fast results, is the ideal solution for taking care of your car yourself at home.
By following the step-by-step guide above, you’ll successfully restore your faded black plastic trim in just minutes, with professional-looking results and no trip to the garage required. The results will last 2-3 months if you maintain consistent protection.
Try NOMA 250 today and discover the difference it makes for your favorite car. If you want to learn more about NOMA’s other car care products, visit the NOMA website to explore more complete care solutions for your vehicle.
References