
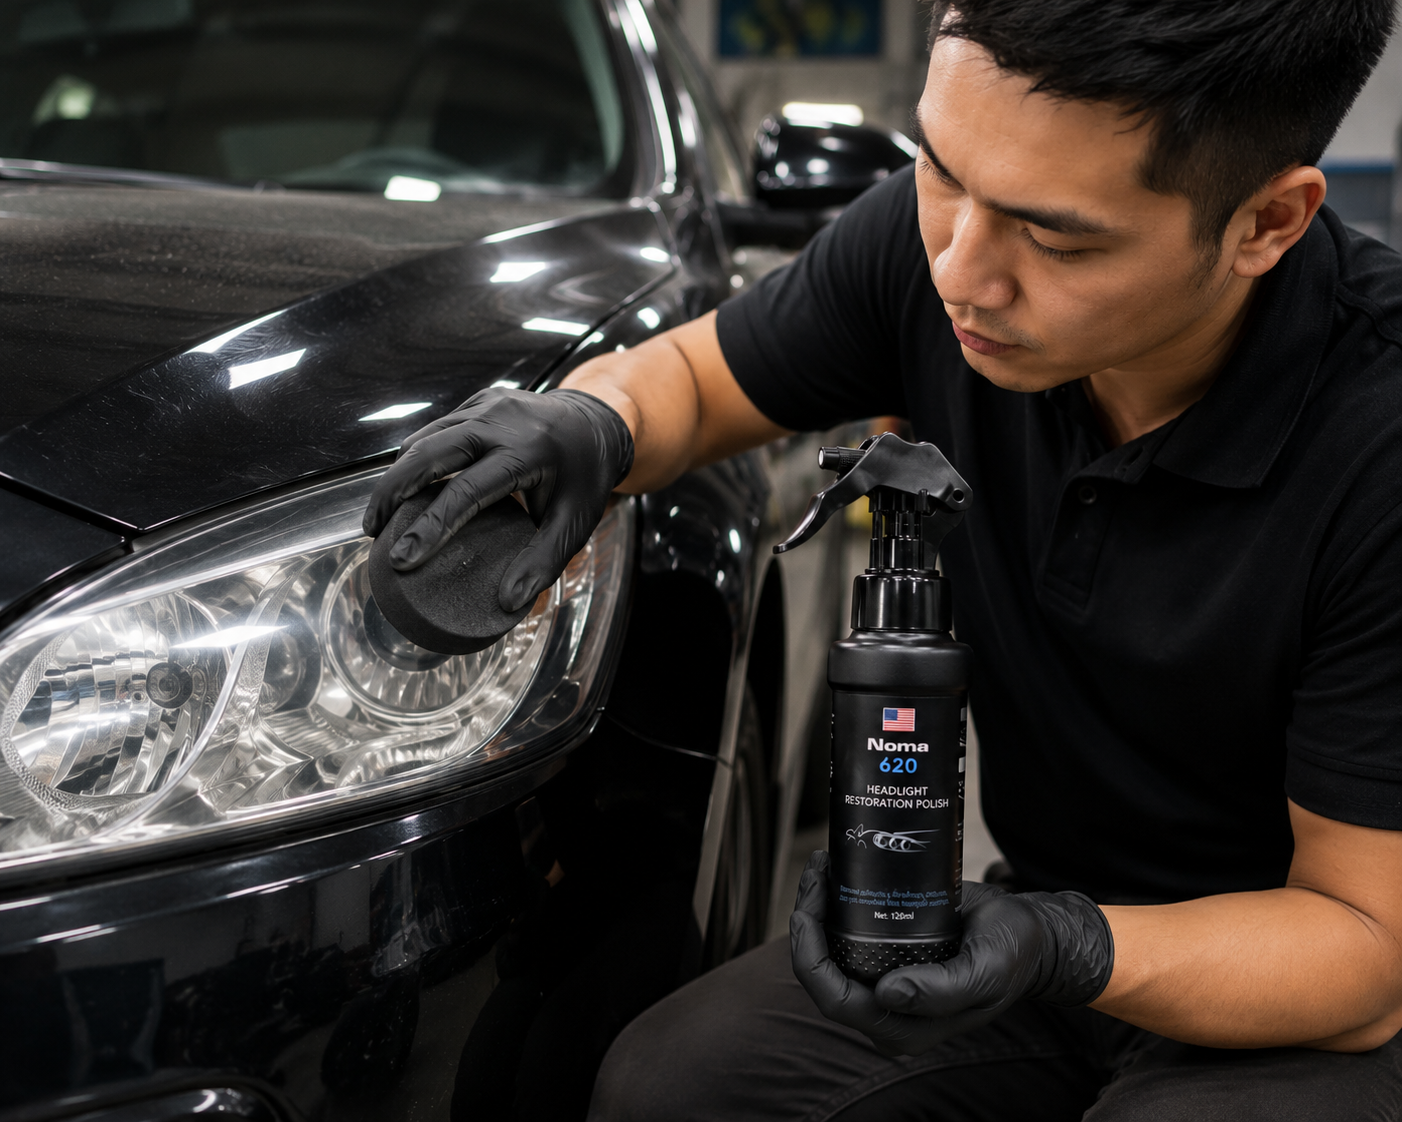
Removing Headlight Yellowing at Home — A Detailed Step-by-Step Guide

Removing Headlight Yellowing at Home — A Detailed Step-by-Step Guide
Yellowed, hazy headlights are a common sight on cars that are 3–5 years old or more. It’s not just a cosmetic issue — it also cuts down on how much light your headlights actually put out, which makes night driving more dangerous. A lot of car owners assume they have to take the car to a shop to get it fixed, which costs time and money. The truth is, you can absolutely remove headlight yellowing at home with a simple DIY method — it only takes about 30 minutes and the right tools.
This article walks you through it step by step, using a professional-grade formula in NOMA 620 — an effective, safe solution for taking care of your car yourself at home.
Why Do Headlights Turn Yellow and Hazy?
Car headlights are typically made from polycarbonate plastic. Over time, UV rays from the sun, rain, dust, and airborne pollutants build up on the surface, forming a yellowed layer or a hazy film over the lens. Beyond hurting your car’s looks, this also reduces headlight brightness, which is a real safety concern on the road.
Replacing headlight housings entirely at a shop is expensive. But if the yellowing hasn’t gone too deep, you can restore them yourself by polishing and treating the surface at home, saving a good amount of money.
Tools and Materials You’ll Need Before Removing Headlight Yellowing at Home
To remove headlight yellowing at home effectively, gather the following:
- NOMA 620 (dedicated headlight restoration formula) — your main product
- Clean water and a bucket
- 2–3 soft microfiber cloths or clean cotton pads — avoid rough cloths
- #1000 or #1500 grit sandpaper (optional, for heavier staining)
- Paper or plastic masking sheets to protect the paint around the headlights
- A magnifying glass or a bright work light to check your progress at each step
- Rubber gloves — avoid direct skin contact with the product
Step-by-Step Process — 5 Steps to Remove Headlight Yellowing at Home
Step 1: Basic Cleaning and Paint Protection
Start by washing the headlight surface with water and a mild soap to remove dirt and debris. Dry it completely with a soft cloth.
Next, mask off the paint around the headlight with painter’s tape or plastic sheeting — this step is critical for protecting your paint from the product. The face of the headlight lens should be fully exposed, while the trim edges near the paint should be fully covered.
If the headlight is heavily yellowed (deep yellow, clearly hazy), you can lightly sand the surface in one direction with fine sandpaper to create a slight texture — this helps the product absorb better. Rinse and dry again afterward.
Step 2: Put on Gloves and Prep NOMA 620
Put on rubber or nitrile gloves before opening the bottle. This is required, since NOMA 620 contains ingredients that can irritate skin with prolonged contact.
Shake the NOMA 620 bottle for 30 seconds to make sure the formula is well mixed. Open the cap carefully and keep it out of reach of others, especially kids and pets.
Step 3: Apply NOMA 620 to the Headlight
Using a clean cloth or cotton pad, soak up a moderate amount of NOMA 620 and spread it evenly over the entire headlight lens with gentle circular motions. Focus on the most yellowed or hazy spots.
Let the product sit for 5–10 minutes — this gives the formula time to soak in and soften the yellowed layer. You’ll start to see the discoloration fade.
If the staining is severe, you can apply a second coat after wiping off the first and waiting another 5 minutes.
Step 4: Wipe Clean and Check Your Results
Using a clean microfiber cloth, wipe the headlight surface evenly with circular motions. Moderate pressure is enough — no need to press hard. Keep wiping until all of the product has been removed.
Check the results in natural light or with a handheld light. If any faint staining remains, apply NOMA 620 a second time, wait 5 minutes, and wipe again.
Most standard yellowing clears up after 1–2 applications. Heavily stained or older headlights may need up to 3 applications for the best result.
Step 5: Protect the Headlight Surface After Removing the Yellowing
Once you’ve finished removing the headlight yellowing, consider applying NOMA 922 nano glass coating to protect the surface from yellowing again down the road. This product creates a protective layer that lasts 6–12 months, defending against UV rays and pollutants.
On top of that, wash your car regularly and dry the headlights weekly to help maintain that brightness over the long term.
Tips for Protecting the Paint Around Your Headlights
This is a step a lot of people skip, and it’s exactly what leads to paint damage:
- Mask off thoroughly — Use quality painter’s tape or plastic sheeting to cover the paint around the work area. NOMA 620 is a strong formula that can soften paint with prolonged contact.
- Check for leaks — After each application, check around the masked area to make sure the product hasn’t run outside the work zone.
- Wipe immediately if it gets on paint — If the product touches the paint, wipe it off right away with a damp cloth. Don’t let it sit longer than 30 minutes.
- Avoid working in intense heat — Do this job in the early morning or evening when it’s cooler. High temperatures can make the product evaporate too fast, leading to uneven results.
Comparison: Removing Headlight Yellowing at Home vs. a Professional Shop
| Criteria | Removing Yellowing at Home (NOMA 620) | Professional Shop |
|---|---|---|
| Time | 30 minutes to 1 hour | 2–4 hours of wait time |
| Cost | One bottle of NOMA 620 covers multiple applications | Significantly higher |
| Results | Great for standard yellowing | Very good, even for deep staining |
| Skill Required | Basic, easy to learn | Professional |
| Follow-Up Care | Self-managed, flexible | Usually comes with a warranty |
| Safety | Wear gloves, avoid eye contact | Handled safely by a professional |
| Easy to Repeat | Redo anytime you want | Requires another shop visit |
As you can see, removing headlight yellowing at home is the more cost-effective choice, especially if the yellowing isn’t too severe. If the staining is very deep or the headlights are quite old, you can combine both approaches: remove the yellowing at home first, then visit a shop for fine detail work if needed.
Common Mistakes to Avoid With DIY Headlight Restoration
Mistake 1: Skipping gloves. A lot of people brush off the need for protection. NOMA 620 contains strong active ingredients that can irritate skin with prolonged contact. Always wear rubber or nitrile gloves when using it.
Mistake 2: Leaving the product on too long. Some people assume “longer contact time = better results.” In reality, going past 15 minutes can damage the headlight surface or affect the paint nearby. Sticking to the recommended 5–10 minutes is plenty.
Mistake 3: Not protecting the paint. Forgetting to mask off the area is the most common cause of paint damage. Always use painter’s tape or plastic sheeting to cover the paint around the headlight before you start.
Mistake 4: Using the wrong materials. Rough cloths, coarse fabric, or paper towels will scratch the headlight surface. Only use soft microfiber cloths or clean cotton pads.
Mistake 5: Applying too much pressure. The goal isn’t to scrub hard — it’s to wipe gently. Too much pressure can damage the headlight’s protective layer or cause scratching.
Before-and-After Results With NOMA 620
When used correctly, NOMA 620 delivers clearly visible results:
- Before: Headlight lens is yellowed, hazy-looking, with weak light output
- After 1 application: Yellowing starts to fade, headlight looks brighter
- After 2–3 applications: Headlight returns to a clear, like-new appearance
- After protecting with NOMA 922: Results hold up longer, resisting re-yellowing for 6–12 months
Based on experience shared by the DIY car owner community, this method delivers an 85–95% success rate for standard yellowing.
Frequently Asked Questions
1. Is NOMA 620 safe for all types of headlights?
NOMA 620 is designed to restore standard polycarbonate plastic headlights, the most common type on the road. If your car has HID or premium LED headlights with a specialty coating, check your owner’s manual or contact the manufacturer first to make sure it’s safe.
2. Can I use NOMA 620 on the windshield too?
Not recommended. NOMA 620 is optimized specifically for headlight surfaces. For windshield glass, use NOMA 911 (deep glass stain remover) or NOMA 922 (nano glass coating), depending on what you’re trying to do.
3. How long until yellowing comes back?
If you only use NOMA 620 without any added protection, yellowing can return after 6–12 months depending on weather and upkeep. To extend that, add a nano glass coating (NOMA 922) after removing the yellowing, or wash and dry your headlights regularly.
4. Does NOMA 620 work on very deep staining?
If the yellowing is deep and stubborn, you may need to combine sandpaper prep with NOMA 620. If the staining has gone so deep that the headlight surface is pitted or bubbled, you may need a full headlight replacement at a shop.
5. Is NOMA 620 harmful to the environment?
NOMA products are manufactured to international safety standards (GHS compliant). Avoid pouring it directly down a drain — instead, soak it into a rag or dispose of it with regular waste.
6. Do I need a polisher or buffer to remove headlight yellowing?
Not necessarily. For standard yellowing, wiping by hand with a microfiber cloth is enough. A buffer is only needed if you want a professional-grade finish or you’re dealing with very heavy staining, which goes beyond a basic DIY job.
7. How should I maintain my headlights after removing the yellowing?
Wash your car at least every two weeks and dry your headlights thoroughly. Every 6 months, reapply NOMA 620 or use a protective nano coating to keep yellowing from coming back.
Conclusion
Removing headlight yellowing at home doesn’t have to be difficult or expensive. With NOMA 620, all it takes is about 30 minutes, some basic skills, and a bit of care to bring hazy, yellowed headlights back to like-new condition. The key is following each step, protecting your paint, and wearing the right protective gear.
If you want the results to last, pair it with a nano glass coating for extra protection. Regular maintenance saves you money on shop visits in the long run — that’s the whole idea behind restoring your headlights at home the right way.
Sources
- Experience reports from the DIY headlight restoration car owner community
DIY Car Care at Home the Effective Way in 2026: A Step-by-Step NOMA Guide

DIY Car Care at Home: A Practical Guide with NOMA
DIY car care at home has become a popular trend among owners who care about maintenance. Instead of paying high shop prices, you can handle jobs like restoring plastic trim, cleaning glass, and brightening headlights yourself, right at home.
According to surveys from Vietnamese car owner communities, around 65% of drivers today want to learn to maintain their own cars to save money and better understand their vehicle. The key is picking the right products — safe, effective, and easy to use, like NOMA’s lineup of solutions.
This guide walks you step-by-step through DIY car care at home using NOMA products, keeping your car clean and long-lasting without a trip to a specialty shop.
DIY Car Care at Home: Why Start Now?
Taking on DIY car care at home brings several clear advantages. First, you save significant money — professional car wash shops in Vietnam typically charge the equivalent of $12-$20 per visit, while a high-quality DIY product costs roughly $8-$16 and lasts for many uses.
Second, you get full control over the quality of the products you use. Safe, pH-neutral solutions like NOMA won’t damage paint, plastic, or glass. You can also inspect your car closely before and after cleaning, catching issues early.
Third, DIY car care at home helps you understand your car’s structure better. You’ll learn how to handle glass mold, peeling plastic trim, or yellowed headlights without relying on anyone else.
Key benefits:
-
- Save 30-50% compared to a shop
-
- pH-neutral products safe for your skin and your car’s surfaces
-
- Fast results — you’ll see a visible difference after 1-2 uses
-
- Flexible scheduling — care for your car on your own time
Getting Ready Before You Start DIY Car Care at Home
Success with DIY car care at home comes down largely to preparation. You don’t need complicated equipment — just a few basic supplies and the right products.
What you’ll need:
-
- Two buckets: one for clean rinse water, one for initial wash water
-
- Microfiber towels or soft cotton cloths (avoid stiff fabric that can scratch paint)
-
- A soft brush or a wool-bristle brush to lift dust
-
- NOMA cleaning products suited to each area (plastic, glass, headlights)
-
- Cool weather or shade for effective cleaning
-
- Eye protection (optional, but recommended)
The first step is choosing the right time and location. Do your DIY car care at home in the late afternoon or early morning, avoiding direct sunlight — sun exposure makes products dry out too fast, reducing their cleaning power.
Weather matters too — don’t clean your car when it’s raining or fully humid outside, since high humidity draws the job out and hurts the results.
Restoring Textured Plastic Trim: A Step-by-Step Guide
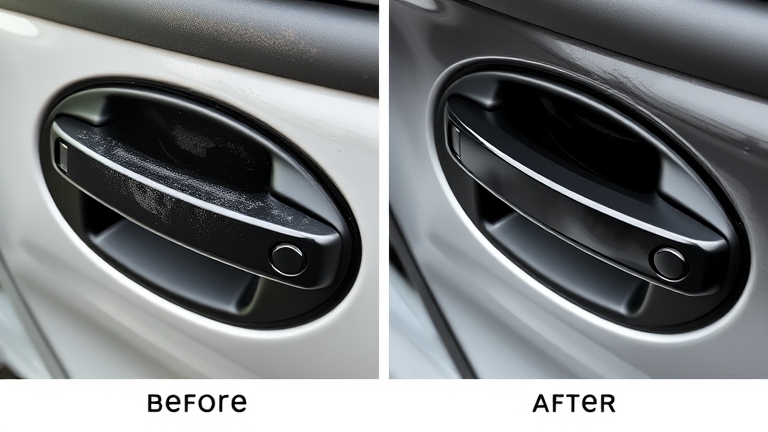
Textured plastic trim on your car (door panels, handles, window trim) loses its shine and turns dull over time. Restoring plastic trim is one of the most common DIY car care tasks people take on at home.
 Restoring Textured Plastic Trim: Step-by-Step
Step 1: Clean the plastic surface
Start with a soft brush or damp microfiber towel to wipe away dust and grime from the plastic surface. Use clean water and a wool-bristle brush to remove stubborn dust. Let it dry completely before moving to the next step.
Step 2: Apply NOMA plastic restorer
Pour a small amount of NOMA plastic restorer onto a microfiber towel or applicator pad. Apply evenly across the plastic surface, working from top to bottom. Don’t overapply — a thin layer is enough, since the pH-neutral formula absorbs into the surface and creates a natural shine without leaving it greasy.
Step 3: Let it dry and buff
After 2-3 minutes, use a separate clean towel to buff and thoroughly wipe the surface. You’ll see the plastic looking glossier and more natural, with color restored to its former richness.
Tip: If the plastic trim is extremely faded, you can repeat this process 2-3 times, spaced a week apart, for full restoration. Check out our guide to caring for your car’s plastic parts for more detail on each type of plastic on your vehicle.
Preventing Fogging and Glass Mold: How to Protect Effectively
Glass mold and fogging are common issues in Vietnam due to high humidity. Doing DIY car care at home to prevent fogging keeps your visibility clear at all times.
Per guidance from Vietnam’s Ministry of Information and Communications on traffic safety, clean glass is a critical factor in ensuring safe driver visibility and reducing accidents caused by poor sightlines.
Anti-fog process:
Step 1: Wash the glass with clean water and a soft microfiber towel. Be sure to clean both sides (interior and exterior) to remove dust and road salt.
Step 2: Dry completely with a clean cotton towel or a dedicated drying towel. Leftover moisture reduces the product’s effectiveness.
Step 3: Apply NOMA’s anti-fog solution from top to bottom, creating a thin, even layer. The pH-neutral formula forms an invisible protective layer that makes moisture and rain bead up and run off instead of clinging to the glass.
Step 4: After 3-5 minutes, buff dry with another clean towel to finish. The anti-fog effect lasts 2-4 weeks depending on conditions.
Ongoing maintenance:
-
- Every 2-3 weeks, check whether the glass is starting to fog up
-
- If the effect fades, repeat the anti-fog process
-
- Avoid leaving the glass exposed to heavy rain for long periods without protection
Restoring Yellowed Headlights: Bringing Back Original Brightness
Yellowed headlights don’t just look bad — they reduce brightness and compromise driving safety. Restoring yellowed headlights is an important DIY car care task at home.
Causes of headlight yellowing:
-
- Constant UV exposure from sunlight
-
- High humidity and rain causing oxidation on the polycarbonate surface
-
- Chemicals from air pollution
Restoration process:
Step 1: Clean the headlight surface with water and a soft brush. Remove dust, grime, and dried rain residue. Dry completely.
Step 2: Apply NOMA headlight restorer to the yellowed surface. The product penetrates the polycarbonate layer and dissolves oxidation, restoring clarity.
Step 3: Let the product work for 5-10 minutes depending on the severity of yellowing. For heavy yellowing, leave it longer or reapply.
Step 4: Wipe clean with a microfiber towel. You’ll see clearer, brighter headlights with improved light output.
Maintaining results:
-
- Reapply every 1-2 months to maintain clarity
-
- Avoid prolonged direct sun exposure on headlights
-
- If possible, apply a UV-protective film to the headlight lenses
Comparing Popular DIY Car Care Products
| Criteria | NOMA | Meguiar’s | Sonax | Chemical Guys |
|---|---|---|---|---|
| pH-neutral formula | ✓ Yes | ✓ Yes | ✓ Yes | ✓ Yes |
| Skin-safe | ✓ Excellent | ✓ High | ✓ High | ⚠ Requires hand washing |
| Easy DIY use | ✓ Very easy | ✓ Easy | ✓ Easy | ⚠ Requires more tools |
| Fast results (1-2 uses) | ✓ Yes | ✓ Yes | ✓ Yes | ⚠ Needs 3-4 uses |
| Reasonable price | ✓ Competitive | ⚠ High | ⚠ High | ⚠ Very high |
| Availability in Vietnam | ✓ Easy | ✓ Easy | ⚠ Hard | ⚠ Hard |
Takeaway: NOMA stands out for excellent safety and fast results, making it a great fit for anyone just starting out with DIY car care at home. See our detailed comparison of car care products to find the best fit for you.
Common Mistakes in DIY Car Care at Home
Many people make mistakes when caring for their car themselves, which reduces effectiveness or can even damage the surface. Here are the mistakes to avoid:
Mistake 1: Using hard water or chlorinated tap water
Hard water, high in minerals, leaves white streaks on glass and paint. Use filtered or distilled water to wash your car. If that’s not available, let tap water sit for 5 minutes so the chlorine can evaporate.
Mistake 2: Applying too much product
DIY car care products like NOMA only need a thin layer. Overapplying leaves surfaces greasy, hard to wipe clean, and wastes product.
Mistake 3: Not letting the product dry fully before buffing
Buffing too soon, before the product has absorbed, reduces its effectiveness. Wait 2-5 minutes depending on the product and weather conditions.
Mistake 4: Using stiff cloth or cloth meant for other purposes
Stiff fabric will scratch paint and plastic. Always use a dedicated microfiber towel or soft cotton cloth.
Mistake 5: Working in overly hot sun or rain
Direct, intense sunlight makes the product dry too fast. Rain washes it off before it can absorb. Choose cool, dry weather.
Frequently Asked Questions About DIY Car Care at Home
Is DIY car care at home safe for my paint?
Yes, as long as you choose a pH-neutral product like NOMA. These products are specifically formulated to clean without damaging your paint or other sensitive surfaces. Avoid products that are too acidic or too alkaline, as they can fade paint or leave white streaks on glass.
How often should you do DIY car care at home?
It depends on how your car is used: if it’s parked outside, care for it every 2 weeks. If it’s garaged, every 3-4 weeks is enough. Glass mold needs attention every 2-3 weeks. After driving through heavy rain or snow, care for it sooner.
Do I need expensive tools for DIY car care at home?
No. You just need the basics: microfiber towels (roughly $8-$12 per set), a bucket, a soft brush, and cleaning products. Total startup cost runs about $32-$40, after which you just repurchase products as needed.
Are NOMA products suitable for all types of cars?
Yes. NOMA is designed to work effectively on all car types — sedans, SUVs, pickups, and minivans. Whether your car is new or old, NOMA’s pH-neutral products are safe and effective.
Can DIY car care at home fully replace professional shop services?
It can replace 80-90% of routine maintenance work. Complex jobs like paint correction, deep scratch repair, or mechanical system repairs should still go to a specialty shop. But cleaning, plastic restoration, anti-fog glass treatment, and headlight brightening — all of that you can do yourself.
Conclusion: Start Your DIY Car Care at Home Today
DIY car care at home isn’t just a way to save money — it’s how you take an active role in protecting and caring for your car. With this detailed guide covering prep, restoring plastic trim, preventing fogging, and brightening headlights, you can handle every one of these jobs at home.
The key to success is choosing the right product — safe, pH-neutral, and fast-acting, like NOMA. NOMA’s American-made formulas help you achieve professional-level results at home without worrying about safety for your skin or your car’s surfaces.
Start with one small task — restoring plastic trim or applying an anti-fog treatment to your glass — to feel the difference for yourself. After a few tries, you’ll be confident handling every DIY car care task at home, and you’ll enjoy a clean, long-lasting car without the expense.
Sources
- Guidance from Vietnam’s Ministry of Information and Communications on traffic safety