
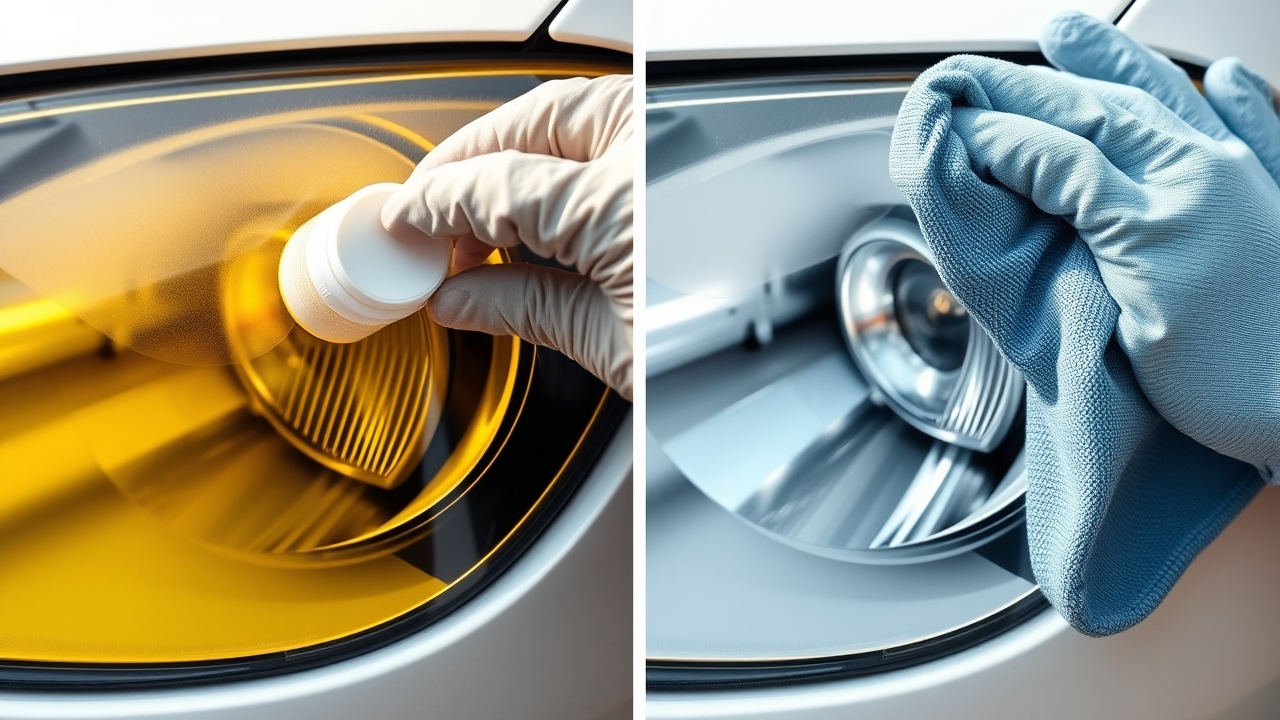
NOMA 620 – Effective At-Home Restoration for Yellowed Headlights in 2026

NOMA 620 – Effective At-Home Restoration for Yellowed Headlights in 2026
Yellowed, hazy headlights are a common problem on cars after years of use. According to traffic safety research, dim headlights are a contributing factor in more than 15% of nighttime traffic accidents. Instead of paying for a full headlight housing replacement, you can restore yellowed headlights yourself at home with just NOMA 620. This product is formulated to professional detailing standards to remove the yellowed layer, restore original brightness, and is easy for anyone to use.
This article walks through each step of using NOMA 620, compares it against popular DIY methods, and shares long-term maintenance tips to keep your headlights bright.
Why Do Headlights Turn Yellow and Hazy?
Car headlights are typically made from polycarbonate plastic. The main causes of yellowing include:
- UV rays from the sun: UV exposure penetrates the plastic, breaking down the polymer structure and creating a dull, yellowed layer. This happens continuously, especially in hot, sunny climates.
- Oxidation: Air and high humidity oxidize the plastic surface, creating a hazy film that blocks light from passing through.
- Residue from the exterior coating: As a car ages, the protective coating on the headlight can break down and leave residue on the surface.
The result is a headlight that’s no longer as bright as it once was — brightness can drop by 30-40%, which affects nighttime driving safety. Restoring yellowed headlights with NOMA 620 helps bring back that original brightness without needing a full headlight replacement.
Step-by-Step Headlight Restoration Process
NOMA 620 is a dedicated headlight restoration product, manufactured through an international OEM partner. Here’s a detailed 5-step guide to restoring your headlights at home:
Step 1: Prep Your Materials and Workspace
Before you start restoring yellowed headlights, gather the following:
- NOMA 620 (headlight restoration formula)
- Clean water and dish soap
- 2-3 microfiber cloths
- A soft brush for dusting
- Safety glasses
- Rubber or nitrile gloves (NOMA 620 can irritate skin)
Safety Warning: NOMA 620 contains a strong formula that can irritate skin. Wear gloves and avoid contact with skin and eyes. If it gets on your skin, rinse immediately with clean water. If it gets in your eyes, rinse for 15 minutes and contact a doctor.
Choose a shaded work area (out of direct sunlight), since NOMA 620 needs 15-30 minutes to absorb into the surface.
Step 2: Thoroughly Clean the Headlight Surface
This step is critical to how well your headlight restoration turns out. Wash the headlight with warm water and dish soap. Dry it completely with a microfiber cloth.
Then, use a soft brush to remove any dust or debris. The headlight needs to be fully dry before you apply NOMA 620.
Step 3: Apply NOMA 620 to the Headlight Surface
Shake the NOMA 620 bottle for 30 seconds to mix the formula evenly. Apply the product to the entire yellowed headlight surface using a microfiber cloth, working in slow circular motions without pressing too hard.
Cover the surface evenly, making sure you don’t miss any spots. The first application might not show dramatic results — that’s completely normal.
Step 4: Let the Product Absorb (Dwell Time)
After applying NOMA 620, let it absorb into the surface for 15-30 minutes. The time needed depends on how severe the yellowing is:
- Light yellowing: 15 minutes is enough
- Moderate yellowing: 20-25 minutes
- Heavy yellowing: 30 minutes
Don’t leave it on longer than 45 minutes, since it may dry out too much. You can use this waiting time to prep other parts of the car for restoration.
Step 5: Wipe Clean and Check Your Results
After the dwell time, use a microfiber cloth to wipe the headlight surface dry with slow, circular motions. Keep wiping until there’s no more residue or grime left.
Apply 2-3 rounds for the best results, waiting 15-20 minutes between each one. After 3 applications, you’ll notice a clear improvement in headlight brightness.
Comparing Effectiveness: NOMA 620 vs. Other DIY Methods
| Method | Time | Cost | Effectiveness | How Long It Lasts | DIY-Friendly |
|---|---|---|---|---|---|
| NOMA 620 restoration | 1-2 hrs | Affordable | ⭐⭐⭐⭐⭐ | 6-12 months | ✓ Very easy |
| Sanding + standard polish spray | 3-4 hrs | Low | ⭐⭐⭐ | 2-3 months | ✓ Moderate |
| Full headlight housing replacement | 1-2 hrs | High | ⭐⭐⭐⭐⭐ | 10+ years | ✗ Needs a technician |
| Protective film wrap | 2 hrs | Higher | ⭐⭐⭐⭐ | 3-5 years | ✓ Moderate |
| DIY UV resin coating | 4-5 hrs | Moderate | ⭐⭐⭐⭐ | 5-7 years | ✓ Difficult |
Looking at the comparison, NOMA 620 is the most well-rounded solution: least time invested, low cost, strong results, and easy enough for anyone to do. According to detailing experts, restoring yellowed headlights with a dedicated product delivers more durable results than basic sanding-and-spray methods.
Headlight Maintenance Tips After Restoration
Once you’ve successfully restored your yellowed headlights, keep up with maintenance to make the results last:
- Wash headlights regularly: Every 2 weeks, gently rinse with clean water and soap to remove dust and grime.
- Apply NOMA 922 nano glass coating: After restoring, you can apply NOMA 922 (water-repellent nano glass coating) to the headlight surface to add a protective layer against UV and oxidation, extending results by an extra 2-3 months.
- Avoid road salt and harsh chemical cleaners: Acidic rain and road salt (in coastal areas) can damage a restored headlight surface. Rinse it off promptly after exposure to rain or salt.
- Park in the shade: Direct sunlight is the top cause of yellowing coming back. Park in a garage or shaded spot whenever possible.
With proper maintenance, headlight restoration results can last 6-12 months. After that, you’ll just need to reapply NOMA 620 once or twice to maintain that brightness.
Frequently Asked Questions About Headlight Restoration
Is NOMA 620 safe to use?
NOMA 620 is manufactured through an international OEM partner and comes with a publicly available MSDS (safety data sheet) that meets GHS standards. The product is safe when used as directed: wear gloves, avoid skin and eye contact, and work in a well-ventilated area. It doesn’t damage the headlight — it only removes the yellowed layer.
How soon will I see results restoring yellowed headlights?
After your first application of NOMA 620, you’ll notice improvement within 15-30 minutes. For the best results, apply 2-3 times, spaced about 20 minutes apart. The entire restoration process takes 1-2 hours depending on how severe the yellowing is.
Can I restore headlights on a rainy day?
It’s not recommended. Rainwater will dilute NOMA 620 and reduce its effectiveness. Choose a sunny or overcast (rain-free) day, and work in a shaded spot so the product can absorb into the headlight surface properly.
Should I apply NOMA 922 nano glass coating after restoring?
It’s not required, but it’s a good idea. NOMA 922 (water-repellent nano glass coating) adds a protective layer that resists UV and oxidation, extending your restoration results by an extra 2-3 months.
Can NOMA 620 remove deep yellowing completely?
NOMA 620 works very well on light to moderate yellowing (under 50% affected). For heavy yellowing (over 80% affected), you may need more applications (4-5 times) or light sanding beforehand. If the yellowing is extremely deep, a full headlight replacement is the safest option.
How often should I restore my headlights?
Depending on your driving and parking conditions, NOMA 620‘s results last 6-12 months. You can restore your headlights every 6 months to keep brightness at its best, or whenever you notice yellowing starting to return.
Conclusion: Restoring Yellowed Headlights Made Easy With NOMA 620
Restoring yellowed headlights doesn’t require a full replacement or a trip to a professional shop — you can do it yourself at home in 1-2 hours with just NOMA 620. It’s effective, safe when used as directed, and costs just a fraction of a full headlight replacement.
The key to success is thorough prep, cleaning the headlight surface before applying the product, and being patient while it absorbs. Apply 2-3 times, about 20 minutes apart, for the best results. Afterward, keep up with maintenance — gentle washing, avoiding sun exposure, and applying NOMA 922 nano glass coating — to make the results last.
If you want to restore your headlights’ brightness at home effectively, NOMA 620 is a reliable solution trusted by both detailing professionals and DIY car owners alike. Give it a try today.
Related Reading
- Guide to applying NOMA 922 water-repellent nano glass coating
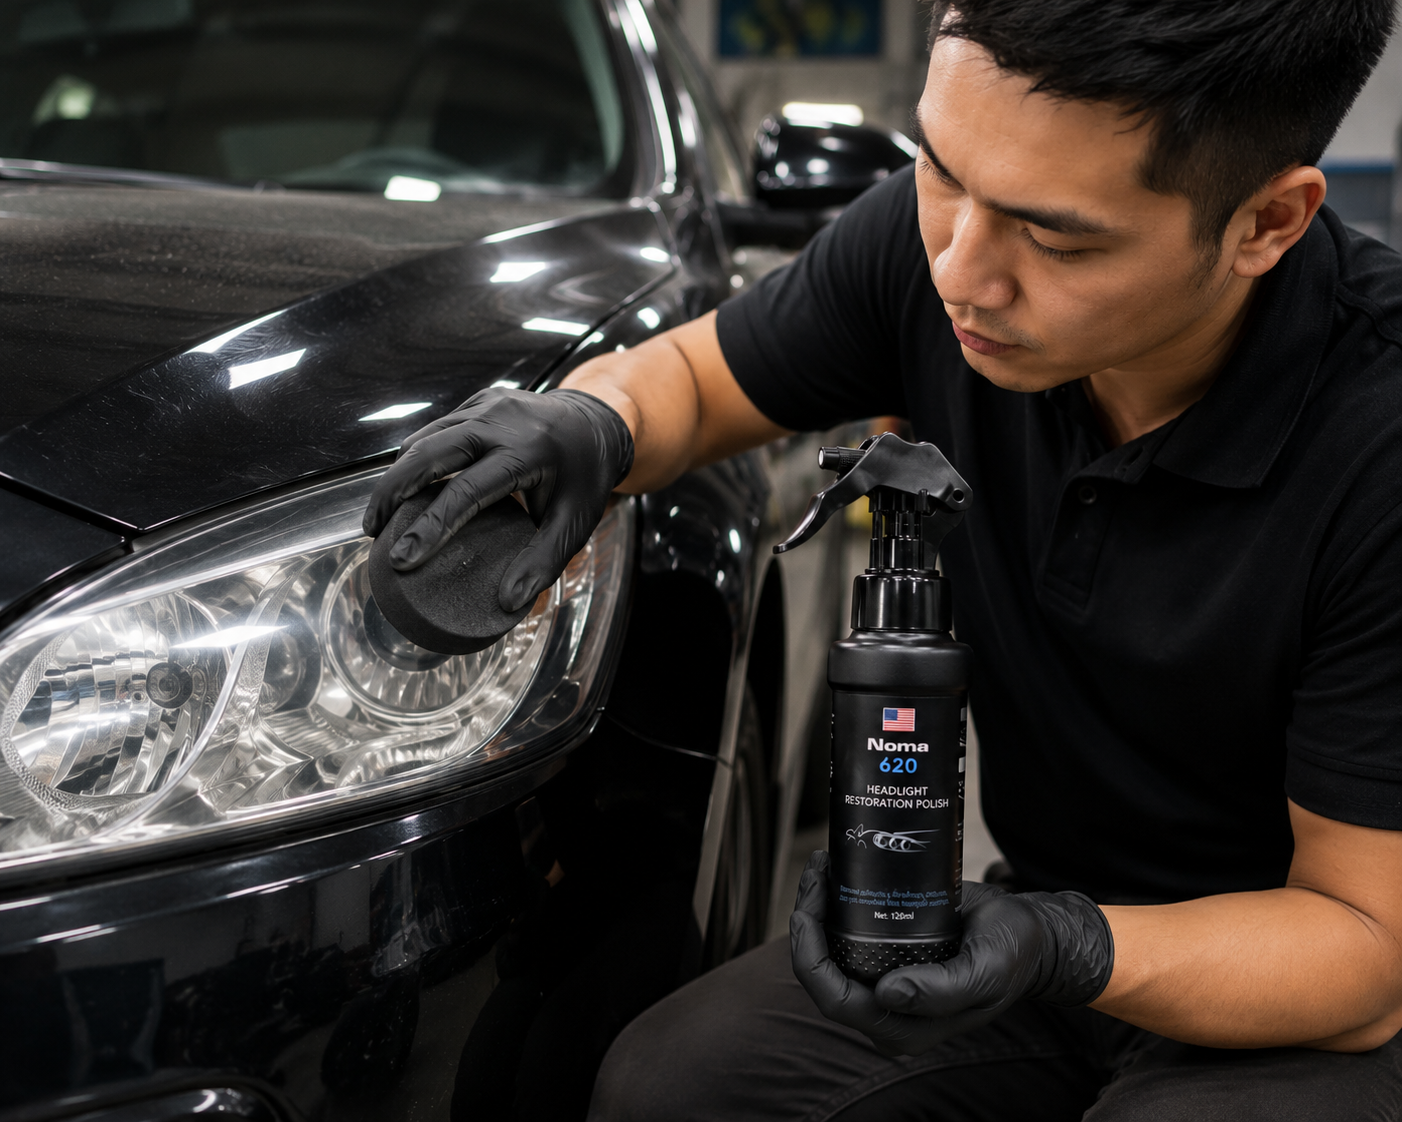
Removing Headlight Yellowing at Home — A Detailed Step-by-Step Guide
Removing Headlight Yellowing at Home — A Detailed Step-by-Step Guide
Yellowed, hazy headlights are a common sight on cars that are 3–5 years old or more. It’s not just a cosmetic issue — it also cuts down on how much light your headlights actually put out, which makes night driving more dangerous. A lot of car owners assume they have to take the car to a shop to get it fixed, which costs time and money. The truth is, you can absolutely remove headlight yellowing at home with a simple DIY method — it only takes about 30 minutes and the right tools.
This article walks you through it step by step, using a professional-grade formula in NOMA 620 — an effective, safe solution for taking care of your car yourself at home.
Why Do Headlights Turn Yellow and Hazy?
Car headlights are typically made from polycarbonate plastic. Over time, UV rays from the sun, rain, dust, and airborne pollutants build up on the surface, forming a yellowed layer or a hazy film over the lens. Beyond hurting your car’s looks, this also reduces headlight brightness, which is a real safety concern on the road.
Replacing headlight housings entirely at a shop is expensive. But if the yellowing hasn’t gone too deep, you can restore them yourself by polishing and treating the surface at home, saving a good amount of money.
Tools and Materials You’ll Need Before Removing Headlight Yellowing at Home
To remove headlight yellowing at home effectively, gather the following:
- NOMA 620 (dedicated headlight restoration formula) — your main product
- Clean water and a bucket
- 2–3 soft microfiber cloths or clean cotton pads — avoid rough cloths
- #1000 or #1500 grit sandpaper (optional, for heavier staining)
- Paper or plastic masking sheets to protect the paint around the headlights
- A magnifying glass or a bright work light to check your progress at each step
- Rubber gloves — avoid direct skin contact with the product
Step-by-Step Process — 5 Steps to Remove Headlight Yellowing at Home
Step 1: Basic Cleaning and Paint Protection
Start by washing the headlight surface with water and a mild soap to remove dirt and debris. Dry it completely with a soft cloth.
Next, mask off the paint around the headlight with painter’s tape or plastic sheeting — this step is critical for protecting your paint from the product. The face of the headlight lens should be fully exposed, while the trim edges near the paint should be fully covered.
If the headlight is heavily yellowed (deep yellow, clearly hazy), you can lightly sand the surface in one direction with fine sandpaper to create a slight texture — this helps the product absorb better. Rinse and dry again afterward.
Step 2: Put on Gloves and Prep NOMA 620
Put on rubber or nitrile gloves before opening the bottle. This is required, since NOMA 620 contains ingredients that can irritate skin with prolonged contact.
Shake the NOMA 620 bottle for 30 seconds to make sure the formula is well mixed. Open the cap carefully and keep it out of reach of others, especially kids and pets.
Step 3: Apply NOMA 620 to the Headlight
Using a clean cloth or cotton pad, soak up a moderate amount of NOMA 620 and spread it evenly over the entire headlight lens with gentle circular motions. Focus on the most yellowed or hazy spots.
Let the product sit for 5–10 minutes — this gives the formula time to soak in and soften the yellowed layer. You’ll start to see the discoloration fade.
If the staining is severe, you can apply a second coat after wiping off the first and waiting another 5 minutes.
Step 4: Wipe Clean and Check Your Results
Using a clean microfiber cloth, wipe the headlight surface evenly with circular motions. Moderate pressure is enough — no need to press hard. Keep wiping until all of the product has been removed.
Check the results in natural light or with a handheld light. If any faint staining remains, apply NOMA 620 a second time, wait 5 minutes, and wipe again.
Most standard yellowing clears up after 1–2 applications. Heavily stained or older headlights may need up to 3 applications for the best result.
Step 5: Protect the Headlight Surface After Removing the Yellowing
Once you’ve finished removing the headlight yellowing, consider applying NOMA 922 nano glass coating to protect the surface from yellowing again down the road. This product creates a protective layer that lasts 6–12 months, defending against UV rays and pollutants.
On top of that, wash your car regularly and dry the headlights weekly to help maintain that brightness over the long term.
Tips for Protecting the Paint Around Your Headlights
This is a step a lot of people skip, and it’s exactly what leads to paint damage:
- Mask off thoroughly — Use quality painter’s tape or plastic sheeting to cover the paint around the work area. NOMA 620 is a strong formula that can soften paint with prolonged contact.
- Check for leaks — After each application, check around the masked area to make sure the product hasn’t run outside the work zone.
- Wipe immediately if it gets on paint — If the product touches the paint, wipe it off right away with a damp cloth. Don’t let it sit longer than 30 minutes.
- Avoid working in intense heat — Do this job in the early morning or evening when it’s cooler. High temperatures can make the product evaporate too fast, leading to uneven results.
Comparison: Removing Headlight Yellowing at Home vs. a Professional Shop
| Criteria | Removing Yellowing at Home (NOMA 620) | Professional Shop |
|---|---|---|
| Time | 30 minutes to 1 hour | 2–4 hours of wait time |
| Cost | One bottle of NOMA 620 covers multiple applications | Significantly higher |
| Results | Great for standard yellowing | Very good, even for deep staining |
| Skill Required | Basic, easy to learn | Professional |
| Follow-Up Care | Self-managed, flexible | Usually comes with a warranty |
| Safety | Wear gloves, avoid eye contact | Handled safely by a professional |
| Easy to Repeat | Redo anytime you want | Requires another shop visit |
As you can see, removing headlight yellowing at home is the more cost-effective choice, especially if the yellowing isn’t too severe. If the staining is very deep or the headlights are quite old, you can combine both approaches: remove the yellowing at home first, then visit a shop for fine detail work if needed.
Common Mistakes to Avoid With DIY Headlight Restoration
Mistake 1: Skipping gloves. A lot of people brush off the need for protection. NOMA 620 contains strong active ingredients that can irritate skin with prolonged contact. Always wear rubber or nitrile gloves when using it.
Mistake 2: Leaving the product on too long. Some people assume “longer contact time = better results.” In reality, going past 15 minutes can damage the headlight surface or affect the paint nearby. Sticking to the recommended 5–10 minutes is plenty.
Mistake 3: Not protecting the paint. Forgetting to mask off the area is the most common cause of paint damage. Always use painter’s tape or plastic sheeting to cover the paint around the headlight before you start.
Mistake 4: Using the wrong materials. Rough cloths, coarse fabric, or paper towels will scratch the headlight surface. Only use soft microfiber cloths or clean cotton pads.
Mistake 5: Applying too much pressure. The goal isn’t to scrub hard — it’s to wipe gently. Too much pressure can damage the headlight’s protective layer or cause scratching.
Before-and-After Results With NOMA 620
When used correctly, NOMA 620 delivers clearly visible results:
- Before: Headlight lens is yellowed, hazy-looking, with weak light output
- After 1 application: Yellowing starts to fade, headlight looks brighter
- After 2–3 applications: Headlight returns to a clear, like-new appearance
- After protecting with NOMA 922: Results hold up longer, resisting re-yellowing for 6–12 months
Based on experience shared by the DIY car owner community, this method delivers an 85–95% success rate for standard yellowing.
Frequently Asked Questions
1. Is NOMA 620 safe for all types of headlights?
NOMA 620 is designed to restore standard polycarbonate plastic headlights, the most common type on the road. If your car has HID or premium LED headlights with a specialty coating, check your owner’s manual or contact the manufacturer first to make sure it’s safe.
2. Can I use NOMA 620 on the windshield too?
Not recommended. NOMA 620 is optimized specifically for headlight surfaces. For windshield glass, use NOMA 911 (deep glass stain remover) or NOMA 922 (nano glass coating), depending on what you’re trying to do.
3. How long until yellowing comes back?
If you only use NOMA 620 without any added protection, yellowing can return after 6–12 months depending on weather and upkeep. To extend that, add a nano glass coating (NOMA 922) after removing the yellowing, or wash and dry your headlights regularly.
4. Does NOMA 620 work on very deep staining?
If the yellowing is deep and stubborn, you may need to combine sandpaper prep with NOMA 620. If the staining has gone so deep that the headlight surface is pitted or bubbled, you may need a full headlight replacement at a shop.
5. Is NOMA 620 harmful to the environment?
NOMA products are manufactured to international safety standards (GHS compliant). Avoid pouring it directly down a drain — instead, soak it into a rag or dispose of it with regular waste.
6. Do I need a polisher or buffer to remove headlight yellowing?
Not necessarily. For standard yellowing, wiping by hand with a microfiber cloth is enough. A buffer is only needed if you want a professional-grade finish or you’re dealing with very heavy staining, which goes beyond a basic DIY job.
7. How should I maintain my headlights after removing the yellowing?
Wash your car at least every two weeks and dry your headlights thoroughly. Every 6 months, reapply NOMA 620 or use a protective nano coating to keep yellowing from coming back.
Conclusion
Removing headlight yellowing at home doesn’t have to be difficult or expensive. With NOMA 620, all it takes is about 30 minutes, some basic skills, and a bit of care to bring hazy, yellowed headlights back to like-new condition. The key is following each step, protecting your paint, and wearing the right protective gear.
If you want the results to last, pair it with a nano glass coating for extra protection. Regular maintenance saves you money on shop visits in the long run — that’s the whole idea behind restoring your headlights at home the right way.
Sources
- Experience reports from the DIY headlight restoration car owner community