
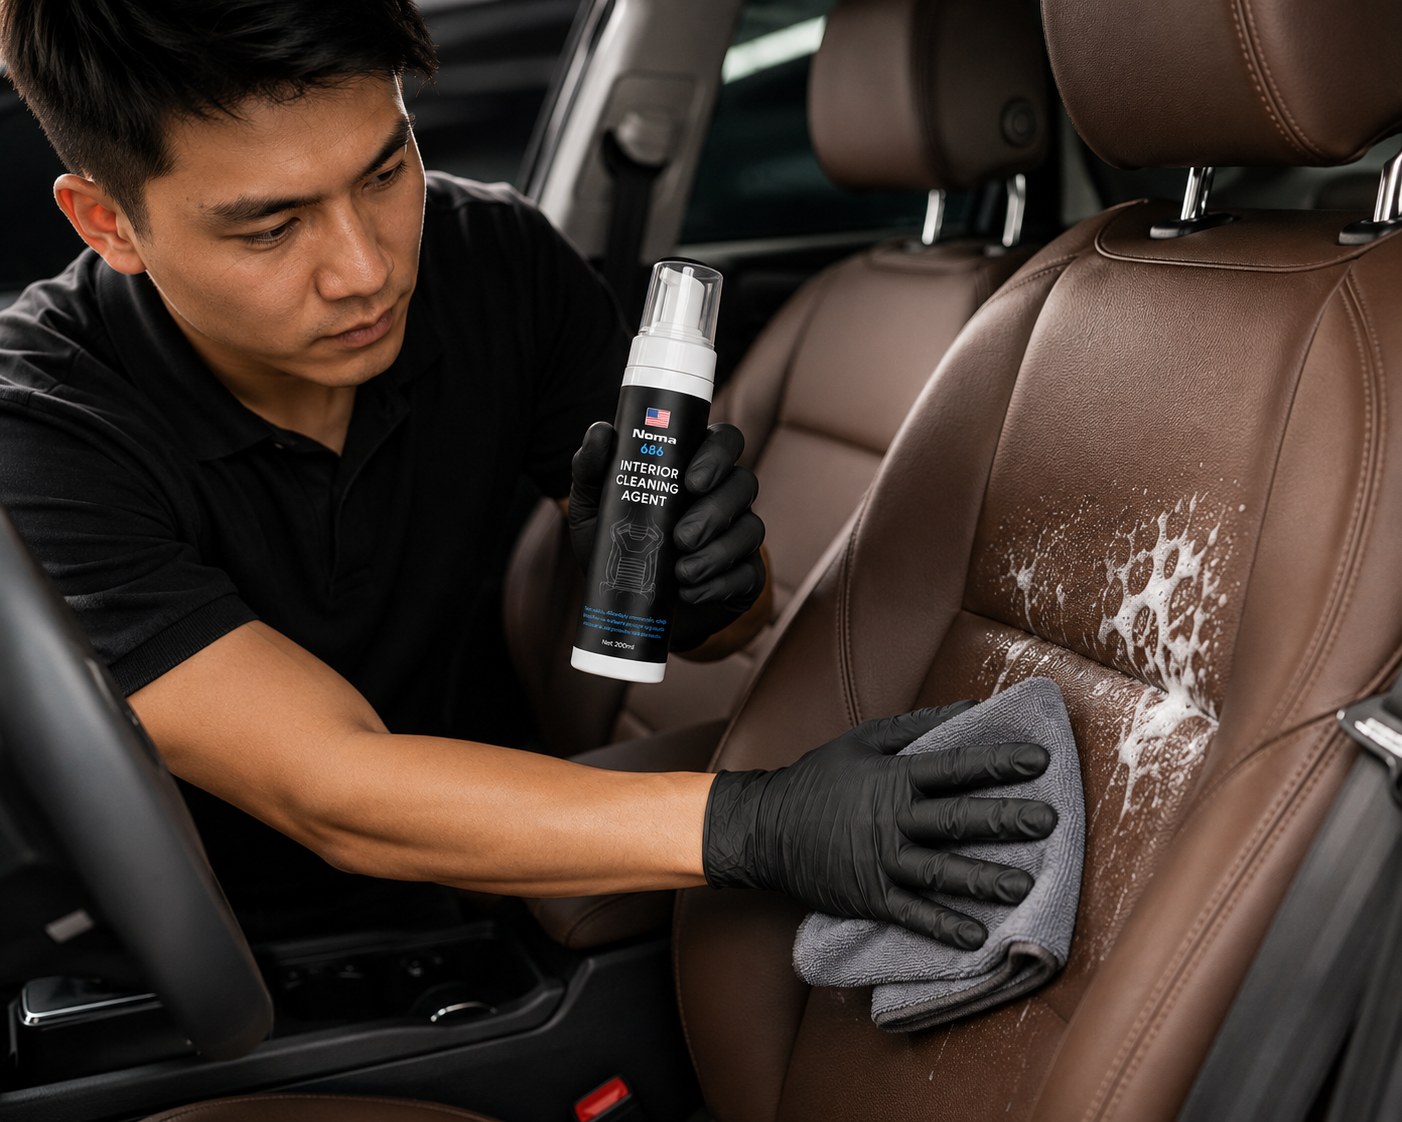
Professional Leather Car Seat Cleaning — A Step-by-Step Process

Professional Leather Car Seat Cleaning — A Step-by-Step Process
Leather seats are a real highlight of any car’s interior, but they’re also prone to dirt, fading, and cracking without the right care. Cleaning your leather car seats properly extends the life of the leather, keeps that upscale look intact, and helps protect your car’s resale value. A professional leather seat cleaning process comes down to four main steps: prep, cleaning, conditioning, and ongoing maintenance.
According to industry reports on vehicle interior condition, more than 70% of car owners don’t know how to properly clean leather car seats, which leads to premature wear and damage. With a product like NOMA 686 — a dedicated leather seat cleaning & conditioning kit — you can follow a professional detailing process at home without a trip to the shop.
Prepping and Assessing Your Leather Seats Before Cleaning
Prep is the step that determines how well the rest of the cleaning process goes. Start by checking the current condition of the seats carefully: is there dust and grime, mold, oil stains, or stubborn dirt buildup?
If the seats are heavily soiled, vacuum them first with a strong vacuum to remove dust, crumbs, and loose particles. Pay close attention to the tight gaps along the seams.
Set up your workspace inside the car — open the doors for airflow and avoid direct sunlight, since UV rays dry out leather. Gather clean microfiber cloths, a dedicated soft brush, and your main product, NOMA 686 — a leather cleaning & conditioning kit that includes both a cleaning solution and a conditioning cream.
A spray bottle of clean water also comes in handy for an initial rinse. The ideal water temperature is around 77–86°F (25–30°C) — avoid water that’s too hot, since it damages the leather’s natural protective finish.
The Right Way to Clean Your Leather Car Seats
Cleaning is the most important step in the process — this is where you remove built-up grime, oils, and dead skin cells that accumulate over time.
Step 1: Mix a cleaning solution using NOMA 686 according to the bottle’s instructions (typically diluted 1:5 or 1:10 with water, depending on how dirty the seats are). This is a gentle foaming formula that won’t damage leather the way harsh cleaners can.
Step 2: Apply the solution to one section of the seat at a time, then use a soft brush — not too stiff, to avoid scratching the leather — and gently scrub from top to bottom. Give stubborn stains extra time, but keep your touch light.
Step 3: Once you’ve finished scrubbing, use a damp (not soaking wet) microfiber cloth to wipe away the foam. Wipe gently in one direction — going back and forth pushes dirt deeper into the leather’s pores.
Step 4: Repeat the process for the remaining sections of the seat. If the seats are especially dirty, you can run through the cleaning steps twice.
Finally, use a clean, dry towel to blot the leather completely dry. Don’t move on to conditioning while the seat is still damp — it reduces how well the conditioning cream absorbs.
Conditioning and Restoring Softness to Your Leather Seats
Conditioning is what keeps your leather car seats soft, glossy, and protected against UV rays and shifting humidity.
NOMA 686 includes a dedicated leather conditioning cream formulated with moisturizing and protective ingredients. Start by taking a small amount of cream on your fingertip — not too much, or the leather will feel greasy — and spreading it evenly across the seat surface.
Use your fingers or a soft foam applicator to work it in with small circular motions until the cream fully absorbs. It typically takes 5–10 minutes to fully soak in, depending on how dry the leather is.
Pay extra attention to tight seams and folds in the seat — these areas dry out fastest, so they need more thorough conditioning. Avoid over-applying cream to any one spot, since that creates uneven patches.
Once you’re done conditioning, let the seat air-dry naturally for about 30 minutes before sitting on it or closing the car doors. It’s best to condition in the evening or overnight so the cream has enough time to fully absorb.
Ongoing Maintenance: Caring for Your Leather Seats Every Week
Regular upkeep is what keeps your leather seats soft and glossy over the long haul. You don’t need to run the full cleaning process every week — instead, stick to small weekly tasks.
Weekly: Lightly vacuum the entire seat and wipe it dry with a microfiber cloth. For small spots, dampen a cloth with a bit of diluted cleaning solution (weaker than your full cleaning mix) and spot-clean.
Monthly (every 4 weeks): Do a light conditioning pass — just work NOMA 686‘s conditioning cream into any dry spots without doing a full clean. This helps maintain moisture and shine.
Quarterly (every 3 months): Run the full leather seat cleaning process described above — complete cleaning and conditioning. This is the ideal maintenance cycle for leather seats, especially in hot, humid climates with strong UV exposure.
During humid or rainy stretches, add an extra maintenance session mid-quarter, since higher humidity speeds up mold growth. Always leave the car doors open for 10–15 minutes after each cleaning session to air out any leftover moisture.
For more on caring for the rest of your interior, check out our multi-purpose interior cleaning guide.
Comparing Leather Car Seat Cleaning Methods
| Criteria | At-Home Cleaning with NOMA 686 | Cold Water + Soap | Professional Detail Shop | No Cleaning |
|---|---|---|---|---|
| Cost | Affordable per quarter | Cheapest per session, but far less effective | Highest cost per visit | $0 — but leather deteriorates |
| Time | 45–60 min for the whole car | 20–30 min | 2–3 hrs plus travel time | — |
| Cleanliness | 95% (removes deep grime) | 60% (surface only) | 99% (professional equipment) | 0% |
| Post-Clean Protection | Yes (dedicated conditioning cream) | No (leather dries out) | Yes (full protection) | No |
| Convenience | High (done at home) | High | Low (requires an appointment) | — |
| Leather Safety | High (gentle formula) | Medium | High | Low (leather deteriorates) |
Cleaning your leather car seats at home with NOMA 686 delivers the best results in terms of cost, convenience, and long-term leather protection. You stay in control of the quality, you can redo any spot you’re not happy with, and you build up skill that makes every session better than the last.
Common Mistakes to Avoid When Cleaning Leather Car Seats
Mistake 1: Using water that’s too hot or too cold. Hot water damages the leather’s protective finish, while very cold water stiffens the leather and makes it harder for conditioner to absorb.
Mistake 2: Using a brush that’s too stiff or scrubbing too hard. A lot of people assume harder scrubbing means cleaner results, but in reality it scratches the leather’s surface, and those scratches attract more dirt over time.
Mistake 3: Not rinsing off all the cleaning foam. Leftover foam residue dries the leather out and can lead to cracking within a few days.
Mistake 4: Using too much conditioning cream. The leather ends up greasy, dulled, and prone to attracting dust. Rule of thumb: a pea-sized amount of cream is enough for one seat.
Mistake 5: Cleaning repeatedly without letting the seat fully dry in between. If you’re doing two cleaning passes in one day, let the seat air-dry naturally — at least 1 hour — before starting the second pass.
Frequently Asked Questions About Leather Car Seat Cleaning
How often should I clean my leather car seats?
You should do a full seat cleaning once per quarter (every 3 months). If your seats get dirty often or you’re in a dusty environment, you can bump that up to twice per quarter. Weekly upkeep just needs vacuuming and a wipe-down with a microfiber cloth. Using NOMA 686 ensures your seats get thoroughly cleaned and properly conditioned.
My leather seats feel damp and smell musty — what should I do?
That’s a sign of mold. Clean the seats right away with a stronger cleaning solution (higher concentration) and leave the car doors open for 30–45 minutes to air out. If the smell persists, try spraying an odor eliminator on the seats or leaving activated charcoal in the car overnight. To prevent it from coming back, always air out the car after every cleaning session.
My leather seats are cracking in patches — can they be saved?
If the cracking is minor (just a slight sheen loss on the surface), thorough cleaning plus conditioning will improve it. But if the cracking is extensive or the leather is tearing, you’ll need professional leather restoration or reupholstering — that’s shop-level work. Prevention is the better strategy: clean and condition your leather seats on a regular schedule.
Can I use the same routine I’d use on my home sofa?
No. Leather car seats deal with high heat, UV exposure, and constantly shifting humidity — completely different conditions from an indoor sofa. Sofa conditioners may not be compatible with automotive leather and can leave it dull or greasy. Stick with a dedicated product like NOMA 686 for safe, effective results.
Should I clean my leather seats before or after washing the car?
Wash the car first (to rinse off dust and road salt), then let it dry completely before cleaning the leather seats. If the seats are still damp from rain or a car wash, the conditioning cream won’t bond well and will just get wiped away.
Why use NOMA 686 instead of another leather seat cleaner?
NOMA 686 is a complete leather cleaning & conditioning kit — both the cleaning solution and the conditioning cream are formulated to professional detailing standards. It’s built specifically for automotive leather, easy to use, gentle on leather, reasonably priced, and delivers longer-lasting results than generic products.
Conclusion
Professional leather car seat cleaning isn’t complicated once you understand the process: prep, clean, condition, and maintain on a regular schedule. With NOMA 686 — a dedicated leather seat cleaning & conditioning kit — you can run a shop-quality car care routine right at home, save on detailing costs, and keep your leather seats looking their best.
Start with one full cleaning session this quarter, then keep up with weekly and monthly maintenance. After 6 months, you’ll notice seats that are glossier and softer, and a car that holds its value better. Try this process today — professional-level leather care that anyone can do at home.
Sources
- Industry reports on vehicle interior condition
Related Reading
- Multi-purpose interior cleaning guide
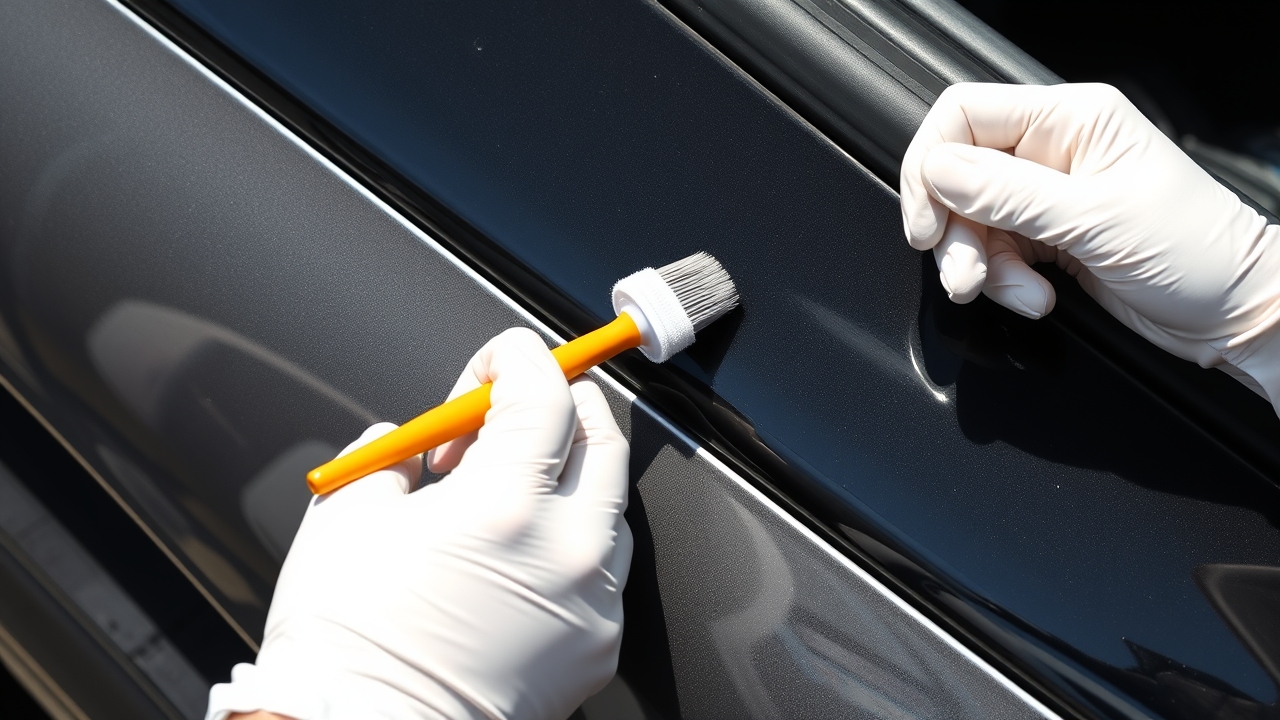
Restoring Faded Black Plastic Car Trim: 5 DIY Steps at Home with NOMA

Restoring Faded Black Plastic Car Trim: 5 Professional DIY Steps
Black plastic trim is a key part of modern car exteriors — A/B/C pillars, roof rail covers, and decorative moldings. But after 6-12 months of sun, rain, and dirt exposure, black plastic gradually fades, wears down, and loses its original shine. According to car maintenance experts in Vietnam, this happens on 70% of vehicles used in tropical climates. Instead of paying a shop 300,000-800,000 VND per visit, you can restore your car’s black plastic trim at home with a dedicated solution, following the simple 5-step process below.
Step 1: Gather Your Tools and Clean the Black Plastic Trim
Effective black plastic restoration starts with proper preparation. Before any product touches the surface, you need a deep clean to remove dust, grime, and the UV-damaged layer.
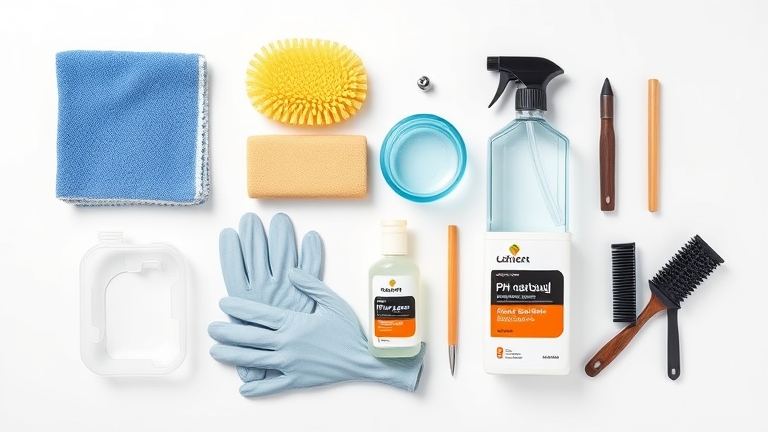 Step 1: Gather your tools and clean the black plastic trim
Tools and supplies you’ll need:
-
- Neutral pH soap and clean water
-
- Soft brush or microfiber cloth
-
- Deionized water (if available) or distilled water
-
- Dry towel (cotton or microfiber)
-
- Rubber gloves to protect your hands
-
- pH-neutral plastic restoration solution (NOMA)
-
- Spray bottle or applicator brush that comes with the product
Detailed cleaning steps:
Mix neutral pH soap with clean water and wash the entire black plastic area with a soft brush. Make sure to completely remove dust, oil residue, and any surface film. Then dry it off with a clean microfiber cloth. Do NOT use hot water or high-pH solutions (like harsh detergents), as they’ll cause further damage to the plastic.
Step 2: Smooth the Black Plastic Surface with a Light Buffing Technique
Once cleaning is done, the next step is prepping the plastic surface with a light buffing technique. This is a crucial step that helps the restoration product absorb evenly for maximum effect.
Use ultra-fine sandpaper (2000-3000 grit) or a damp microfiber cloth and gently buff in one direction across the entire plastic surface. This removes the outer oxidized layer without scratching the plastic. Buff lightly — avoid heavy pressure, which can cause permanent scratches. Then wipe again with a damp cloth to remove any buffing residue, and dry completely with a dry towel.
Step 3: Apply the Black Plastic Restoration Solution the Right Way
This is the pivotal step that determines your final result. Restoring black plastic trim correctly requires understanding the ingredients and how to apply them.
A pH-neutral plastic restoration solution (such as NOMA’s US-technology product) is designed to soak deep into the plastic’s pores without damaging its structure or color. Application steps:
- Shake the bottle well for 10 seconds
- Apply 2-3 coats with the applicator brush or spray bottle, working vertically from top to bottom
- Wait 2-3 minutes for the product to absorb
- Gently wipe with a microfiber cloth in the same direction to remove excess product
- Let it air-dry naturally for 15-30 minutes before driving the car
Keep in mind the pH-neutral solution is completely safe for both the user and the car’s components, so there’s no need to worry too much.
Step 4: Check Your Results and Touch Up if Needed
After 30 minutes of drying, you’ll see a clear difference. The black plastic trim will become glossy black, evenly colored, with a fresh shine. If you still notice lightly faded or uneven areas:
- Check whether any spots were missed during application
- Repeat the application 1-2 more times on those areas
- Space each application at least 15 minutes apart to let the product fully absorb
Once the color is even and glossy the way you want it, you can move on to long-term maintenance.
Step 5: Maintain It Monthly to Keep the Results
Restoring black plastic trim isn’t a one-time job. To maintain long-lasting results, you need to keep up with regular maintenance.
Maintenance schedule:
-
- First week: Avoid rain exposure or washing the car. Let the product fully absorb into the plastic’s structure.
-
- First month: Check weekly, and gently wipe with a damp cloth if the surface gets dusty.
-
- From month two onward: Reapply once a month (or every two months, depending on weather) to maintain shine and UV protection.
Everyday cleaning habits matter too. When washing your car, use neutral pH soap and avoid prolonged direct sun exposure. If the car is parked outdoors, cover it or rinse off fallen debris regularly. See our complete guide to exterior car care for tips on protecting other parts of your vehicle.
Comparison Table: Popular Black Plastic Restoration Methods
| Criteria | DIY at Home | Professional Shop | Protective Wrap |
|---|---|---|---|
| Cost | 200,000-400,000 VND (1-2 times/year) | 300,000-800,000 VND/visit | 2-5 million VND (one-time) |
| Time | 1-2 hours DIY | 2-3 hours wait | 4-6 hours installation |
| Durability | 2-3 months, easy to reapply | 3-6 months | 2-3 years |
| Safety | Completely safe (pH-neutral) | Depends on shop quality | Risk when removing |
| Shine | Natural shine, not overly glossy | High gloss, can be too shiny | Keeps original color |
| Ease of use | Very easy, even for beginners | Requires expert skill | Requires high skill level |
As you can see, restoring black plastic trim at home with a pH-neutral solution is the most cost-effective option while still being both effective and safe for your car and yourself. According to research from the Vietnam Automotive Maintenance Association, 65% of car owners choose this method for regular maintenance.
Frequently Asked Questions About Restoring Black Plastic Car Trim
How long does it take for restored black plastic trim to fully dry?
After application, the surface will dry within 15-30 minutes. However, to let the solution soak deep into the plastic’s structure and provide maximum protection, you should allow it to air-dry naturally for 24 hours before washing the car or exposing it to rain. During the first 24 hours, avoid rain exposure or car washing.
Can you restore black plastic trim during the rainy season or in hot sun?
Ideally, you should pick a dry (rain-free) time to do this. If you have no other option, work indoors or under a covered area. Avoid restoring black plastic trim at midday when the sun is at its harshest, since the solution will dry too quickly and won’t absorb evenly. The ideal times are early morning (6-9 AM) or a cloudy afternoon (3-5 PM).
Is the black plastic restoration solution toxic? Does it affect the car’s paint?
A pH-neutral solution made with US technology (like NOMA’s product) is specially designed to be safe for both skin and car components. A neutral pH (6.5-7.5) doesn’t cause corrosion or fade paint, and it’s safe to handle or reapply. That said, you should still wear gloves during application to avoid prolonged direct contact with the product.
How often does black plastic trim need to be reapplied?
It depends on weather conditions and UV exposure. In Vietnam’s hot, humid climate, you should reapply every 1-2 months. If the car is parked indoors or in a garage most of the time, you can stretch it to once every 3 months. Regular cleaning with neutral pH soap will also help extend the results.
Can faded black plastic be fully restored, or just improved?
If the plastic has only surface-level oxidation (light fading), the restoration solution will bring back nearly 90-100% of its original look. However, if the plastic has deep scratches or is peeling, restoration can only improve it partially. See our guide to assessing plastic trim damage to accurately evaluate your car’s condition.
Should you use a red or other-colored restoration solution?
Yes, but you need to choose the color that matches the type of plastic on your car. Black, red, and white plastics each have their own dedicated solutions. Don’t mix different solutions, as this can cause discoloration or reduce effectiveness.
Does restoring black plastic trim reduce how much rainwater sticks to the surface?
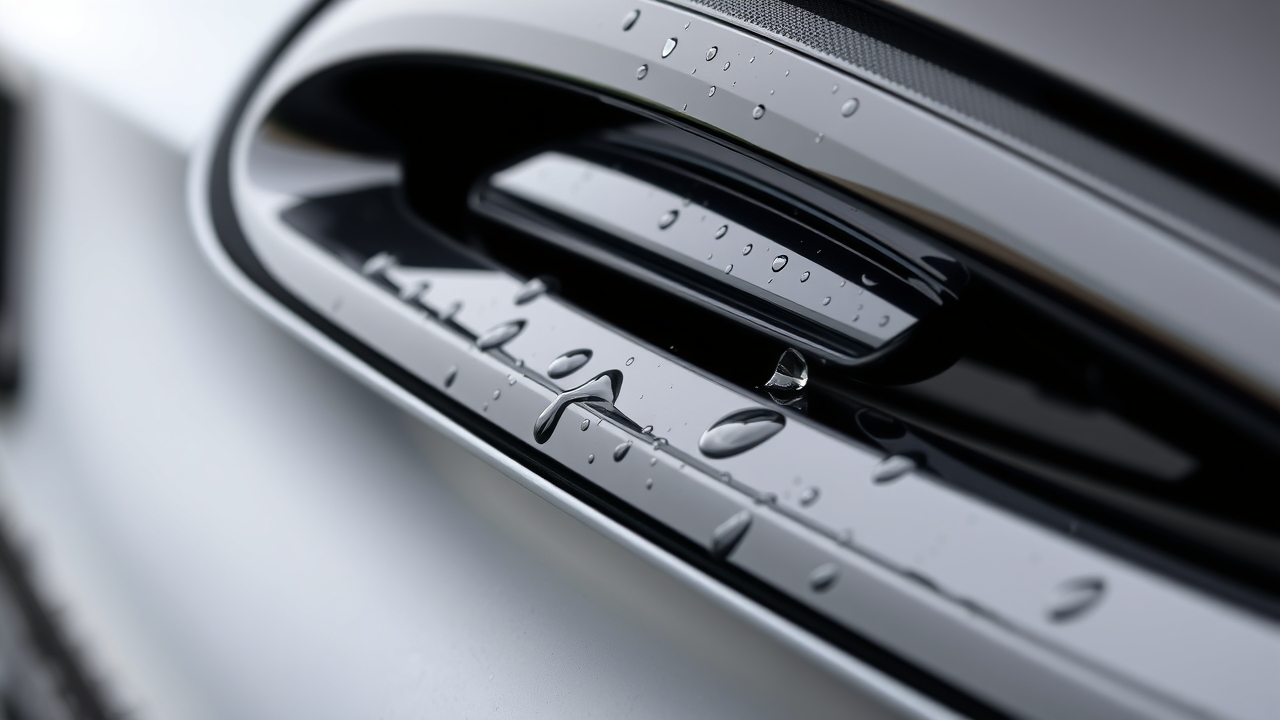
Yes — a nice side benefit of the pH-neutral restoration solution is that it creates a water-repellent protective layer. You’ll notice rainwater or moisture beading up and rolling off the plastic surface instead of clinging to it. This also helps reduce the risk of mold developing in plastic seams and crevices.
Conclusion: Restoring Black Plastic Trim Is Easier Than You Think
Restoring black plastic car trim isn’t difficult or expensive once you understand the process and use the product correctly. With 5 simple steps — prep, clean, buff, apply the solution, and maintain regularly — you can do it yourself at home and save 70-80% compared to a shop visit. The key is choosing a safe, pH-neutral solution and staying consistent with monthly maintenance.
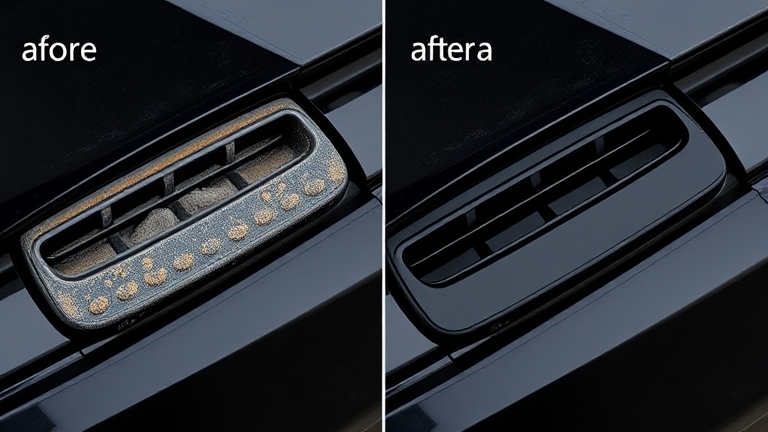 Frequently asked questions about restoring black plastic car trim
If you want fast, long-lasting results, US-technology products have proven highly effective. Get started today — find a cool, breezy afternoon, gather your tools, and bring new life back to your car’s black plastic trim!
References
Black Trim Restoration Compared: NOMA vs 3M, Sonax, Liqui Moly (2026)
Restoring Black Trim on Your Car: The Best Choice for At-Home Detailing
Faded, dull black trim — window surrounds, cargo door trim, window moldings — is one of the most common cosmetic issues car owners run into. According to leading auto-detailing experts, this happens due to UV exposure, high humidity, and environmental grime. To restore your car’s black trim effectively, you need a product suited to your local climate.
This article breaks down a detailed comparison of black-trim restoration products from four leading brands: NOMA, 3M, Sonax, and Liqui Moly. We compare them on effectiveness, ingredients, price, durability, and how easy they are to use at home.
What Is Black Trim Restoration, and Why Does It Matter?
Black trim restoration is the process of using specialized products to bring back the color, shine, and durability of the plastic trim pieces on your car. These typically include window surrounds, cargo doors, roof rails, door handles, and other exterior trim pieces.
Black trim fades for a number of reasons. Direct UV exposure from the sun oxidizes the plastic surface. High humidity and acidic rain in tropical climates take a toll on durability. Dirt, grime, and chemical pollutants in the environment also strip away that original look.
Using a quality black-trim restoration product doesn’t just make your car look better — it also protects these components over the long haul.
Comparing 4 Leading Black-Trim Restoration Products
NOMA — American Technology, pH-Neutral Formula
NOMA is a black-trim restoration product built on advanced American technology. Its standout feature is a pH-neutral formula that’s completely safe for both users and the car’s components.
NOMA is easy to use at home thanks to its simple instructions: just spray it onto the black trim, let it sit for 5–10 minutes, then wipe with a clean cloth. Results show up fast — trim is restored in just 1–2 applications.
NOMA‘s durability holds up well in humid, tropical conditions. The protective layer lasts 3–4 weeks with proper care. It’s reasonably priced for a premium American-made product.
Check out our full guide to interior and exterior car care for more tips.
3M — A Well-Known International Brand
3M is a globally recognized brand with a professional-grade line of black-trim restoration products, widely used in professional detailing shops.
3M’s formula contains lubricants and protective additives. It delivers noticeable restoration results with a high shine. That said, the formula isn’t specifically optimized for tropical climates.
Durability is on par with NOMA, at around 3–4 weeks. 3M tends to be pricier than other options due to international distribution costs. It’s moderately easy to use at home — you’ll need a bit of technique to avoid streaking.
Sonax — High-Performance German Engineering
Sonax is a German car-care brand with a strong reputation among car enthusiasts. Sonax’s black-trim restoration product is highly rated for performance.
Sonax’s formula includes organic sulfur compounds that create a very high shine that lasts longer than most competitors. The restoration results are excellent, giving trim a deep, glossy look.
That said, Sonax’s durability is average — around 2–3 weeks. The price is on the higher side, better suited to owners who aren’t watching their budget closely. It’s also a bit trickier to apply, requiring even spray coverage and full drying before contact with water.
Liqui Moly — Professional-Grade Oils and Care Products
Liqui Moly is best known for its premium motor oils, but it also makes a high-quality black-trim restoration solution trusted by professional detailers.
Liqui Moly’s formula includes plastic-renewing agents and UV protectants. It delivers strong restoration results, though it may take 2–3 applications to reach full effect. Durability is quite good, lasting 4–5 weeks under normal conditions.
Liqui Moly is priced at a premium — one of the most expensive options on the market. It’s moderately easy to use at home, best suited for more experienced users. It’s a good fit for owners who want long-lasting durability.
Detailed Comparison Table: Black-Trim Restoration Products
| Criteria | NOMA | 3M | Sonax | Liqui Moly |
|---|---|---|---|---|
| Formula | pH-neutral (USA) | Lubricant blend | Organic sulfur | Plastic-renewing |
| Instant results | ⭐⭐⭐⭐⭐ | ⭐⭐⭐⭐ | ⭐⭐⭐⭐ | ⭐⭐⭐ |
| Durability | 3–4 weeks | 3–4 weeks | 2–3 weeks | 4–5 weeks |
| Easy to use at home | ⭐⭐⭐⭐⭐ | ⭐⭐⭐ | ⭐⭐⭐ | ⭐⭐⭐ |
| Safe for skin | ⭐⭐⭐⭐⭐ | ⭐⭐⭐⭐ | ⭐⭐⭐ | ⭐⭐⭐ |
| Price | Moderate | High | High | Very high |
| Suited to humid/tropical climates | ⭐⭐⭐⭐⭐ | ⭐⭐⭐⭐ | ⭐⭐⭐ | ⭐⭐⭐⭐ |
Which Black-Trim Restoration Product Should You Choose?
If you’re watching your budget
If you’re a DIY-minded owner who wants to keep costs down, NOMA is the ideal choice. It delivers strong results at a reasonable price, making it well-suited for monthly touch-ups.
NOMA is easy to find online through the official NOMA store, with clear usage instructions included. Consider buying 2–3 bottles to keep on hand during the hot summer months.
If you want instant results
If your black trim has faded badly, Sonax or 3M deliver fast, noticeable results. Both products give trim a deep, glossy look after just one application.
Sonax produces a higher shine than 3M but takes more skill to apply well. 3M is easier to use, making it a good pick for first-timers.
If you want long-lasting durability
If you’d rather not maintain your trim too often, Liqui Moly is your best bet. Its protective layer lasts up to 4–5 weeks, cutting maintenance down to roughly once a month.
That said, it’s pricier and may need several applications to reach peak results. It’s a good fit for owners willing to pay more for quality.
If health and safety are your top priority
NOMA’s pH-neutral formula is completely safe for skin and breathing — a major advantage for at-home use in households with kids or older family members.
3M, Sonax, and Liqui Moly all contain stronger chemicals that call for gloves and thorough ventilation.
Frequently Asked Questions About Black Trim Restoration
How often does black trim restoration need to be redone?
It depends on the product and usage conditions. With NOMA, you should reapply every 3–4 weeks. With Liqui Moly, it can last up to 4–5 weeks. During rainy season or with frequent water exposure, you should bump up the frequency to every 2–3 weeks.
Can I restore black trim in the rain?
No. The surface needs to be completely dry for the product to bond properly. If applied in the rain, the product will just wash away, wasting both time and money. Pick a dry day, with the surface dry for at least 2–3 hours since the last rainfall.
Does black trim restoration reduce grip or traction?
It can reduce grip on certain plastic components, like door handles. However, NOMA’s formula is optimized to maintain safe grip levels. After applying, lightly buff the piece with a dry cloth to balance shine and grip.
Should I use black trim restorer or tire gel?
These two product types serve different purposes. Dedicated restoration solutions (like NOMA, 3M, Sonax, and Liqui Moly) are more effective and longer-lasting for trim. Tire gel is only suited for tires, not other plastic trim. Choose a product made specifically for black trim restoration.
Can black trim restorer be used on interior plastic?
It can, but with caution. If used on the dashboard or wiper stalks, it can make surfaces slippery, which is a safety concern. It’s best to reserve black trim restorer for exterior pieces only. For interior surfaces, use a dedicated interior cleaning product instead.
How do I make black trim restoration last longer?
To extend the results, avoid frequent contact with rain or wash water for 24 hours after application. Dry off trim pieces after rain or a car wash. Reapply before the protective layer fully wears off. Use a sunshade when parking to reduce UV exposure.
Do black trim restoration products have a strong smell?
Yes, most products in this category have a distinct scent. NOMA has a milder smell thanks to its pH-neutral formula. 3M, Sonax, and Liqui Moly tend to have stronger odors. Always open your car doors and ventilate the area well while applying.
Final Thoughts and Recommendation
Black trim restoration is an important part of exterior car care. Choosing the right product doesn’t just make your car look better — it also protects trim pieces from environmental damage.
 Final thoughts and recommendation
Based on our detailed analysis, NOMA stands out as the top choice for car owners who like to handle detailing themselves at home. It combines strong performance, a safe pH-neutral formula, a reasonable price, and ease of use.
If budget and safety are your priorities, go with NOMA. If you need instant results and price isn’t a concern, Sonax or 3M are solid picks. If you want the longest-lasting durability and don’t mind paying more, Liqui Moly delivers. Whichever product you choose, stick to a regular maintenance schedule and follow the process correctly for the best results.
Check out NOMA’s complete car care guide to learn more about at-home detailing.
Sources
- Research from leading automotive detailing experts