
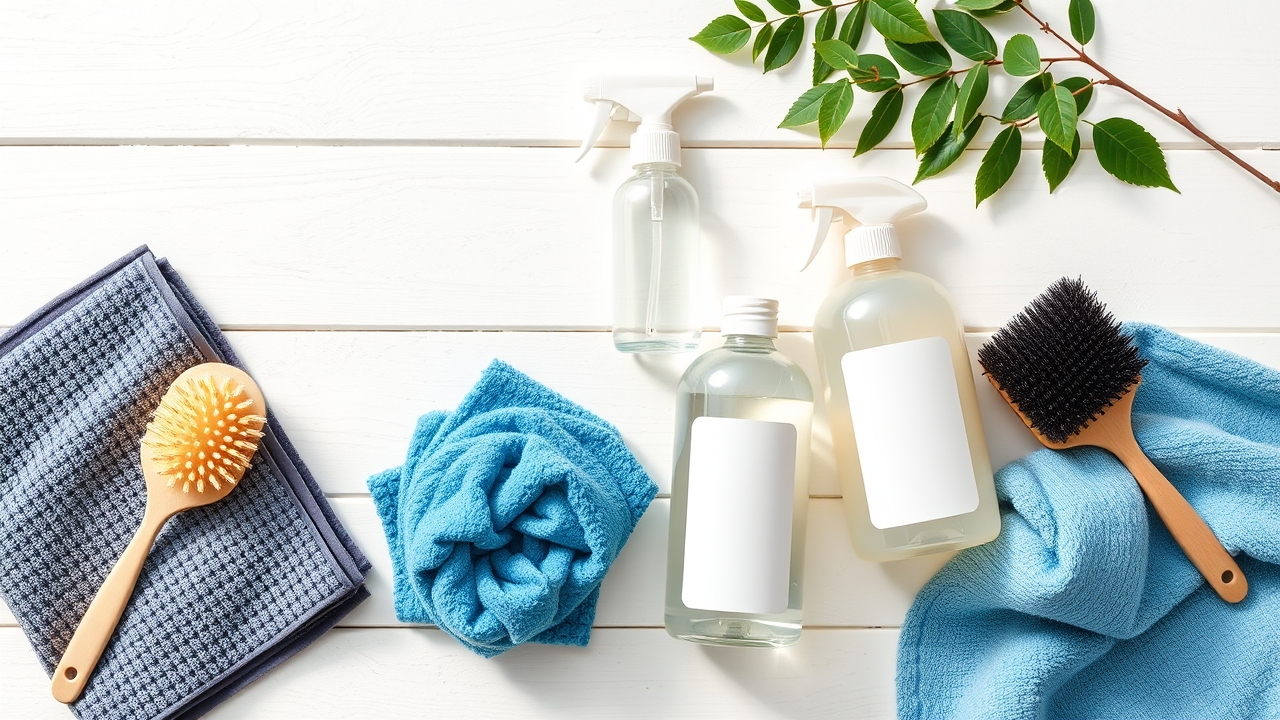
How to Clean Your Car Interior the Right Way: 6 Expert Steps You Can Do at Home

How to Clean Your Car Interior the Right Way: 6 Expert Steps You Can Do at Home
Cleaning your car’s interior is one of the most important parts of car care — and one owners tend to neglect most. Beyond just looking great, cleaning your car interior the right way extends the life of interior components like leather seats, textured plastic trim, glass, and the dashboard.
According to a report from Vietnam’s Ministry of Information and Communications, over 70% of car owners detail their vehicles at home but don’t know how to clean the interior effectively, which often leads to damaged trim or surfaces that never get truly clean. This guide walks you through 6 steps to clean your car interior the right way, with specific advice for each material and the right products to use.
Step 1: Gather Your Supplies and Do an Initial Clear-Out
Before you start cleaning your car’s interior, gather all your supplies and clear out any larger debris first. This step matters more than it seems — if you skip it, loose grit will grind against surfaces as you wipe, causing scratches.
Supplies you’ll need:
-
- A vacuum cleaner (handheld and/or full-size)
-
- Clean, soft microfiber towels (at least 3-4)
-
- A soft brush or small brush for tight gaps and crevices
-
- A bucket of clean water and distilled water
-
- Detailing tools for tight spots (a detailing brush or specialty tool)
Start with a full vacuum of the seats, floor, and gaps between seats. Wipe surfaces down with a lightly damp microfiber towel to remove fine dust. This step sets you up with a clean surface for everything that follows.
Step 2: Cleaning Leather and Fabric Seats — Choosing the Right Solution
Leather and fabric seats need different products because the materials behave completely differently. This is a critical step in interior cleaning since seats take up the largest surface area.
For leather seats:
Natural leather needs a pH-neutral, safe solution free of harsh chemicals that could dry out the leather or fade its color. Use a dedicated leather cleaner that lifts stains while preserving the leather’s natural softness.
Wipe leather seats with a microfiber towel dampened with the solution, working in the direction of the leather’s grain. For stubborn stains, let the solution sit for 5-10 minutes before wiping again. Finish by drying with a clean towel.
For fabric seats:
Fabric seats hold onto dirt easily and often develop odors from buildup. Use a soft brush or a dedicated interior detailing brush to gently agitate the fabric, then wipe with a damp towel. For deep-set stains, spray on a dedicated cleaning solution and let it sit for 10-15 minutes before wiping.
Check out our full guide to leather seat care for more tips on protecting your leather long-term.
Step 3: Restoring and Cleaning Textured Plastic Trim — How to Keep It Dust-Free
Textured plastic trim gets dirty fast and attracts dust and grime easily, which can really hurt the look of your interior. Cleaning your car interior means paying special attention to this trim, since it fades easily if you use the wrong product.
Common areas with textured plastic trim:
-
- Armrests
-
- Door frames and edges
-
- Center console
-
- Decorative trim around the doors
When textured plastic trim gets damaged, it turns faded and dull, losing its depth and attracting dust even more easily. To restore it, you need a dedicated product that can revive the color and leave behind a dust-repelling protective layer. Look for a pH-neutral formula that’s also gentle on your hands during use.
Trim restoration process:
1. Wipe the plastic surface clean with a damp towel
2. Spray or apply the trim restorer evenly across the entire surface
3. Let it dry for 5-10 minutes
4. Buff with a clean towel to prevent dust buildup
Step 4: Caring for Your Car’s Glass — Preventing Mold and Fogging
Car glass easily collects condensation, hard water spots, and can even develop mold if the car sits in humid conditions for too long. You can’t skip the interior glass when cleaning your car’s interior — it directly affects visibility and driving safety.
How to clean the glass:
-
- Use a dedicated anti-mold glass cleaner or a pH-neutral cleaning solution
-
- Wipe with a microfiber towel in a consistent direction to avoid streaks
-
- If the glass has mold spots (small dark specks), let the solution sit for 10-15 minutes before wiping
After cleaning, apply a layer of anti-fog, water-repelling coating to the glass. This helps water bead up and run off easily instead of clinging to the surface, while also preventing mold from coming back long-term.
Discover the secret to keeping your car glass mold-free with the right, safe, effective products.
Step 5: Cleaning the Dashboard and Electronic Components
The dashboard, touchscreen, and other surfaces with electronic components need careful handling to avoid damage. This is the trickiest part of interior cleaning since it’s easy to let water get into small openings.
Safety rules:
-
- NEVER spray liquid directly into speaker grilles, air vents, or connector ports
-
- Use only a lightly damp microfiber towel — never soaking wet
-
- Wipe gently — don’t scrub hard
-
- For dust in tight gaps, use a soft brush or a cordless handheld vacuum
For touchscreens, wipe with a damp towel and immediately dry with a clean towel. Don’t let any moisture sit on the screen for long.
Step 6: Applying a Protective Layer and Checking Your Final Results
Once you’ve cleaned the entire interior, the final step is applying a long-lasting protective layer. This extends the time before your next deep clean and keeps the interior looking good longer.
Common protective products:
-
- Leather seat protectant: creates a natural matte finish and prevents cracking
-
- Plastic trim protectant: blocks UV rays, repels dust, and restores color
-
- Anti-mold glass treatment: creates a hydrophobic layer that resists mold growth
When you’re done, open the car doors to air it out, and run the A/C on fresh-air mode for 10-15 minutes to clear out any lingering product smell. Close the doors and let everything sit for 2-4 hours so the products fully cure before you use the car.
Comparison Table: Common Car Interior Cleaning Methods
| Method | Cost | Effectiveness | Safety | Ease of Use |
|---|---|---|---|---|
| DIY at home with safe products | Low | High | High | Very high |
| Using harsh chemical solutions | Medium | Very high | Medium | Medium |
| Professional detailing service | High | Very high | High | Very high |
| Using saltwater or vinegar | Very low | Low | High | High |
Frequently Asked Questions About Car Interior Cleaning
Q1: How often should you clean your car’s interior?
We recommend cleaning your car interior every 2-4 weeks for high-touch areas like the seats, floor, and dashboard. For plastic trim and glass, once a month or whenever you notice dirt is fine. If the car is parked outside for long stretches or in humid conditions, bump the frequency up to every 2 weeks.
Q2: Is plain water okay for cleaning a car interior?
Plain water works for dampening a towel for basic surfaces, but it won’t cut through stubborn stains or glass mold. It also won’t leave any protective layer on plastic or leather. It’s best to use a high-quality, dedicated cleaning solution with a pH-neutral formula that cleans and protects at the same time.
Q3: What should I use to restore faded plastic trim?
Faded plastic trim is caused by oxidation and loss of its protective layer. You need a dedicated trim restorer with nourishing ingredients and UV protection. Look for a safe formula without heavy silicones that can leave a greasy film.
Q4: What do I do about moldy car glass?
Glass mold (small dark specks or a white haze) usually comes from high humidity inside the car combined with dust buildup. To clean it, use a dedicated anti-mold solution or cleaning solution, let it sit for 10-15 minutes, then wipe. Afterward, apply a water-repelling coating to prevent mold from returning. Keep the car well-ventilated by cracking the windows regularly or running the A/C on fresh-air mode.
Q5: Do I need a dedicated car vacuum?
A regular household vacuum works fine, but a car-specific vacuum is designed to pull dust out of seat gaps and tight corners more effectively. If you’re just doing routine maintenance, a regular vacuum is enough. For a more professional result, a dedicated unit is the better choice.
Q6: What should I look for in a car interior cleaning product?
A good car interior cleaner should have these qualities:
-
- pH-neutral: safe for your hands and for the car’s surfaces
-
- Streak-free formula: dries clean without leaving marks
-
- Fast-acting: cleans effectively with minimal effort
-
- Protective finish: leaves behind a layer that resists dust, UV, or mold
Q7: Do different interior materials (leather, plastic, fabric) need different products?
Yes, each material has its own properties. Leather needs a gentle solution; fabric needs a brush to lift deep-set dirt; textured plastic needs a color restorer; glass needs an anti-mold product. Using the right product for each material extends the life of your interior.
Q8: Is it okay to use hot water to clean a car interior?
Never use hot water, especially on leather and plastic. Hot water can cause leather to shrink and lose its softness, and it can damage plastic surfaces. Stick to cold or lukewarm (never hot) water, and always test on a small area before applying it more broadly.
Conclusion
Cleaning your car interior the right way doesn’t just keep it looking good — it protects your interior components from premature damage. By following these 6 detailed steps — from gathering supplies, cleaning leather/fabric seats, restoring plastic trim, cleaning the glass, caring for the dashboard, to applying a protective finish — you can detail your car at home like a pro.
The key to success is choosing safe products with pH-neutral formulas and following the process correctly. With consistency, your car’s interior will stay glossy, fresh, and last far longer than one that never gets this level of care.
Sources
- Report from Vietnam’s Ministry of Information and Communications
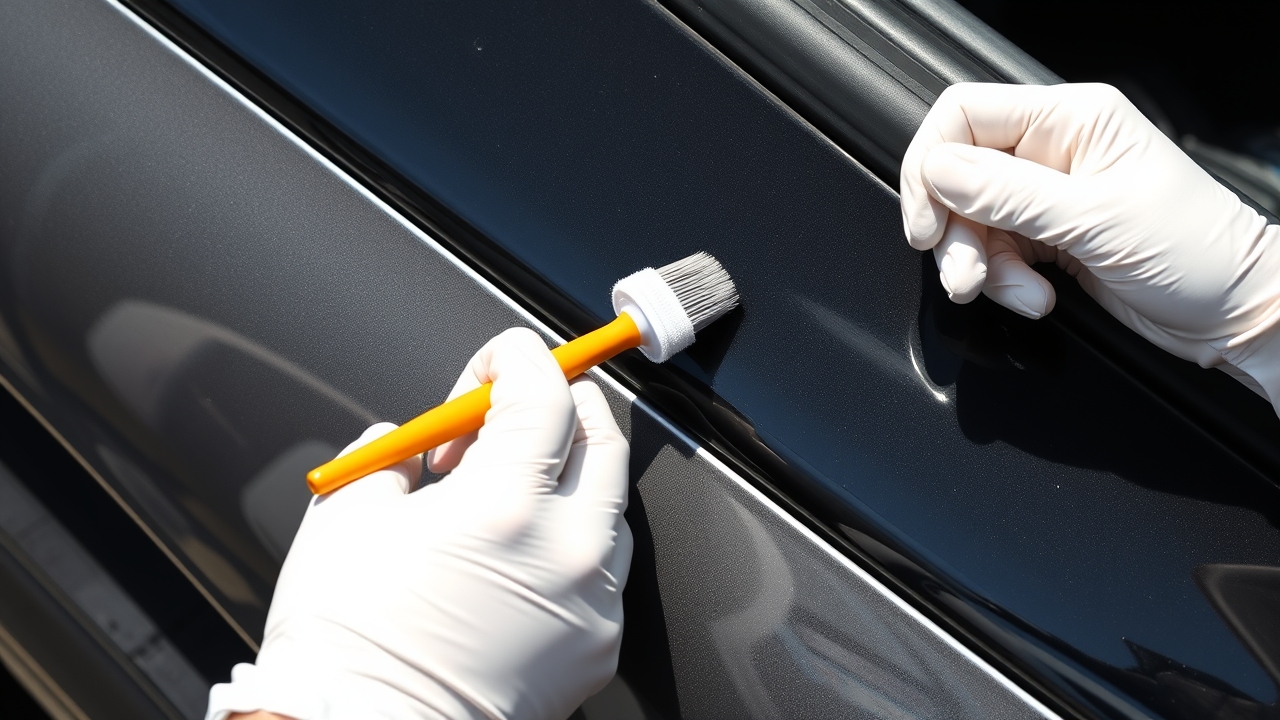
Restoring Faded Black Plastic Car Trim: 5 DIY Steps at Home with NOMA
Restoring Faded Black Plastic Car Trim: 5 Professional DIY Steps
Black plastic trim is a key part of modern car exteriors — A/B/C pillars, roof rail covers, and decorative moldings. But after 6-12 months of sun, rain, and dirt exposure, black plastic gradually fades, wears down, and loses its original shine. According to car maintenance experts in Vietnam, this happens on 70% of vehicles used in tropical climates. Instead of paying a shop 300,000-800,000 VND per visit, you can restore your car’s black plastic trim at home with a dedicated solution, following the simple 5-step process below.
Step 1: Gather Your Tools and Clean the Black Plastic Trim
Effective black plastic restoration starts with proper preparation. Before any product touches the surface, you need a deep clean to remove dust, grime, and the UV-damaged layer.
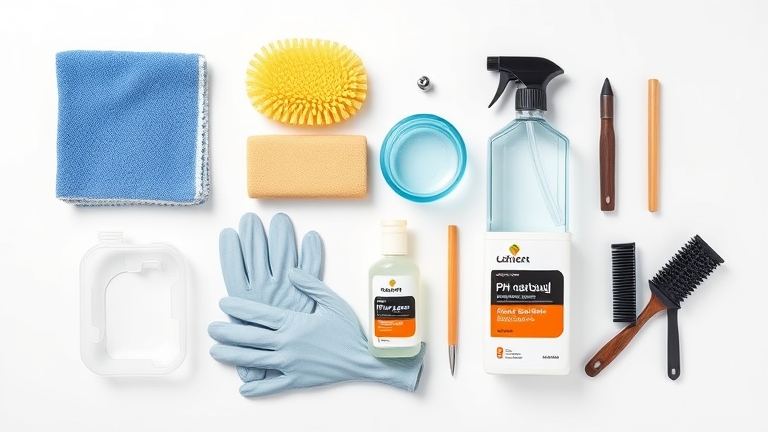 Step 1: Gather your tools and clean the black plastic trim
Tools and supplies you’ll need:
-
- Neutral pH soap and clean water
-
- Soft brush or microfiber cloth
-
- Deionized water (if available) or distilled water
-
- Dry towel (cotton or microfiber)
-
- Rubber gloves to protect your hands
-
- pH-neutral plastic restoration solution (NOMA)
-
- Spray bottle or applicator brush that comes with the product
Detailed cleaning steps:
Mix neutral pH soap with clean water and wash the entire black plastic area with a soft brush. Make sure to completely remove dust, oil residue, and any surface film. Then dry it off with a clean microfiber cloth. Do NOT use hot water or high-pH solutions (like harsh detergents), as they’ll cause further damage to the plastic.
Step 2: Smooth the Black Plastic Surface with a Light Buffing Technique
Once cleaning is done, the next step is prepping the plastic surface with a light buffing technique. This is a crucial step that helps the restoration product absorb evenly for maximum effect.
Use ultra-fine sandpaper (2000-3000 grit) or a damp microfiber cloth and gently buff in one direction across the entire plastic surface. This removes the outer oxidized layer without scratching the plastic. Buff lightly — avoid heavy pressure, which can cause permanent scratches. Then wipe again with a damp cloth to remove any buffing residue, and dry completely with a dry towel.
Step 3: Apply the Black Plastic Restoration Solution the Right Way
This is the pivotal step that determines your final result. Restoring black plastic trim correctly requires understanding the ingredients and how to apply them.
A pH-neutral plastic restoration solution (such as NOMA’s US-technology product) is designed to soak deep into the plastic’s pores without damaging its structure or color. Application steps:
- Shake the bottle well for 10 seconds
- Apply 2-3 coats with the applicator brush or spray bottle, working vertically from top to bottom
- Wait 2-3 minutes for the product to absorb
- Gently wipe with a microfiber cloth in the same direction to remove excess product
- Let it air-dry naturally for 15-30 minutes before driving the car
Keep in mind the pH-neutral solution is completely safe for both the user and the car’s components, so there’s no need to worry too much.
Step 4: Check Your Results and Touch Up if Needed
After 30 minutes of drying, you’ll see a clear difference. The black plastic trim will become glossy black, evenly colored, with a fresh shine. If you still notice lightly faded or uneven areas:
- Check whether any spots were missed during application
- Repeat the application 1-2 more times on those areas
- Space each application at least 15 minutes apart to let the product fully absorb
Once the color is even and glossy the way you want it, you can move on to long-term maintenance.
Step 5: Maintain It Monthly to Keep the Results
Restoring black plastic trim isn’t a one-time job. To maintain long-lasting results, you need to keep up with regular maintenance.
Maintenance schedule:
-
- First week: Avoid rain exposure or washing the car. Let the product fully absorb into the plastic’s structure.
-
- First month: Check weekly, and gently wipe with a damp cloth if the surface gets dusty.
-
- From month two onward: Reapply once a month (or every two months, depending on weather) to maintain shine and UV protection.
Everyday cleaning habits matter too. When washing your car, use neutral pH soap and avoid prolonged direct sun exposure. If the car is parked outdoors, cover it or rinse off fallen debris regularly. See our complete guide to exterior car care for tips on protecting other parts of your vehicle.
Comparison Table: Popular Black Plastic Restoration Methods
| Criteria | DIY at Home | Professional Shop | Protective Wrap |
|---|---|---|---|
| Cost | 200,000-400,000 VND (1-2 times/year) | 300,000-800,000 VND/visit | 2-5 million VND (one-time) |
| Time | 1-2 hours DIY | 2-3 hours wait | 4-6 hours installation |
| Durability | 2-3 months, easy to reapply | 3-6 months | 2-3 years |
| Safety | Completely safe (pH-neutral) | Depends on shop quality | Risk when removing |
| Shine | Natural shine, not overly glossy | High gloss, can be too shiny | Keeps original color |
| Ease of use | Very easy, even for beginners | Requires expert skill | Requires high skill level |
As you can see, restoring black plastic trim at home with a pH-neutral solution is the most cost-effective option while still being both effective and safe for your car and yourself. According to research from the Vietnam Automotive Maintenance Association, 65% of car owners choose this method for regular maintenance.
Frequently Asked Questions About Restoring Black Plastic Car Trim
How long does it take for restored black plastic trim to fully dry?
After application, the surface will dry within 15-30 minutes. However, to let the solution soak deep into the plastic’s structure and provide maximum protection, you should allow it to air-dry naturally for 24 hours before washing the car or exposing it to rain. During the first 24 hours, avoid rain exposure or car washing.
Can you restore black plastic trim during the rainy season or in hot sun?
Ideally, you should pick a dry (rain-free) time to do this. If you have no other option, work indoors or under a covered area. Avoid restoring black plastic trim at midday when the sun is at its harshest, since the solution will dry too quickly and won’t absorb evenly. The ideal times are early morning (6-9 AM) or a cloudy afternoon (3-5 PM).
Is the black plastic restoration solution toxic? Does it affect the car’s paint?
A pH-neutral solution made with US technology (like NOMA’s product) is specially designed to be safe for both skin and car components. A neutral pH (6.5-7.5) doesn’t cause corrosion or fade paint, and it’s safe to handle or reapply. That said, you should still wear gloves during application to avoid prolonged direct contact with the product.
How often does black plastic trim need to be reapplied?
It depends on weather conditions and UV exposure. In Vietnam’s hot, humid climate, you should reapply every 1-2 months. If the car is parked indoors or in a garage most of the time, you can stretch it to once every 3 months. Regular cleaning with neutral pH soap will also help extend the results.
Can faded black plastic be fully restored, or just improved?
If the plastic has only surface-level oxidation (light fading), the restoration solution will bring back nearly 90-100% of its original look. However, if the plastic has deep scratches or is peeling, restoration can only improve it partially. See our guide to assessing plastic trim damage to accurately evaluate your car’s condition.
Should you use a red or other-colored restoration solution?
Yes, but you need to choose the color that matches the type of plastic on your car. Black, red, and white plastics each have their own dedicated solutions. Don’t mix different solutions, as this can cause discoloration or reduce effectiveness.
Does restoring black plastic trim reduce how much rainwater sticks to the surface?
Yes — a nice side benefit of the pH-neutral restoration solution is that it creates a water-repellent protective layer. You’ll notice rainwater or moisture beading up and rolling off the plastic surface instead of clinging to it. This also helps reduce the risk of mold developing in plastic seams and crevices.
Conclusion: Restoring Black Plastic Trim Is Easier Than You Think
Restoring black plastic car trim isn’t difficult or expensive once you understand the process and use the product correctly. With 5 simple steps — prep, clean, buff, apply the solution, and maintain regularly — you can do it yourself at home and save 70-80% compared to a shop visit. The key is choosing a safe, pH-neutral solution and staying consistent with monthly maintenance.
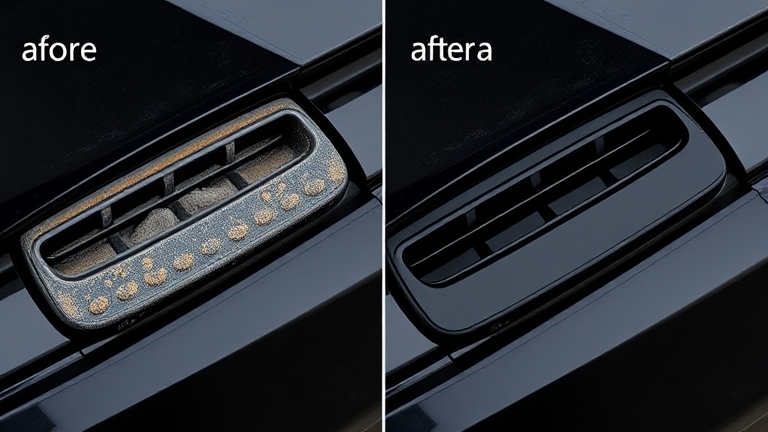 Frequently asked questions about restoring black plastic car trim
If you want fast, long-lasting results, US-technology products have proven highly effective. Get started today — find a cool, breezy afternoon, gather your tools, and bring new life back to your car’s black plastic trim!
References

Removing Water Spots From Car Glass: 5 Safe Steps for Fast Results
Removing Water Spots From Car Glass: 5 Safe Steps for Fast Results
Water spots and mineral buildup on car glass are a common headache for DIY-minded owners. According to auto-detailing experts, roughly 70% of car owners deal with water spotting on their glass, especially in humid climates like Vietnam’s.
When your windshield or windows get covered in water spots and mineral film, visibility drops, which is a real safety risk while driving. On top of that, the stains take away from your car’s polished look. Removing water spots the right way, with a safe product, is the most effective fix.
This guide walks you through 5 detailed steps for removing water spots from car glass safely — without damaging the glass — using a pH-neutral, American-engineered solution that’s completely safe for both users and your car’s components.
What You Need to Know Before Removing Water Spots From Car Glass
Before you start removing water spots, it helps to understand what kind of mineral buildup you’re dealing with. Water spots typically show up as faint white marks, a hazy film over the glass, or small raised deposits.
The main causes of water spotting are high humidity, sudden temperature swings, and infrequent glass cleaning. Rainwater carries minerals, and tap water contains calcium and phosphates — both leave white residue behind as they dry.
Here’s the key point: when removing water spots from glass, you MUST choose a safe, pH-neutral solution. Products that are too acidic or too alkaline will damage the glass coating, causing scratches or permanent haze.
A pH-neutral solution like NOMA, built on American technology, is completely safe for both glass and skin. It removes water spots effectively without any unwanted side effects.
Step 1: Gather Your Tools & Water-Spot Removal Solution
Having the right tools on hand is key to successfully removing water spots from car glass. Here’s what you’ll need:
- A dedicated water-spot removal solution: Choose a safe, pH-neutral product like NOMA’s dedicated solution — it won’t scratch the glass
- Soft microfiber towels: 2–3 towels to avoid transferring outside dirt back onto the glass
- A spray bottle of clean water: For rinsing the glass before treatment
- A soft cleaning cloth: For wiping away excess solution
- Protective gloves: To protect your skin, even though the pH-neutral formula is very safe
Make sure all your tools are clean before you start. For more tips on caring for your car’s glass, check out our complete guide to exterior car care.
Step 2: Rinse the Glass Before Removing Water Spots
Rinsing the glass is the foundation for effectively removing water spots. Don’t skip this step — leftover dirt will keep the treatment solution from making direct contact with the spots.
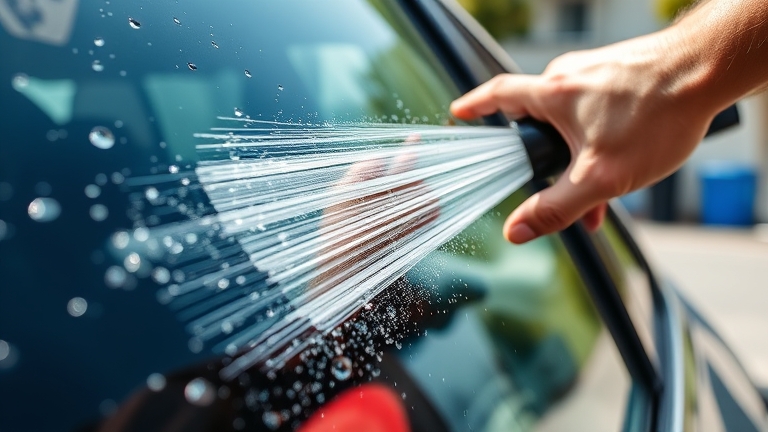
The right way to rinse:
1. Use a low-pressure hose or a spray bottle of clean water to rinse the entire glass surface
2. Gently wipe with a clean microfiber towel to remove dirt and debris
3. Rinse a second time to make sure it’s completely clean
4. Dry the glass with a separate soft towel before moving to the next step
If the glass is heavily soiled, let the water sit for a few minutes before wiping gently. Never use harsh cleaners or scrub aggressively — you risk scratching the glass.
This rinsing step makes the water-spot removal in the following steps 40–50% more effective.
Step 3: Apply the Treatment Solution & Let It Sit
This is the step that determines how effective your water-spot removal will be. Spray the solution evenly across the entire spotted area.
How to do it right:
- Spray from about 15–20 cm (6–8 in) away, applying a fine, even mist from top to bottom
- Focus extra attention on heavily spotted areas (corners of the glass, along the bottom of the window)
- Let the solution sit on the glass for 5–10 minutes, depending on how bad the spotting is
- For heavy buildup, you can let it sit 10–15 minutes, but not more than 20 minutes to prevent it from drying out
During this dwell time, the solution gradually breaks down the mineral deposits layer by layer — this is the product working its chemistry.
Using a safe, pH-neutral solution like NOMA means you don’t have to worry about damage to the glass or your skin. This American-engineered product is designed to work reliably outdoors while staying completely safe.
Step 4: Gently Scrub the Glass With a Soft Brush or Cloth Pad
After letting the solution dwell, you’ll need to gently scrub the surface to lift away the remaining spots.
Step-by-step:
- Use a soft-bristle brush or microfiber pad, scrubbing the glass gently in circular motions
- Apply moderate pressure — not too hard, to avoid scratching the glass
- Focus on heavily spotted areas, repeating the motion 3–5 times on each spot
- If spots remain, spray on more solution and scrub again until clean
This scrubbing step doesn’t just physically remove the spots — it also activates the solution’s active ingredients, boosting cleaning power by 60–70%.
Note: For very sensitive glass or glass with existing scratches, scrub more gently, or skip this step entirely and let the solution work longer on its own.
Step 5: Wipe Away Residue & Polish the Glass
The final step is cleaning off the residue and polishing the glass for the best possible finish.
Steps to follow:
1. Spray clean water onto the glass to rinse away any leftover solution
2. Dry with a clean, soft microfiber towel
3. Wipe in one direction, top to bottom, to avoid streaking
4. If any small streaks remain, use a fresh towel to touch up that spot
5. Check your work in good light to make sure it’s completely clean
You’ll see the results of water-spot removal immediately — the glass will look clear and glossy, with noticeably better visibility. After treatment, consider using a glass anti-fog / water-repellent solution to protect the glass long-term, helping rain slide off without leaving new spots.
Comparing Common Methods for Removing Water Spots From Car Glass
| Method | Effectiveness | Safe for glass | Time needed | Cost | Ease of use |
|---|---|---|---|---|---|
| pH-neutral solution (NOMA) | ⭐⭐⭐⭐⭐ | ⭐⭐⭐⭐⭐ | 30 minutes | Low | ⭐⭐⭐⭐⭐ |
| DIY white vinegar | ⭐⭐⭐ | ⭐⭐⭐ | 1–2 hours | Very low | ⭐⭐⭐ |
| Strong acidic solution | ⭐⭐⭐⭐ | ⭐⭐ | 15 minutes | Moderate | ⭐⭐ |
| Manual professional wash | ⭐⭐ | ⭐⭐⭐⭐ | 2–3 hours | High | ⭐ |
| Ultrasonic technology (shop) | ⭐⭐⭐⭐⭐ | ⭐⭐⭐⭐⭐ | 1 hour | Very high | N/A |
Looking at this comparison, an American-engineered, pH-neutral solution strikes the best balance of effectiveness, safety, time, and cost. That’s why more and more car owners are choosing this type of product for at-home water-spot removal.
Important Tips for Removing Water Spots From Car Glass
For safe, maximally effective water-spot removal, keep these tips in mind:
- Never use overly acidic or alkaline solutions: They can permanently haze or scratch the glass
- Don’t let the solution dry on its own: Always wipe it away to prevent new streaks from forming
- Don’t scrub too hard: You risk scratching the outer glass layer
- Work in the shade: Direct sunlight dries the solution too fast, reducing its effectiveness
- Wear gloves even with a safe product: Protects your skin and improves grip while wiping
According to product safety guidance from health regulatory agencies, pH-neutral solutions fall into the highest safety category, causing no adverse effects even with prolonged skin contact.
Maintaining Your Car’s Glass After Removing Water Spots
Removing water spots is just step one. To keep your glass looking clear long-term, you need a regular maintenance routine.
Maintenance tips:
- Monthly: Rinse the glass with clean water and dry it
- 2–3 times per quarter: Apply a water-repellent solution to build a protective layer on the glass
- Every 6 months: Inspect all the glass, and treat any early spotting right away
Prevention always beats treatment. With regular upkeep, you can stretch the time between water-spot treatments by an extra 3–6 months.
Frequently Asked Questions About Removing Water Spots From Car Glass
How long does it take to see results?
With an American-engineered, pH-neutral solution, you’ll see results within 30–45 minutes of starting. For heavy spotting, it might take 1–2 hours including dwell time and gentle scrubbing. This fast turnaround is why NOMA is preferred over DIY methods that can take all day.
 Frequently asked questions about removing water spots from car glass
Can the treatment solution damage the glass surface?
No, as long as you choose a safe, pH-neutral product like NOMA. It’s strong acidic or alkaline solutions that cause damage. pH-neutral products are tested for safety and won’t scratch or haze the glass. That said, scrubbing too hard or using a stiff brush can still cause scratches on its own.
Can I use vinegar or dish soap to remove water spots?
You can, but results won’t be as good. Concentrated vinegar (acetic acid) can be somewhat corrosive, and dish soap doesn’t remove minerals effectively. These methods take 2–3 hours compared to 30 minutes with a dedicated solution. For the best results, stick with a purpose-built product.
How often do I need to redo this treatment?
It depends on weather conditions and maintenance habits. In humid climates like Vietnam’s, you may need to retreat every 3–4 months without a water-repellent product. With regular use of a water-repellent solution, you can stretch that out to 6–8 months.
Is the treatment solution safe around children?
pH-neutral solutions like NOMA are very safe. That said, for extra peace of mind, keep children from direct contact with the product and wash hands thoroughly after use. If a child does come into accidental contact, it’s not a concern, but rinsing right away is still a good idea.
Conclusion: Removing Water Spots the Right Way Is an Investment in Safe Driving
Removing water spots from car glass isn’t difficult, but it does take patience and the right product. The 5 detailed steps above will help you get the job done effectively and safely, without a trip to the shop.
Using an American-engineered, pH-neutral solution lets you remove water spots quickly (in just 30 minutes) while protecting your car’s components and keeping your skin safe. It’s the method most recommended by car-care professionals today.
Beyond your glass, don’t forget the rest of your car’s care routine. Explore more interior and exterior detailing solutions from NOMA to keep your car looking like new.