
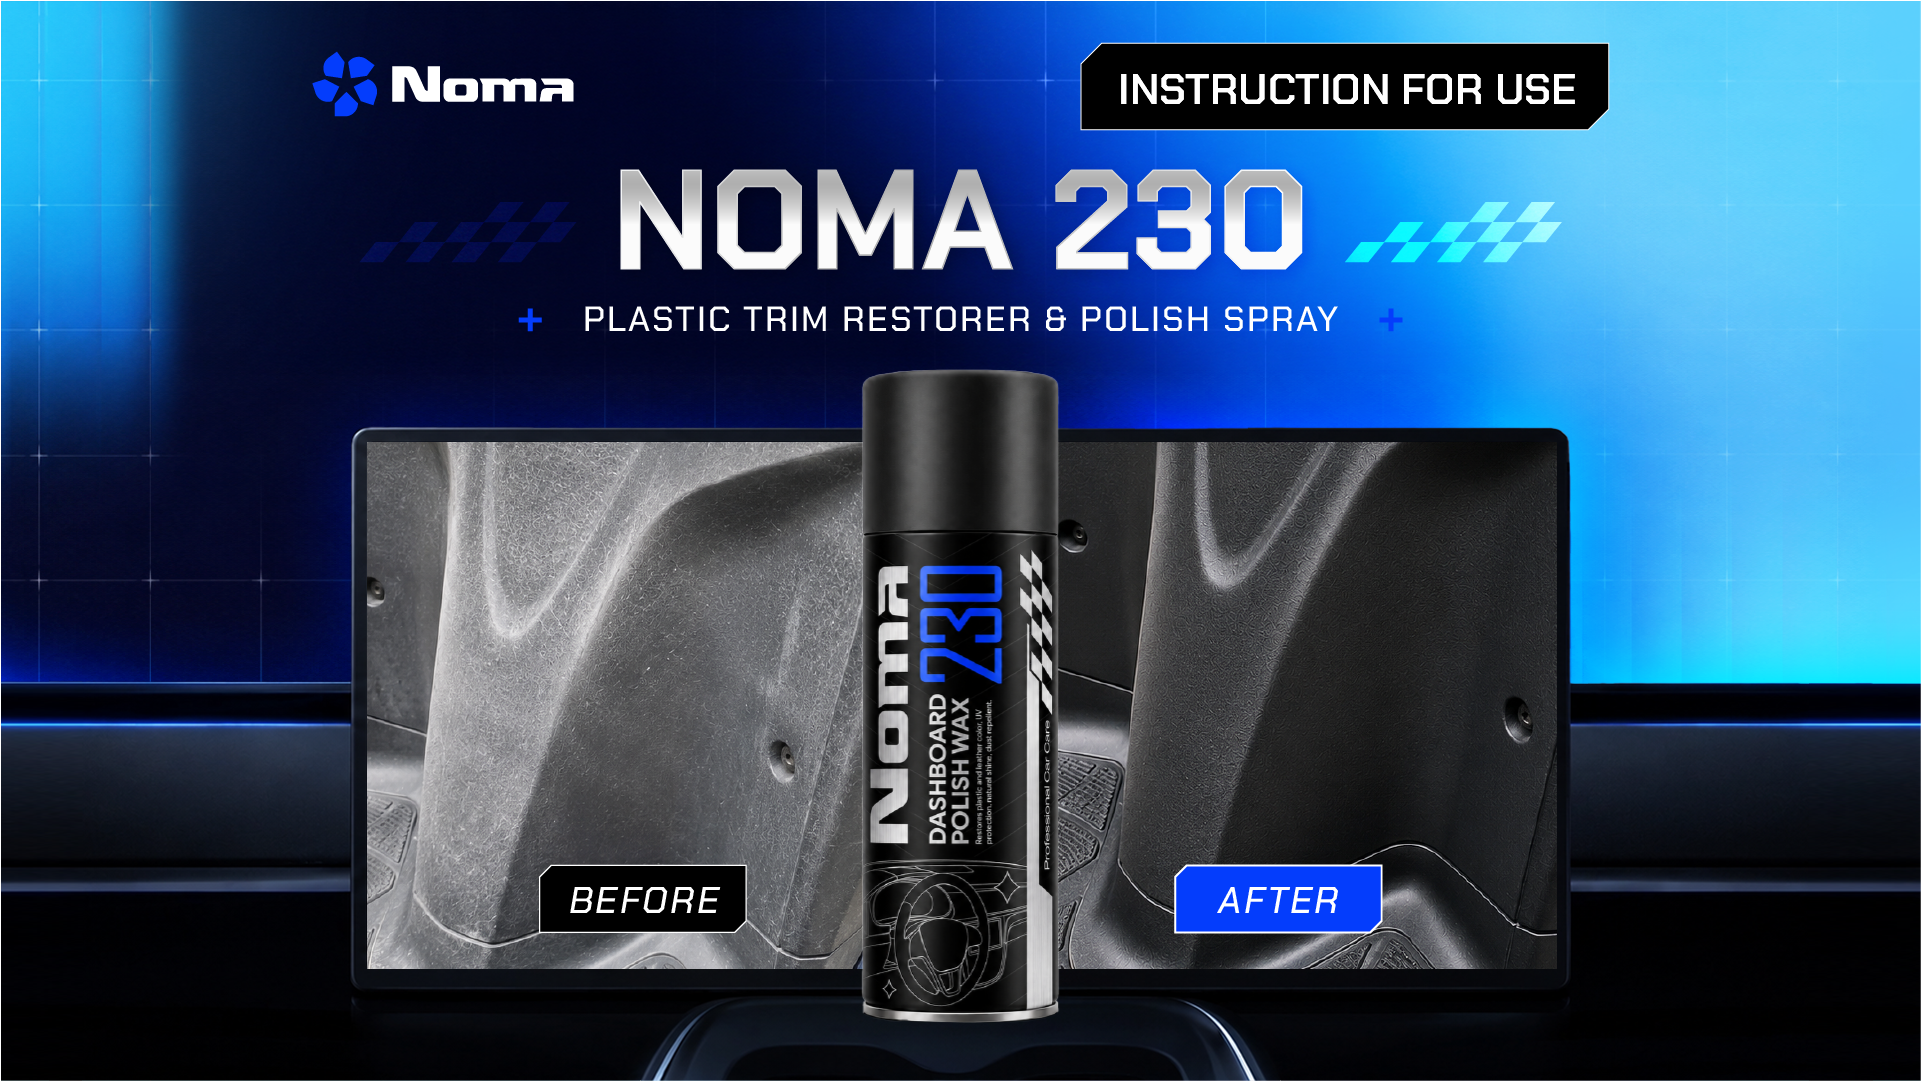
How to Use NOMA 230 – Textured Plastic Trim Restorer Spray

Over time, textured plastic trim on your car can fade, dry out, and lose its original look thanks to sun, heat, and dirt. NOMA 230 is a spray-on restorer that revives natural color, builds a protective layer against aging, and keeps surfaces looking clean and fresh.
Read on to learn how to use the product the right way!
PRODUCT OVERVIEW
NOMA 230 is a dedicated textured plastic restorer and polish that revives color, conditions the surface, and builds a protective layer against UV rays, heat, and aging. It keeps plastic trim looking clean and fresh, resists dust buildup, and helps maintain that like-new appearance.
WHAT PROBLEMS DOES NOMA 230 SOLVE?
NOMA 230 is built to tackle these common issues:
- Restores natural color to textured plastic.
- Helps resist fading and sun damage.
- Reduces dust buildup and static cling.
- Conditions plastic surfaces to help prevent drying and cracking.
- Keeps interior and exterior trim looking clean and fresh.
WHY DO SO MANY DRIVERS CHOOSE NOMA 230 — THE DEDICATED TEXTURED PLASTIC RESTORER AND POLISH?
- Effective color restoration: Helps plastic trim regain its natural color and improves faded, dull-looking surfaces.
- Long-lasting protection: Builds a protective film that helps reduce the effects of UV rays, heat, and the elements.
- Fast-drying, no greasy feel: Once wiped down, the surface dries quickly and doesn’t feel sticky when used as directed.
- Easy to use: The spray format makes it quick to cover larger surface areas.
QUICK-START GUIDE
- Clean and dry the plastic surface.
- Shake the can well before use.
- Spray onto the surface from about 20-25 cm (8-10 in) away.
- Wipe evenly with a clean microfiber cloth.
- Let it air-dry.
STEP-BY-STEP INSTRUCTIONS
For best results, follow these steps:
- Step 1 – Clean: Remove dirt and dust and dry the plastic surface completely.
- Step 2 – Prep: Shake the NOMA 230 can well before use.
- Step 3 – Spray: Spray evenly onto the surface from about 20-25 cm (8-10 in) away.
- Step 4 – Wipe it down: Use a clean microfiber cloth to wipe and spread the solution evenly across the surface.
- Step 5 – Finish: Let the surface air-dry before use.
A FEW TIPS FOR BETTER RESULTS
To get the most out of this product, keep the following in mind:
- Only use on textured plastic surfaces — DO NOT use on paint, glass, fabric, or leather.
- Clean and dry the surface before spraying.
- Don’t spray on a hot surface or in direct sunlight.
- After treatment, keep the surface away from water for the first 2-4 hours.
- Mask off surrounding trim (glass, paint) to avoid overspray.
SAFETY PRECAUTIONS
While using this product, NOMA recommends that you:
- Use it in a well-ventilated area.
- Avoid breathing in the spray directly.
- Avoid contact with eyes and skin.
- Keep away from heat sources or open flames.
- Don’t smoke while using the product.
- Keep out of reach of children.
STORAGE TIPS
- Store in a cool, dry place.
- Keep away from direct sunlight and heat sources.
- Close the cap tightly after use.
- Don’t store the product in high-heat areas.
FREQUENTLY ASKED QUESTIONS
Q: What surfaces is NOMA 230 made for?
A: It’s suited for textured plastic trim, both interior and exterior.
Q: Does it leave a greasy or oily shine?
A: No. It leaves surfaces clean, dry, and with a natural sheen when used as directed.
Q: How long does the effect last?
A: About 60-90 days, depending on usage and environment.
Q: Can it be used on painted surfaces?
A: Not recommended. This product is designed specifically for textured plastic.
Q: Can I wash the car right after applying it?
A: It’s best to wait about 2-4 hours for the protective layer to set before exposing it to water.
WARRANTY POLICY
We offer a 1-1 replacement within 7 days if the product arrives damaged or broken during shipping. Please inspect your order as soon as you receive it so we can assist you promptly.
SUPPORT AND CONTACT
We hope this guide makes it easy to tackle the job yourself at home. If you run into any issues while using the product or need more advice, feel free to reach out to us:
Hotline: 1900 638990
Address:
- Location 1 – Hanoi: 38B Trieu Viet Vuong, Hai Ba Trung District, Hanoi
- Location 2 – Ho Chi Minh City: No. 22, Street 12, City Land Urban Area, Ward 10, Go Vap District
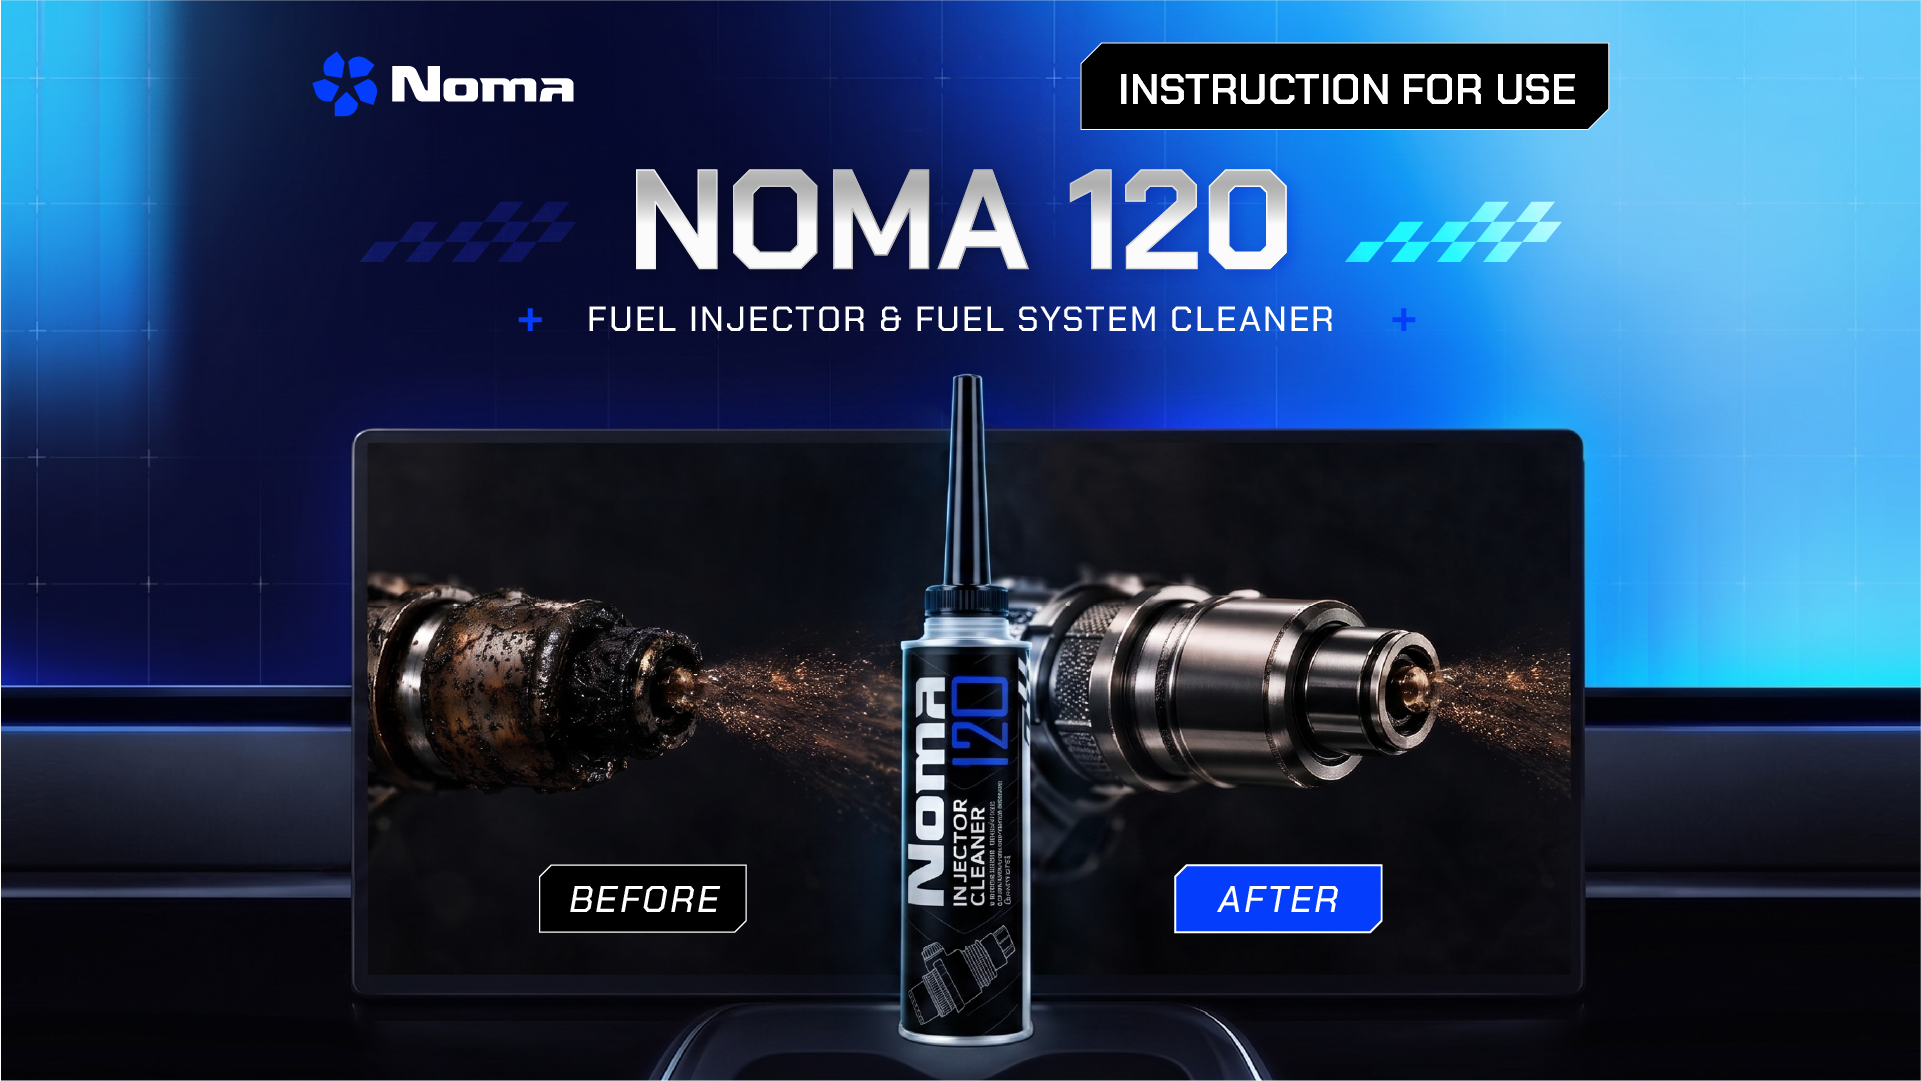
How to Use NOMA 120 – Fuel Injector Cleaner
Over time, carbon deposits and other gunk can build up in your fuel system, leaving the engine sluggish, thirstier for gas, and slower off the line. NOMA 120 is a dedicated fuel injector cleaning solution that cleans out the fuel system without any teardown, helping restore engine performance and keep your ride running smoother.
Read on to learn how to use the product the right way!
PRODUCT OVERVIEW
NOMA 120 is a fuel system cleaning solution made for gasoline engines that cleans the fuel system simply by running through your car as you drive. Its formula contains dedicated cleaning agents that help strip away built-up carbon deposits, improve fuel spray, and optimize combustion.
It’s easy to use — just pour it straight into the fuel tank, no need to take the fuel system apart.
WHAT PROBLEMS DOES NOMA 120 SOLVE?
NOMA 120 is built to tackle these common issues:
- Cleans injectors and the fuel system.
- Helps remove carbon deposits from the combustion chamber and valves.
- Improves acceleration and throttle response.
- Helps reduce fuel consumption.
- Helps the engine run smoother and more steadily.
WHY DO SO MANY DRIVERS CHOOSE NOMA 120 — THE DEDICATED FUEL SYSTEM CLEANER?
- 3-in-1 cleaning: Helps clean the injectors, combustion chamber, and valves in a single use.
- No teardown needed: Just pour it straight into the fuel tank, saving you time and maintenance costs.
- Helps restore performance: Clean injectors spray fuel more evenly, which helps improve acceleration and reduce engine hesitation.
- Easy to use at home: The bottle comes with a pour spout for quick, mess-free application.
QUICK-START GUIDE
For cars
- Fill up the fuel tank.
- Give the bottle a gentle shake and attach the pour spout.
- Pour the entire bottle into the fuel tank.
- Drive as usual until the tank runs dry.
For motorbikes
- Fill up the fuel tank.
- Give the bottle a gentle shake.
- Measure out about 50 ml of the solution and pour it into the fuel tank.
- Ride as usual.
STEP-BY-STEP INSTRUCTIONS
For best results, follow these steps:
FOR CARS
- Step 1: Use NOMA 120 right after filling up the tank
- Step 2: Give the NOMA 120 bottle a gentle shake and attach the pour spout
- Step 3: Pour the entire 300ml bottle into the fuel tank.
- Step 4: Close the fuel cap and wipe away any spilled solution.
- Step 5: Drive until the tank is empty as usual so the solution can work its way through the fuel system.
- Step 6: Watch for results after 1-2 tanks; you can use it regularly every 10,000 km (about 6,200 miles).
FOR MOTORBIKES
- Step 1: Fill up the fuel tank before use
- Step 2: Give the NOMA 120 bottle a gentle shake and attach the pour spout
- Step 3: Slowly pour 50 ml of NOMA 120 into a measuring cup, then pour it into the fuel tank
- Step 4: Close the fuel cap and wipe away any spilled solution.
- Step 5: Ride until the tank is empty as usual so the solution can work its way through the fuel system.
- Step 6: Watch for results after 1-2 tanks; you can use it regularly every 2,000-3,000 km (about 1,200-1,900 miles).
A FEW TIPS FOR BETTER RESULTS
To get the most out of this product, keep the following in mind:
- Only use it in gasoline engines — do not use in diesel vehicles.
- Don’t exceed the recommended dose.
- Don’t mix with other fuel additives.
- After pouring in the solution, drive the vehicle right away so the product can go to work.
- NOMA 120 is a maintenance additive — it isn’t a substitute for repairing mechanical engine damage.
SAFETY PRECAUTIONS
While using this product, NOMA recommends that you:
- Use it in a well-ventilated area.
- Avoid breathing in the fumes directly.
- Avoid contact with eyes and skin.
- Keep away from heat sources or open flames.
- Don’t smoke while using the product.
- Keep out of reach of children.
STORAGE TIPS
- Store in a cool, dry place.
- Keep away from direct sunlight and heat sources.
- Close the cap tightly after use.
- Don’t store the product in high-heat areas.
FREQUENTLY ASKED QUESTIONS
Q: Can NOMA 120 be used in diesel vehicles?
A: No. This product is only suitable for gasoline engines.
Q: How soon will I see results?
A: Typically, after using 1-2 tanks, the engine can start running smoother and more steadily.
Q: How often should it be used?
A: About every 10,000 km (6,200 miles) for cars and every 2,000-3,000 km (1,200-1,900 miles) for motorbikes.
Q: Do I need to remove the injectors to use it?
A: No. Just pour it straight into the fuel tank following the instructions.
Q: Can it be used alongside other additives?
A: We don’t recommend using multiple additives in the same tank at once.
WARRANTY POLICY
We offer a 1-1 replacement within 7 days if the product arrives damaged or broken during shipping. Please inspect your order as soon as you receive it so we can assist you promptly.
SUPPORT AND CONTACT
We hope this guide makes it easy to tackle the job yourself at home. If you run into any issues while using the product or need more advice, feel free to reach out to us:
Hotline: 1900 638990
Address:
- Location 1 – Hanoi: 38B Trieu Viet Vuong, Hai Ba Trung District, Hanoi
- Location 2 – Ho Chi Minh City: No. 22, Street 12, City Land Urban Area, Ward 10, Go Vap District

How to Use NOMA 110 – Multi-Purpose Rust Remover & Lubricant
Read on to see exactly how to use this product the right way!
PRODUCT OVERVIEW
NOMA 110 is a dedicated multi-purpose rust remover and lubricant for metal parts on cars, motorcycles, bicycles, mechanical equipment, and household items. It penetrates tight spaces to help remove rust, cut friction, prevent corrosion, and displace moisture — helping your equipment last longer when used correctly.
WHAT PROBLEMS DOES NOMA 110 SOLVE?
NOMA 110 is built to solve the following problems:
- Removes rust from metal surfaces.
- Helps loosen rusted bolts, nuts, and other seized parts.
- Quiets squeaky hinges, locks, chains, and moving joints.
- Forms a protective film that helps prevent rust and corrosion.
- Displaces moisture from metal parts and damp components.
- Works on a wide range of metal equipment around the house and on vehicles.
WHY DO SO MANY CAR OWNERS CHOOSE NOMA 110 – THE DEDICATED RUST REMOVER & LUBRICANT?
- A 4-in-1 formula: Rust removal, lubrication, corrosion prevention, and moisture displacement — all in one product.
- Fast penetration: Slips easily into tight gaps and hard-to-reach spots to free up stuck parts.
- Truly versatile: Works on cars, motorcycles, bicycles, door hinges, locks, hand tools, and plenty of other metal parts.
- Easy to use: The included precision nozzle makes it easy to target exactly where you need it, right at home.
QUICK-START GUIDE
- Shake the can well before use.
- Attach the precision nozzle if you need to target a small spot.
- Spray onto the surface from about 15–20 cm (6–8 in) away.
- Let it soak in for a few minutes.
- Wipe off any excess oil and check the results.
STEP-BY-STEP INSTRUCTIONS
For the best results, follow these steps:
- Step 1 – Prep: Shake the NOMA 110 can well before use.
- Step 2 – Spray it on: Attach the precision nozzle if needed and spray the target spot from about 15–20 cm (6–8 in) away.
- Step 3 – Let it soak in: Wait a few minutes for the solution to penetrate the rust or work into the stuck parts.
- Step 4 – Work on it: For heavy rust, gently scrub with a wire brush, then spray again.
- Step 5 – Finish up: Wipe off any excess oil and check your results. Repeat if needed.
A FEW TIPS FOR BETTER RESULTS
- Don’t spray it on painted surfaces (it may add temporary shine but attracts dust more easily).
- For heavy rust, repeat the process 2–3 times for better results.
- Don’t use it on fabric, paper, leather, soft plastic, or painted surfaces.
- Don’t spray directly onto live electrical equipment.
- Wipe off excess oil once you’re done to avoid attracting dust.
SAFETY PRECAUTIONS
When using this product, NOMA recommends the following:
- Work in a well-ventilated area.
- Avoid inhaling the spray directly.
- Avoid contact with eyes and skin.
- Don’t use near heat sources, sparks, or open flames.
- Don’t smoke while using the product.
- Keep out of reach of children.
STORAGE TIPS
- Store in a cool, dry place.
- Avoid direct sunlight and heat sources.
- Close the cap tightly after each use.
- Don’t store the product anywhere hot.
FREQUENTLY ASKED QUESTIONS
Q: What is NOMA 110 used for?
A: It removes rust, lubricates, prevents corrosion, and displaces moisture on metal parts.
Q: Can it be used on door hinges and locks?
A: Yes. NOMA 110 helps quiet squeaks and keeps parts moving smoothly.
Q: Can it be used on a stuck bolt or nut?
A: Yes. Spray it on and let it soak in for a few minutes before you try to loosen it.
Q: How often should I reapply it?
A: It depends on the purpose. For routine lubrication, about every 1–3 months; for rust prevention, about every 3–6 months.
WARRANTY POLICY
We offer a 1-to-1 replacement within 7 days if the product arrives damaged or broken in shipping. Please inspect your order as soon as it arrives so we can assist you promptly.
TECHNICAL SUPPORT & CONTACT
We hope this guide makes it easy to tackle rust and squeaky parts at home. If you run into any issues or want more advice about the product, feel free to reach out to us through:
Hotline: 1900 638990
Address:
- Location 1 – Hanoi: 38B Trieu Viet Vuong, Hai Ba Trung District, Hanoi
- Location 2 – Ho Chi Minh City: 22, Street 12, City Land Urban Area, Ward 10, Go Vap District
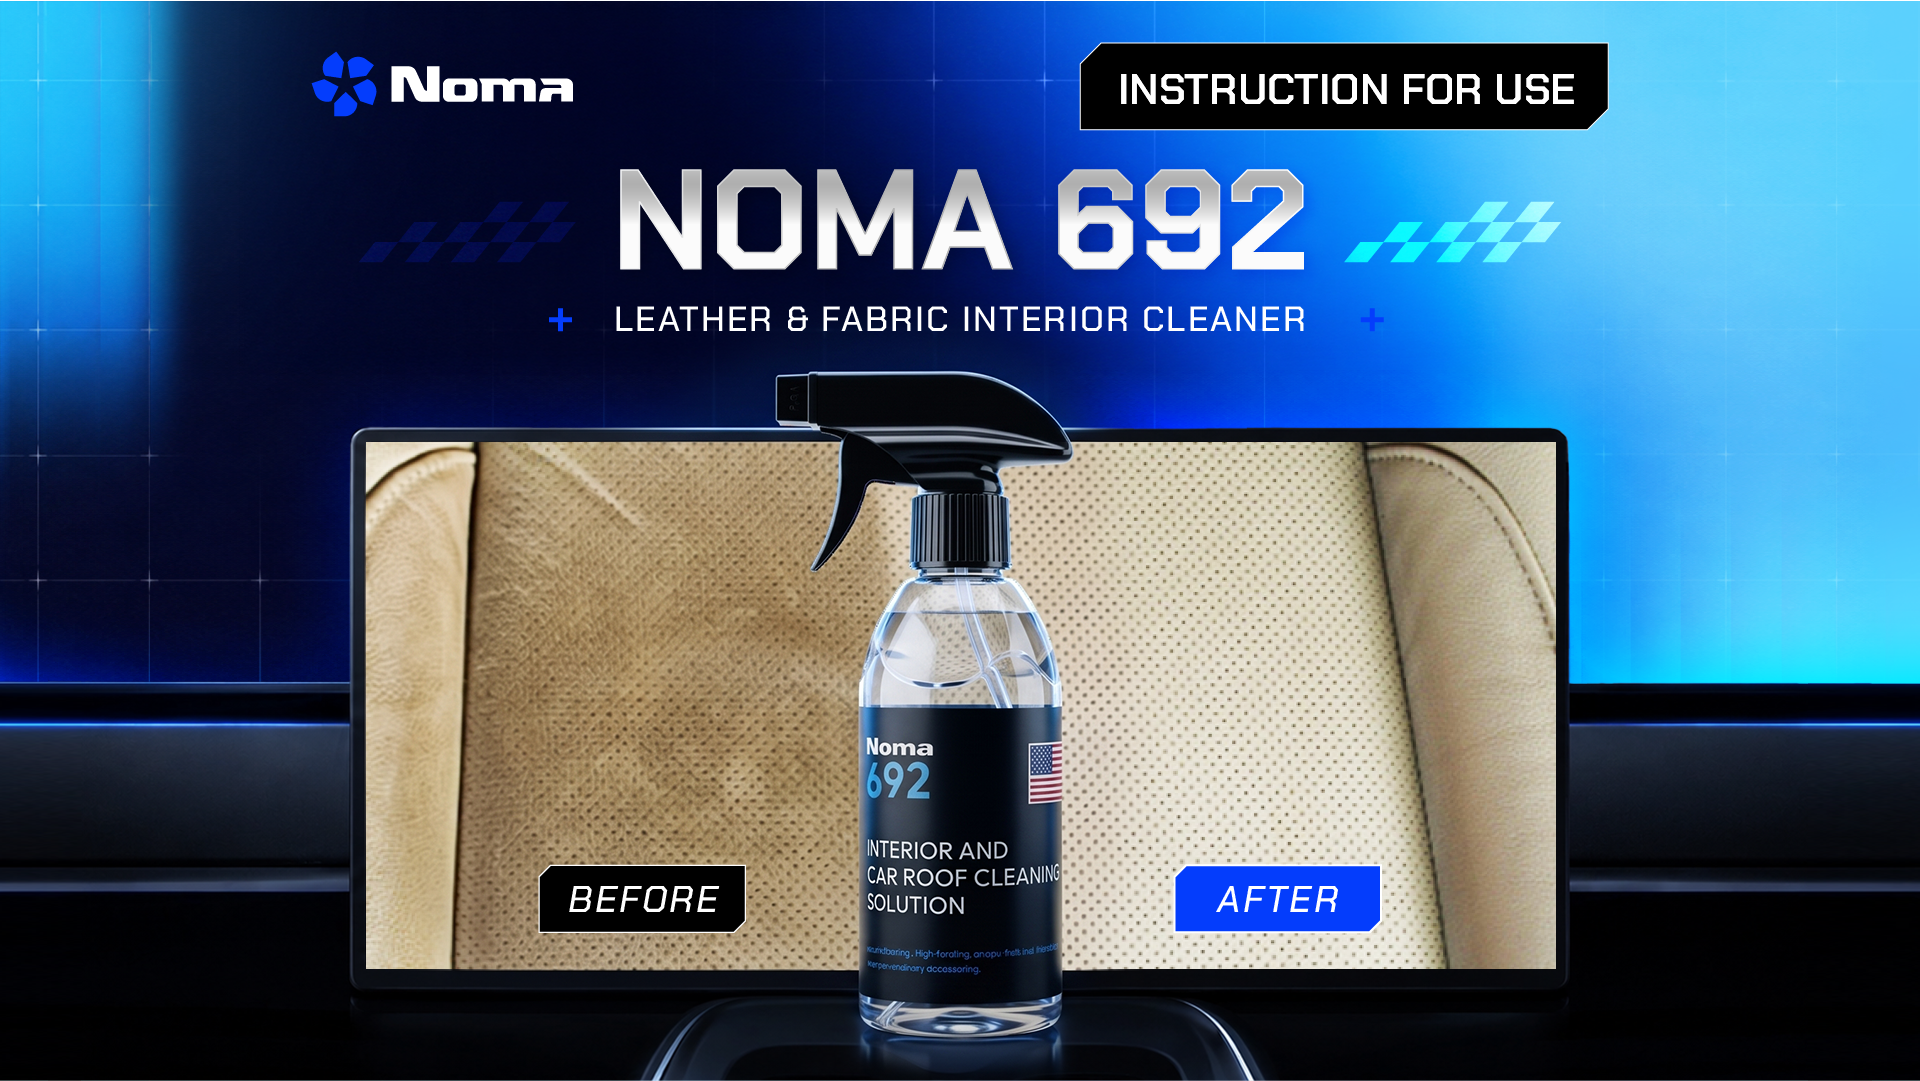
How to Use NOMA 692 – Interior Cleaner for Fabric, Leather & Headliner
Leather seats, cloth seats, and headliners are prime spots for dirt, grease, sweat, and lingering odors to build up over time. Left unchecked, that grime wears down your interior faster and makes every drive a little less pleasant. NOMA 692 is a dedicated automotive interior cleaner that effectively cleans leather, cloth, and headliner surfaces while helping neutralize light odors, leaving your cabin fresh, clean, and dry.
Read on to see exactly how to use this product the right way!
PRODUCT OVERVIEW
NOMA 692 is a dedicated cleaning solution for car interiors, effective on leather seats, cloth seats, and headliners. Its foaming formula lifts dirt, grease, and everyday stains without leaving streaks or watermarks when used as directed. It also helps neutralize light odors, keeping your cabin fresh and pleasant.
WHAT PROBLEMS DOES NOMA 692 SOLVE?
- Effectively cleans leather seats, cloth seats, and headliners.
- Removes dirt, grease, and everyday stains from interior surfaces.
- Helps neutralize light odors for a more pleasant cabin.
- Cleans evenly, without leaving streaks or watermarks.
- Makes DIY interior cleaning faster and more convenient.
WHY DO SO MANY CAR OWNERS CHOOSE NOMA 692 – THE DEDICATED INTERIOR CLEANER?
- 3-in-1 versatility: One product works on leather seats, cloth seats, and headliners, saving you time on interior care.
- Deep cleaning power: Its foaming formula lifts dirt and grease off the surface while still wiping away easily with a microfiber towel.
- Transparent sourcing: Officially imported, with a clear GHS-compliant MSDS on file.
- Easy to use at home: With just a few simple steps, you can clean your own interior without a trip to the shop.
QUICK-START GUIDE
- Shake the bottle well before use.
- Vacuum the surface first.
- Spray the solution onto a microfiber towel (recommended for headliners) or spray directly onto the surface from about 40 cm (16 in) away.
- Wipe gently in circular motions or in one direction.
- Buff dry with a clean microfiber towel.
STEP-BY-STEP INSTRUCTIONS
For the best cleaning results, follow these steps:
- Step 1 – Prep: Shake the NOMA 692 bottle well, grab a clean microfiber towel, and vacuum the area you’re about to clean.
- Step 2 – Apply the solution: For headliners, spray the solution onto the towel first, then wipe. For leather or cloth seats, you can spray directly onto the surface from about 40 cm (16 in) away.
- Step 3 – Clean: Wipe gently in circular motions or in one direction. For stubborn stains, repeat 1–2 more times and let the solution sit for about a minute to loosen the stain.
- Step 4 – Finish up: Buff dry with a clean, dry microfiber towel for a cleaner, drier finish.
Note: For headliners, always spray the solution onto the towel first — never spray it directly onto the headliner.
A FEW TIPS FOR THE BEST RESULTS
- NOMA 692 works great on leather seats, cloth seats, and headliners. For headliners, always spray the solution onto the towel first rather than spraying directly.
- For premium genuine leather, test on a small hidden spot first to check compatibility.
- Don’t use it on touchscreens, mirrors, glass, natural wood, suede, or nubuck leather.
- Vacuum before cleaning for better results.
- Don’t over-spray one spot, and leave the doors open afterward so the interior dries faster.
SAFETY PRECAUTIONS
When using this product, NOMA recommends the following:
- Wear safety goggles to keep the solution out of your eyes.
- Wear chemical-resistant gloves while working.
- Work in a well-ventilated space and keep the doors open while cleaning.
- Don’t inhale the spray directly.
- Avoid contact with eyes and skin.
- Don’t spray near children.
- Don’t use near heat sources or open flames.
- Don’t smoke while using the product.
STORAGE TIPS
- Store in a cool, dry place.
- Ideal temperature: 15–30°C (59–86°F).
- Avoid direct sunlight and UV exposure.
- Close the cap tightly after each use.
- Keep water and moisture from getting into the bottle.
- Keep away from heat sources and open flames.
FREQUENTLY ASKED QUESTIONS
Q: Is NOMA 692 safe for headliners?
A: Yes. Used correctly — spraying onto a towel first, then wiping — it won’t loosen the headliner’s adhesive.
Q: How do I deal with stubborn stains?
A: Wipe 2–3 times with NOMA 692 and let it sit for about a minute to loosen the stain before wiping again.
Q: Can it be used on touchscreens or glass?
A: No. It’s not recommended for touchscreens, mirrors, or any glass surfaces.
WARRANTY POLICY
We offer a 1-to-1 replacement within 7 days if the product arrives damaged or broken in shipping. Please inspect your order as soon as it arrives so we can assist you promptly.
TECHNICAL SUPPORT & CONTACT
We hope this guide makes it easy to clean your car’s interior at home. If you run into any issues or want more advice about the product, feel free to reach out to us through:
Hotline: 1900 638990
Address:
- Location 1 – Hanoi: 38B Trieu Viet Vuong, Hai Ba Trung District, Hanoi
- Location 2 – Ho Chi Minh City: 22, Street 12, City Land Urban Area, Ward 10, Go Vap District

How to Use NOMA 911 – Deep Glass Water Spot Remover
After a while on the road, car glass tends to build up water spots, mineral deposits, and an oily film. Beyond just looking bad, that buildup cuts down on visibility — especially at night or in the rain. NOMA 911 is a dedicated glass stain remover that strips away stubborn water spots, breaks down oil film, and brings back the glass’s clarity.
Read on to see exactly how to use this product the right way!
PRODUCT OVERVIEW
NOMA 911 is a dedicated glass stain remover that strips mineral deposits, water spots, oil film, and old, degraded nano coatings off automotive glass. Its formula combines ultra-fine polishing particles with surfactants for effective cleaning, leaving glass clearer and helping improve visibility. It’s easy to use at home and works on windshields, side windows, rear windows, and side mirrors.
WHAT PROBLEMS DOES NOMA 911 SOLVE?
NOMA 911 is built to solve the following problems:
- Removes stubborn water spots and mineral deposits from glass.
- Breaks down oil film that’s built up over time.
- Restores glass clarity for better visibility.
- Helps cut down on glare while driving at night.
- Helps wipers glide more smoothly once the glass is clean.
WHY DO SO MANY CAR OWNERS CHOOSE NOMA 911 – THE DEDICATED STAIN REMOVER?
- Ultra-fine polishing formula: NOMA 911 uses ultra-fine polishing particles that lift mineral deposits, water spots, and oil film off glass without scratching the surface when used as directed.
- Restores glass clarity: Once cleaned, glass looks brighter and clearer, which helps with visibility and cuts down on glare while driving at night.
- Safe for use on your car: The formula contains no harsh acids and won’t corrode rubber seals or nearby metal trim when used correctly.
- Works on multiple glass surfaces: It handles windshields, side windows, rear windows, and side mirrors, so you can treat multiple spots with a single product.
- Easy to use at home: With just a few simple steps, you can clean up glass stains yourself without a trip to the shop.
QUICK-START GUIDE
- Do a quick clean and dry the glass surface.
- Shake the bottle well, open the cap, and press gently to release solution onto the pad.
- Work it in with the pad using circular motions.
- Wait 1–2 minutes, then rinse with water and dry with a microfiber towel.
STEP-BY-STEP INSTRUCTIONS
For the best stain-removal results, follow these steps:
- Step 1 – Clean: Rinse off any surface dirt and dry the glass completely before you start.
- Step 2 – Prep: Shake the NOMA 911 bottle well to mix the solution evenly.
- Step 3 – Apply the solution: Squeeze out just enough onto the area of glass you’re treating.
- Step 4 – Scrub it clean: Use the included pad to work in circular motions with moderate pressure to lift off mineral deposits and oil film.
- Step 5 – Let it work: Wait 1–2 minutes for the solution to take effect.
- Step 6 – Finish up: Rinse with water, then dry with a clean microfiber towel.
A FEW TIPS FOR BETTER RESULTS
To get the most out of this product, keep the following in mind:
- Use it on glass only — not on paint, plastic, or glossy coated surfaces.
- Clean off dust and dry the glass first for the best results.
- Don’t apply it to hot glass or in direct sunlight.
- Scrub with moderate pressure — don’t linger too long on one spot.
- Don’t let the solution dry on the glass before rinsing it off.
- Results depend on how bad the staining is and the actual condition of the surface.
- After removing stains, apply a nano glass coating to protect the surface and keep it glossy longer. Check out NOMA 922 – Nano Glass Coating, a DIY, water-repellent coating that protects your glass for up to 5 months.
Important: NOMA 911’s dedicated stain-removal formula clears away water spots, oil film, and mineral deposits — it won’t fix physical scratches on the glass.
SAFETY PRECAUTIONS
When using this product, NOMA recommends the following:
- Wear protective gloves while working.
- Avoid contact with eyes and skin.
- Don’t inhale the fumes or dust directly.
- Keep the product away from children.
STORAGE TIPS
To keep the product from degrading and losing its effectiveness, keep the following in mind:
- Store in a cool, dry place.
- Ideal temperature: 15–30°C (59–86°F).
- Avoid direct sunlight and UV exposure.
- Close the cap tightly after each use.
- Keep water and moisture from getting into the bottle.
FREQUENTLY ASKED QUESTIONS
Q: Will NOMA 911 scratch my glass?
A: No. Its ultra-fine polishing particles (aluminum oxide) are designed to lift off mineral deposits and oil film without scratching the glass when used as directed.
Q: Can I use it on windows with tint film?
A: Not recommended. If your glass has tint film or a specialty coating, test on a small hidden spot first before treating the whole surface.
Q: How long does NOMA 911’s effect last?
A: Depending on how it’s used and environmental conditions, the cleaning effect typically holds for about 1–2 months before you’ll need to treat it again.
Q: Does NOMA 911 provide long-lasting water repellency?
A: NOMA 911 is primarily a stain remover. After cleaning, the glass will have mild water-repellent properties for about 5–7 days. If you want longer-lasting protection, follow up with NOMA 922.
Q: How often should I reapply NOMA 911?
A: Whenever water spots, mineral deposits, or oil film reappear and start affecting your visibility, it’s time to clean the glass again.
Q: Can it be used on side mirrors?
A: Yes. It works well on side mirrors and other glass surfaces on your car.
Q: Can I use it on wet glass?
A: It works fine on glass that’s only lightly damp. Avoid using it on a surface that’s still holding a lot of water, as that can reduce its cleaning power.
WARRANTY POLICY
We offer a 1-to-1 replacement within 7 days if the product arrives damaged or broken in shipping. Please inspect your order as soon as it arrives so we can assist you promptly.
TECHNICAL SUPPORT & CONTACT
We hope this guide makes it easy to clean your car’s glass at home. If you run into any issues or want more advice about the product, feel free to reach out to us through:
Hotline: 1900 638990
Address:
- Location 1 – Hanoi: 38B Trieu Viet Vuong, Hai Ba Trung District, Hanoi
- Location 2 – Ho Chi Minh City: 22, Street 12, City Land Urban Area, Ward 10, Go Vap District
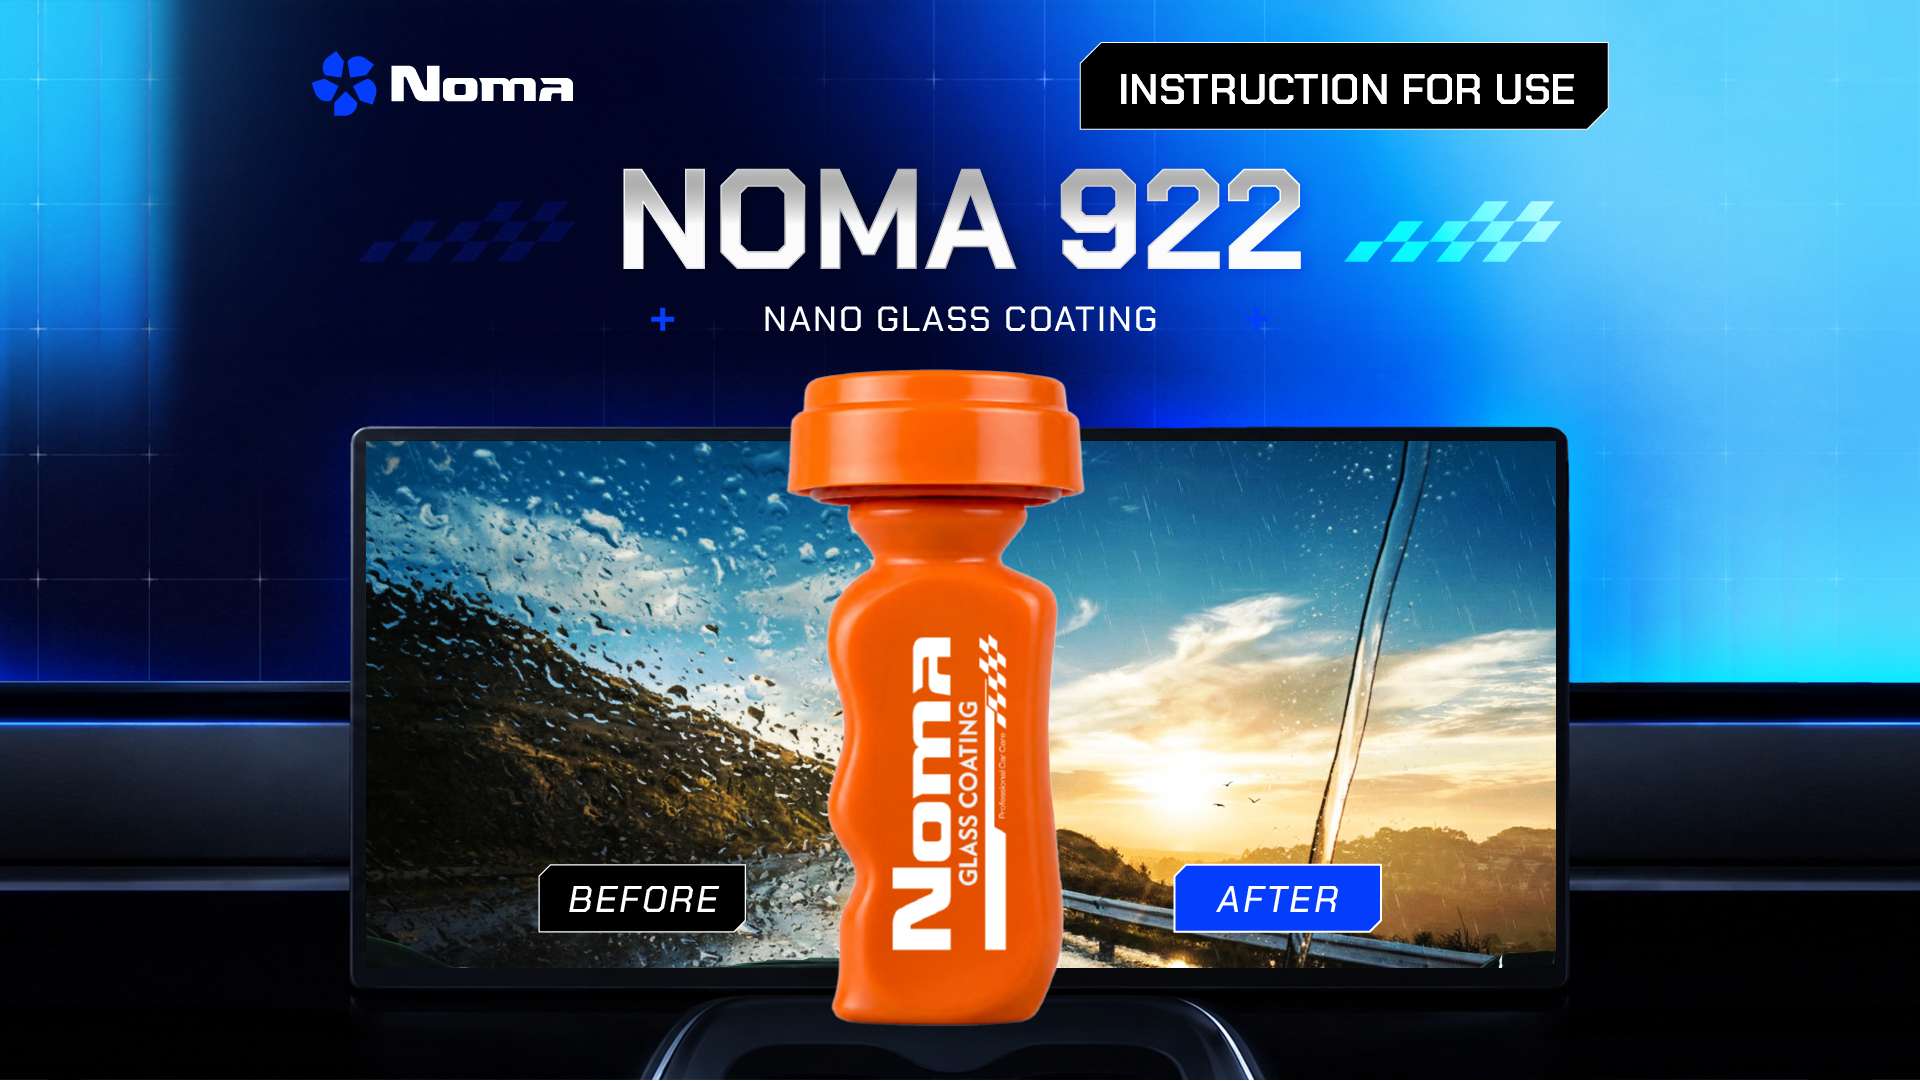
How to Use NOMA 922 – Nano Glass Coating
Driving in the rain, water pooling on your windshield can cut down visibility and force your wipers to work overtime. NOMA 922 is a nano glass coating built on Nano Hydrophobic technology that forms an ultra water-repellent layer on glass surfaces. Once applied, rainwater beads up quickly and slides right off, helping you keep a clear view of the road and making rainy-day driving noticeably less stressful.
Read on to see exactly how to use this product the right way!
PRODUCT OVERVIEW
NOMA 922 is a dedicated nano glass coating that creates a hydrophobic layer on automotive glass. Its Nano Hydrophobic technology, combined with a Silane bonding mechanism that anchors to the glass surface, forms a durable coating that helps rainwater run off fast, boosts clarity, and cuts down on water spotting.
It’s designed for the outer surface of windshields, side windows, rear windows, and side mirrors. For best results, use it after cleaning the glass with NOMA 911.
WHAT PROBLEMS DOES NOMA 922 SOLVE?
NOMA 922 is built to solve the following problems:
- Helps rainwater bead up and run off the glass surface quickly.
- Boosts glass clarity and shine.
- Reduces water spotting.
- Helps cut down on glare while driving in the rain.
- Reduces friction on your wiper blades.
- Lasts 2–5 months depending on how it’s used.
WHY DO SO MANY CAR OWNERS CHOOSE NOMA 922 – THE DEDICATED NANO GLASS COATING?
- Nano Hydrophobic + Bonding technology: Forms an ultra water-repellent nano layer that makes rainwater bead up and run off the glass fast, helping improve visibility when you’re driving in the rain.
- A 5-in-1 solution: One product handles the hydrophobic nano coating, added clarity, added shine, reduced water spotting, and lower wiper-blade friction.
- Lasts up to 5 months: The nano coating keeps repelling water for 2–5 months, depending on how the car is used and where it’s parked.
- Comes with a ready-to-use applicator pad: A convenient design that makes it easy to apply the nano coating yourself at home once the glass is clean.
QUICK-START GUIDE
- Strip off old stains and any leftover coating with NOMA 911.
- Dry the glass completely.
- Shake the bottle well, then squeeze out just enough solution onto the glass.
- Work it in with the pad using circular motions.
- Let it cure for at least 4 hours (overnight is best).
- Buff off with a clean microfiber towel.
- Test with water — if it beads up, the coating is doing its job.
STEP-BY-STEP INSTRUCTIONS
For the best nano coating results, follow these steps:
Step 1 – Prep the surface: Clean the glass with NOMA 911 to strip away mineral deposits, oil film, and any old nano coating, then dry it completely.
Step 2 – Check your safety setup: Make sure you’re working in a well-ventilated area, away from open flames, sparks, or heat sources. Don’t smoke while applying the product.
Step 3 – Apply the solution: Shake the bottle well and squeeze out just enough solution onto the glass surface.
Step 4 – Spread it evenly: Use the included pad to work the solution over the entire surface with small, even circular motions.
Step 5 – Let the coating bond: Let it air-dry naturally for at least 4 hours. Leaving it overnight helps the coating cure more fully.
Step 6 – Finish up: Wipe away any leftover solution with a soft microfiber towel.
Step 7 – Test it: Pour a little water onto the glass. If it quickly beads up and rolls off, the coating is working as it should.
A FEW TIPS FOR BETTER RESULTS
To get the most out of this product, keep the following in mind:
- Always clean the glass with NOMA 911 before applying the nano coating.
- The glass surface must be completely dry before you start.
- Don’t apply it to hot glass or in direct sunlight.
- Don’t over-apply — a coating that’s too thick can leave streaks once it dries.
- Avoid touching the glass surface after coating it.
- Keep the glass away from water while the coating is curing.
Important: Effectiveness lasts 1–5 months, depending on how the product is used and how well the glass was prepped beforehand.
SAFETY PRECAUTIONS
When using this product, NOMA recommends the following:
- Work in a well-ventilated area.
- Wear gloves and safety goggles while applying.
- Don’t inhale the fumes directly.
- Avoid contact with eyes and skin.
- Never use near open flames, sparks, or heat sources.
- Don’t smoke while using the product.
- Keep out of reach of children.
STORAGE TIPS
- Store in a cool, dry place.
- Keep storage temperature below 37°C (about 99°F).
- Don’t leave the product in a car parked in the sun.
- Avoid direct sunlight and heat sources.
- Close the cap tightly after each use.
- Keep away from open flames and sparks.
FREQUENTLY ASKED QUESTIONS
Q: How long does NOMA 922 last?
A: Anywhere from 2–5 months depending on how the car is used. Cars parked indoors or in a garage tend to hold the coating longer.
Q: Does the nano coating cause haze or glare at night?
A: No. Once the coating has cured fully and any excess is wiped away, the glass stays clear.
Q: What surfaces can it be used on?
A: The outer surface of windshields, side windows, rear windows, and side mirrors. It also works on some glass surfaces around the house.
Q: Does it affect window tint film?
A: No, as long as it’s used correctly on the outer glass surface. Don’t apply it to the inner side of tinted windows.
Q: Does a thicker coating work better?
A: No. A thin, even layer is all you need. Applying it too thick can leave streaks once it dries.
Q: Can I keep the product in the trunk?
A: Not a great idea, especially if the car is parked in the sun. The product needs to be stored below 37°C (about 99°F).
Q: Why should I use NOMA 911 before applying NOMA 922?
A: NOMA 911 strips away mineral deposits, oil film, and any old coating, leaving a clean surface so the nano coating can bond properly and perform at its best.
WARRANTY POLICY
We offer a 1-to-1 replacement within 7 days if the product arrives damaged or broken in shipping. Please inspect your order as soon as it arrives so we can assist you promptly.
TECHNICAL SUPPORT & CONTACT
We hope this guide makes it easy to clean your car’s glass at home. If you run into any issues or want more advice about the product, feel free to reach out to us through:
Hotline: 1900 638990
Address:
- Location 1 – Hanoi: 38B Trieu Viet Vuong, Hai Ba Trung District, Hanoi
- Location 2 – Ho Chi Minh City: 22, Street 12, City Land Urban Area, Ward 10, Go Vap District

Simple, Effective Tips to Keep Rodents Out of Your Car
Rats and mice tend to seek out damp, dark places to nest. That makes a car’s warm, enclosed engine bay an ideal hideout for these rodents. Rodents in your car aren’t just a hygiene problem — they can also damage the exhaust and other components, especially the wiring. To avoid these headaches, here are some simple, effective tips for keeping rodents out of your car.
Figuring out where rodents are getting into your car
|
Location |
Signs to look for |
|
Engine bay |
A faint smell of urine or droppings when you stand near the car or pop the hood. |
|
Engine compartment |
Odd noises coming from the engine on a regular basis — rattling, scratching, or scurrying sounds. |
|
Air filter |
Debris or droppings showing up in the filter. |
|
Wiring in the engine bay and elsewhere in the car |
The car won’t start, headlights won’t turn on, the horn doesn’t work, and so on. |
|
Seats |
Chew marks, gnawing damage, paw prints, or droppings under the seats, often along with a sharp smell of urine. |
10+ simple, effective tips for keeping rodents out of your car
Here are 10+ easy, effective tips you can use to keep these unwelcome rodents away and protect your car’s components from damage.
Use rodent-repellent bait tablets
Rodent bait is a go-to method plenty of drivers rely on. You can scatter these tablets anywhere in the car, and they kill rodents quickly once eaten. That said, the bait is fairly toxic, so families with young kids should think carefully before using it.
Regularly check and clean the engine bay
The engine bay is a favorite hideout for rodents, especially in cars that sit unused for long stretches. To keep rodents from getting in and causing damage, check and clean the engine bay regularly with a cloth, brush, or duster to clear away dirt and debris.
If you have a pressure washer on hand, give the engine bay a thorough rinse too. If you’re short on time, you can also take your car to a detailing shop to have the engine bay cleaned properly. Regular care like this clears out unpleasant odors, keeps the car clean, and discourages rodents from nesting inside.
Use a rodent-proof mesh cover
A rodent barrier is made from sturdy mesh and a metal frame, sized to wrap around the entire car and keep rodents from getting inside to nest. These covers come with a handy, secure fastening system — it only takes about a minute to unroll one and wrap it around the car, and you can trust it’ll stay put around the clock. Some versions are even up to 80 cm (about 31 inches) tall, sealing off every possible gap, so even a rodent that climbs onto the roof and works its way down can’t get in.
Use rodent-repellent essential oils
Ginger and peppermint oil both have a strong scent that rodents can’t stand. Soak a cotton ball in peppermint or ginger oil and tuck it into the engine bay or engine compartment. The scent of these natural oils will scare rodents off and keep them from making their way into your car.
Rodent-repellent sachets
Rodent-repellent sachets are typically made from natural, pungent ingredients like peppermint, cinnamon, black pepper, or red pine bark. These ingredients overwhelm a rodent’s sense of smell and touch, making them anxious and wary of the area where the sachet is placed. You can hang one of these sachets in the engine bay or under the hood, and it’ll stay effective for 8-12 months. Just keep in mind that you should clean the engine bay thoroughly before placing the sachet, so the scent can do its job as effectively as possible.
Use rodent-repellent spray
Rodent-repellent spray is another effective way to keep rodents away. It leaves behind a protective coating over the electrical components, rubber, and plastic parts in the engine bay, shielding them from gnawing damage and helping keep your car safe to drive.
Before spraying, put on a mask and chemical-resistant gloves. Clean the engine bay and other parts of the car first, then shake the can well and spray it directly onto plastic parts, rubber hoses, and wiring, making sure to cover all four wheel wells.
Use a rodent-repellent device
These devices emit an ultrasonic frequency between 22-60 kHz that constantly shifts, creating an unpleasant, disorienting sensation that scares rodents off. The big advantages here are a compact design that’s easy to install and use, plus no effect on human health.
Use mothballs or camphor
Camphor and mothballs are a rodent’s worst enemy, which is exactly why so many drivers reach for this simple, effective method. Just tuck a few mothballs into spots rodents tend to frequent, and the strong smell will send them packing.
That said, this method only works well at first — rodents can get used to the smell over time, stop being bothered by it, and go back to causing trouble. Mothballs can also affect people’s health, so only use them when no one’s riding in the car.
Use a rodent-deterrent lubricant
Plenty of drivers swear by coating python or ox fat onto pipes and areas in the engine bay that rodents like to chew on. These greases make surfaces too slippery for rodents to grip, making it harder for them to get around or settle in the engine bay. The downside is that engine bay components tend to collect grime much faster this way, making them harder to clean, and the smell can end up drifting into the cabin through the AC system.
Use rodent glue traps
Beyond just trying to repel rodents, plenty of car owners go for a more direct approach and place glue traps around the car, underneath it, and inside the engine bay. That said, this method isn’t always very effective, since rodents are cunning enough to spot and avoid traps set for them.
Keep your car clean, inside and out
Keeping your car clean from top to bottom doesn’t just deter rodents — it also makes for a more pleasant ride. Wipe down the car’s components regularly, especially the cabin and engine bay. If you spot any dropped food in the car, clean it up right away so it doesn’t attract rodents. And if you notice any signs that rodents have been around, deal with it immediately before they can cause serious damage to your car.
5+ tips to help keep rodents out of your car for good
To cut down the odds of rodents getting into your car, keep these tips in your back pocket:
- Don’t park near piles of trash: Avoid parking in damp areas or near drains and garbage, since these are prime rodent hangouts and raise the odds that one will make its way into your car.
- Check the wiring, drive belts, and electrical system at the first sign of rodents: If you notice signs that rodents have gotten in, check the wiring, drive belts, and electrical system right away to avoid serious damage to your car.
- Check the air filter if you notice a smell from the AC: When rodents nest in a car, the urine and droppings they leave behind can dirty up the engine’s air filter, restricting airflow and hurting your AC system’s performance. So if you notice a smell coming from the AC, check the air filter right away to protect its function and lifespan.
- Don’t leave doors open for long stretches: Forgetting to close a car door, or leaving one open too long, is basically an open invitation for a rodent to sneak in. Keep door-open time to a minimum, and always double-check that doors are shut tight whenever you get in or out, to keep rodents from finding their way in.
- Start the engine every 2-3 days if the car isn’t driven often: Cars that sit unused or idle for long periods are especially vulnerable to rodents. Start the engine roughly every 2-3 days to keep rodents from nesting inside, since they dislike the heat and the smell of gasoline.
- Avoid eating in the car: Food scraps left in the car are like a beacon that draws rodents in fast. Keeping the car clean and cutting back on eating inside it reduces food smells in the cabin, which helps keep rodents from finding a way in.
A rodent getting into your car might seem like no big deal, but it can lead to some serious problems — chewed-through wires, damage to the engine bay, and even a fire risk. On top of that, a rodent nest in your car brings a foul smell that’s unpleasant for both driver and passengers. If you notice a strange odor or any signs that rodents have moved in, put the rodent-prevention tips above to work right away. And for the best results long-term, keep checking the engine bay regularly, keep the car clean, and don’t leave food lying around inside.

Safe Driving Tips: Golden Rules for New Drivers
Safe driving habits matter for every driver, but they’re especially crucial if you’re new behind the wheel. To help you start your driving journey with confidence and safety, let’s go through 13+ golden rules every new driver should know for their beloved ride.
1. Right foot only: gas or brake, never both
This rule helps drivers react quickly and correctly in urgent situations. Use only your right foot for both the gas and brake pedals, and keep your left foot off to the side (this applies to automatic-transmission cars). It’s a simple habit that prevents mixing up your feet and keeps you in control no matter what happens on the road.
2. The 3-second rule
The 3-second rule helps you keep a safe following distance between vehicles, especially near traffic lights.
When you see a green light with about 3 seconds left, start preparing to stop so you don’t have to slam the brakes and startle the cars behind you. On the flip side, when a red light has about 3 seconds left before turning green, get your foot ready to ease onto the gas gently so the car moves off smoothly, avoiding a sudden jump that could endanger the car ahead. That’s safe driving in action!

3. Follow another car through flooded roads
When you hit a flooded stretch of road, don’t rush ahead — instead, follow behind another vehicle and watch how it handles the water. Watching the car in front lets you gauge how deep the water actually is and whether it’s safe to cross.
Here’s how to recognize the situation and handle driving through unavoidable flooded roads safely:
- How to tell it’s safe: Water reaching up to roughly the halfway point of your wheel (about 8–10 inches / 20–25 cm) is generally safe
- What to do:
- Drive slowly to avoid creating a bow wave — a wave can push water higher than the axle and into the engine’s air intake
- Turn off the AC so the engine doesn’t have to carry that extra load
- Once you’re clear of the water, pull over somewhere safe and check whether debris got caught in the radiator fan up front, or whether your license plate came loose
- If you were in the water a long time, it can affect your brake pads and reduce braking performance. Drive slowly and tap the brakes repeatedly afterward to dry them out
If the car ahead makes it through safely, you can follow with more confidence. On the other hand, if it struggles or has to turn back, consider doing the same or finding another route. Careful observation is what keeps you — and everyone else on the road — safe.

4. Animals on the road: aim for the head or the tail, depending on the animal
Suddenly encountering animals on the road isn’t rare, especially in rural areas. To handle it safely, remember this old driver’s trick: ease off the brakes to slow down, make sure there’s no one beside or behind you, and avoid any sudden swerve. It’s a small tip worth remembering.
For example, if you suddenly come across a pack of dogs, steer toward their heads — dogs tend to turn and bolt away as a car approaches. Cattle, on the other hand, tend to bolt straight ahead when startled or spooked by a loud noise, so steer toward their tails instead.
5. Build momentum before upshifting, rev-match before downshifting
Shifting gears the right way keeps you safe, saves fuel, and protects your engine from damage. Knowing how and when to shift up or down is a fundamental skill every driver needs.
When shifting up, build enough speed first so the car reaches the right RPM range for a smooth, efficient shift. This avoids “lugging” the engine — forcing it to work too hard, which strains the motor and can even stall the car mid-drive.
When shifting down, ease off the gas first to slow down and keep engine speed steady, which makes engaging a lower gear smooth instead of jarring. Right before you downshift, blip the throttle quickly to rev-match.
Note: this technique only applies to manual-transmission (MT) cars — automatic transmissions (AT) already calculate the right shift points for you.
6. Don’t drink and drive
Studies show that even a small amount of alcohol impairs your ability to drive safely. Drinking and driving isn’t just illegal — it’s a leading cause of serious traffic accidents. Alcohol dulls judgment and slows reaction time, sharply raising the risk of a crash.
If you drove to a place where you end up drinking, choose a different way home instead:
- Call a taxi or ride-hailing service
- Ask a friend or family member to pick you up
- Walk if you can, or take public transit

7. Control your speed and keep a safe following distance
According to Vietnam’s Ministry of Transport, over 80% of traffic accidents stem from speeding or a driver losing control of their speed. As speed increases, your ability to stop in time before an obstacle drops, and the force of any impact grows — making the outcome of a crash far more severe.
Watch the distance markers on the highway to help judge how far you are from the car ahead. Likewise, when stopped behind another vehicle in traffic or at a red light, leave enough space that you can still see its license plate and a bit of pavement beneath it — that’s the safe following gap.
Driving at a reasonable speed helps you maintain a safe gap from the car ahead and gives you enough time to react when needed, avoiding sudden collisions. If the car in front stops abruptly or slows down, you’ll have enough distance to stop safely instead of triggering a chain-reaction pileup.
8. Always wear your seatbelt
A seatbelt keeps your body anchored in your seat, sharply reducing the risk of serious injury in a crash. When a collision happens, the impact throws you forward with tremendous force, and the seatbelt is what absorbs that force and protects your head, neck, and spine. That’s why drivers and passengers should never buckle up the wrong way — like looping it over yourself after the fact, or skipping it out of overconfidence — since that defeats the whole purpose of keeping you secured in the seat during a crash.
9. Stay alert and keep your eyes on the road
Quick judgment and fast reactions to unexpected situations are what keep you safe on the road. Keep in mind: the emptier the road, the more likely everyone gets a little too relaxed. For instance, motorbike riders tend to speed up and drive more recklessly right before rain starts, and long stretches of highway can easily make a driver lose focus and get drowsy.
Just a few seconds of lost focus can lead to serious consequences — injury, even death. To avoid this, stay especially alert at intersections and roundabouts, near residential areas and schools, on curves and blind spots, and in bad weather, as well as on long, empty roads with little traffic. Also keep checking your mirrors continuously to monitor what’s happening behind you and cover your blind spots.
10. Signal before changing lanes
Signal early before you change direction so vehicles behind you can react and know what you intend to do — that’s what makes traffic flow smoothly and safely. Using your turn signal correctly doesn’t just prevent needless accidents; it shows respect and responsibility toward everyone else on the road.
11. Speed up to merge into a new lane
Change lanes one at a time — crossing two lanes at once is essentially driving diagonally across traffic, which is extremely dangerous for the cars behind you. When merging into a new lane, speeding up safely and appropriately is important. Once you’ve checked your surroundings and confirmed it’s clear, accelerate to merge in quickly — this minimizes the time you spend straddling your current lane and reduces the risk of blocking other drivers.
12. Check your mirrors and blind spots
Your mirrors and blind spots are essential to getting a full, accurate picture of what’s happening around your car. Regularly checking your mirrors and knowing exactly where your blind spots are will lower your accident risk and help build a safer driving environment for everyone.
13. Never use your phone while driving
Countless accidents have happened because a driver was on their phone. It’s a dangerous habit with serious consequences — for your health and beyond. Keep your full attention on driving and on what’s happening around you to keep yourself and everyone else safe. Small, simple habits like these are what keep our roads safe for everyone.

14. Get regular checkups for your car
Schedule regular maintenance checks at a certified service center to keep your car in top shape. This lets you catch and fix small issues before they turn into big, expensive problems — and it makes for safer driving overall. Routine checkups reduce the risk of unexpected breakdowns and save you money on maintenance in the long run.
A basic checkup should cover engine oil, tires, brakes, the electrical system, and the cooling system. Sticking to a regular maintenance schedule keeps your car in top condition, boosts safety, and saves you money over time.
That wraps up our full rundown of safe driving tips for new drivers — hopefully this helps you get a solid handle on the rules of the road and drive with confidence. Always stay alert behind the wheel, buckle up, keep your speed in check, and stay calm when handling the unexpected — overconfidence is the one thing you can’t afford while driving!
Long-Distance Driving Tips You Can Actually Use
Long road trips can be a blast — especially those holiday drives home or spring getaways during Tet. The tips below will help you take on a long haul with confidence.
Driving the family back to your hometown, or taking on the role of “captain” for a holiday road trip, can feel a little nerve-wracking, especially if you don’t have much experience with long-distance driving.
On top of that, staring at the road for hours on end, packing kids and a mountain of luggage into the car, and dealing with heavy traffic and jams all add to the stress and fatigue. That’s why every trip needs solid preparation, so the fun doesn’t get derailed by an unexpected hiccup.
The long-distance driving tips below apply whether you’re driving the family home or heading out for a spring road trip over the Tet holiday.

1. Plan ahead and build a suitable itinerary
Every holiday stretches on for several days, so this is exactly the time to map out a concrete plan for your trip, and to get organized on packing the essentials and making sure your car is road-ready.
Building a solid travel itinerary matters a lot for families with young kids. Pack a bit of extra cash, some medicine, and snacks for the road to keep everyone healthy and comfortable along the way.
2. Trade off driving to avoid fatigue
Sitting behind the wheel for hours on end easily leads to drowsiness and exhaustion. Long-distance driving demands not just solid driving skills but also sharp, quick thinking to handle whatever comes up on the road.
So don’t push yourself to grind through the whole trip solo. Hand the wheel over to another passenger for a while. Plenty of people plan carpools with coworkers or people from the same hometown heading the same direction, splitting driving duties so everyone gets a chance to rest — and to enjoy some time behind the wheel too.
3. Schedule rest stops along the way, and avoid stopping in isolated spots
Sitting in a car for hours easily brings on fatigue, drowsiness, and stress. Plan reasonable breaks along the route so everyone’s body can recover, and so passengers have a chance to take care of personal needs.
Stopping to rest and take in the scenery also lifts everyone’s spirits and adds to the fun. How often you stop really depends on how everyone’s feeling, but as a general rule of thumb, plan a break roughly every 25-30 miles (40-50 km).
If your car shows any signs of trouble, head to a populated area where you can get help quickly. If your car breaks down unexpectedly somewhere isolated, stay inside with the doors locked, call for roadside assistance, and stay alert in case you run into anyone suspicious.
4. Bring along a good attitude
Before hitting the road, make sure you and everyone else in the car get enough rest — don’t stay up late, and don’t overeat beforehand. It also helps to pack some gum, energy drinks, or tea for the road to keep your mind sharp.
It’s also worth giving the car a once-over before you go — ideally, get it serviced before the holiday starts, since this is when cars see the heaviest use while repair shops are often closed. A thorough pre-trip check goes a long way toward avoiding surprises on the road.
According to people with plenty of long-distance driving experience, a cheerful, upbeat, happy vibe in the car makes a huge difference in how smoothly a trip goes. Passengers shouldn’t just doze off and forget about the driver — a quiet, sluggish mood can make the person behind the wheel feel weighed down and tired too. So keep the conversation going and be ready to help each other out along the way — it makes the miles fly by.
5. Follow traffic laws and respect local customs
Sticking to traffic laws will keep your trip running smoothly and help you steer clear of bad luck like accidents, collisions, or traffic fines. And for an even smoother trip, take some time to learn about the customs of the area you’re heading to — checking out local Facebook groups for tips is a great way to blend in more easily with the people and places you’ll encounter.
Simple Ways to Remove Stains From Your Car Windows at Home
Removing car glass stains with simple household cleaners
Rainwater and car wash residue that sit on your windows for too long — or don’t get wiped off properly — tend to leave behind stubborn deposits and white streaks. On top of that, the acid in rainwater can make glass look hazy or leave unsightly stains that hurt your car’s appearance and your visibility on the road.
When that happens, you can reach for everyday household ingredients like vinegar or lemon to remove the stains and get your glass clean and clear again. This method is simple, easy to do, and cheap — though it only works well on fresh stains covering a small area.

Removing car glass stains at home with simple, easy-to-find ingredients like lemon and vinegar (Source: Collected)
White vinegar and water
The mild acidity in white vinegar works great for cutting through stains, especially the kind left behind by rainwater. Here’s how to remove glass stains using white vinegar:
- Step 1: Mix vinegar and water in a 50:50 ratio and shake well to create a uniform cleaning solution.
- Step 2: Spray the solution onto the stained area and let it sit for 1-2 minutes for better results.
- Step 3: Gently wipe the sprayed area with a damp, soft cloth.
- Step 4: Wipe the glass once more with a dry, soft cloth to remove any leftover water, solution, or residue.
Fresh lemon
The acidity in fresh lemon juice helps break down stains and grime on car glass. Here’s the process for removing stains with fresh lemon:
- Step 1: Mix lemon juice with clean water to create a uniform solution and pour it into a spray bottle.
- Step 2: Spray the solution directly onto the stain and let it sit for 2-3 minutes.
- Step 3: After that, wipe the glass clean with a soft cloth or sponge. The lemon-water mix will help lift the stains and grime off the glass.
- Step 4: Rinse the glass with clean water, then dry it once more with a soft cloth.
With just a few simple steps and ingredients you already have at home, you can effectively get rid of stains on your car’s glass.
Removing car glass stains at home with simple, easy-to-find ingredients like lemon and vinegar (Source: Collected)
Baking soda or toothpaste
Besides vinegar and lemon, baking soda or toothpaste are also good options for removing glass stains at home.
- Step 1: Prepare a mixture of vinegar and baking soda, or simply use toothpaste. Apply it directly to the stained area on the glass.
- Step 2: Gently scrub with a soft cloth, sponge, or brush to loosen the stain, then let it sit for 4-5 minutes.
- Step 3: Wipe off the baking soda or toothpaste mixture with a damp, soft cloth. Finish by wiping the glass once more with a dry cloth to remove any remaining residue.
Using dedicated glass stain and calcium deposit removers
In many cases, stains that have set in for a long time or cover a large area of glass won’t respond well to the DIY methods above. When that happens, you’ll need to turn to glass cleaning solutions or stronger cleaning agents.
The advantage of these methods is that they’re simple and quick to apply, and they deliver solid cleaning results.
Foaming glass cleaner
Cleaning your car’s glass with a foaming glass cleaner is simple, fast, and highly effective. You can easily find these products at car care stores for just a few hundred thousand dong.
When sprayed, foaming glass cleaner produces a fine foam that clings to the glass surface without dripping. Simply wipe it off with a soft cloth afterward — no rinsing needed. The fine foam breaks down stains on the glass quickly.
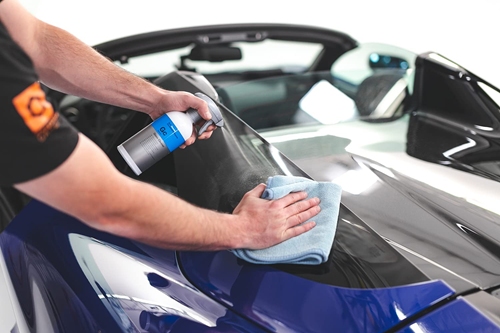
Foaming glass cleaner removes stains quickly and effectively (Source: Collected)
Strong household cleaners like Vim, Duck, or Gift
Using strong household cleaners is another common approach many car owners take. Products like Vim, Duck, and Gift are easy to find and are already sitting in most households. With their high concentration of cleaning agents and strong solvent power, these products effectively cut through stains, grime, and calcium deposits.
That said, because they’re so corrosive, these cleaners can potentially damage the glass surface. For that reason, only use strong cleaners like these when it’s truly necessary.
Melamine sponge
Melamine sponges are made from melamine-formaldehyde foam, forming a fine, slightly abrasive texture similar to natural sponge material. Using a melamine sponge makes cleaning stained glass surfaces remarkably easy.
You can pick up melamine sponges at most car care stores for just a few tens of thousands of dong, depending on size. To use one, simply wet the sponge and gently scrub the stained or dirty area on the glass — no additional cleaning products needed. Finish by rinsing the glass surface once more with clean water.
Using heavy-duty glass cleaning agents
For glass with stains that have set in over a long period, cover a large surface area, are hard to clean, or simply didn’t respond to the methods above, you can turn to cleaning products specifically formulated for cars. These solutions are made with stronger active ingredients — including bleaching agents, stabilizers, and dyes — that more thoroughly break down stubborn stains and grime on car glass.
Here’s the process for using a dedicated glass stain remover:
- Step 1: Clean the glass surface with water, then dry it with a soft cloth.
- Step 2: Apply some of the cleaning solution to a soft cloth and wipe the stained area using circular motions. Repeat until the stains are completely removed.
- Step 3: Rinse the glass with clean water.
- Step 4: Dry the glass surface with a dry cloth to avoid leaving streaks behind.
*Note: While cleaning, wear gloves and a mask to protect your skin and overall health from the cleaning chemicals.
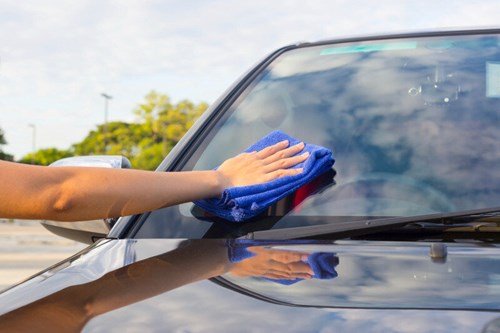
Using a dedicated cleaning product for long-set, hard-to-remove stains (Source: Collected)
Cleaning your car’s glass regularly is essential for keeping your car looking good, lasting longer, and keeping you safe on the road. Choose the method that best fits the type of stain you’re dealing with. And when needed, don’t hesitate to take your car to a trusted detailing shop to avoid accidentally damaging the glass.
You can also check out our own line of professional glass stain removers to give your windows a like-new finish.

Noma 911 Car Glass Stain Remover
What to Pack and Prep Before a Long Road Trip
What to prepare before a long road trip is always the deciding factor between a smooth, safe journey and one full of headaches. Being fully prepared doesn’t just help you avoid unexpected risks and breakdowns — it also gives you and your travel companions real peace of mind. Let’s walk through it together with Noma in the article below.
1. What to Prepare Before a Long Road Trip
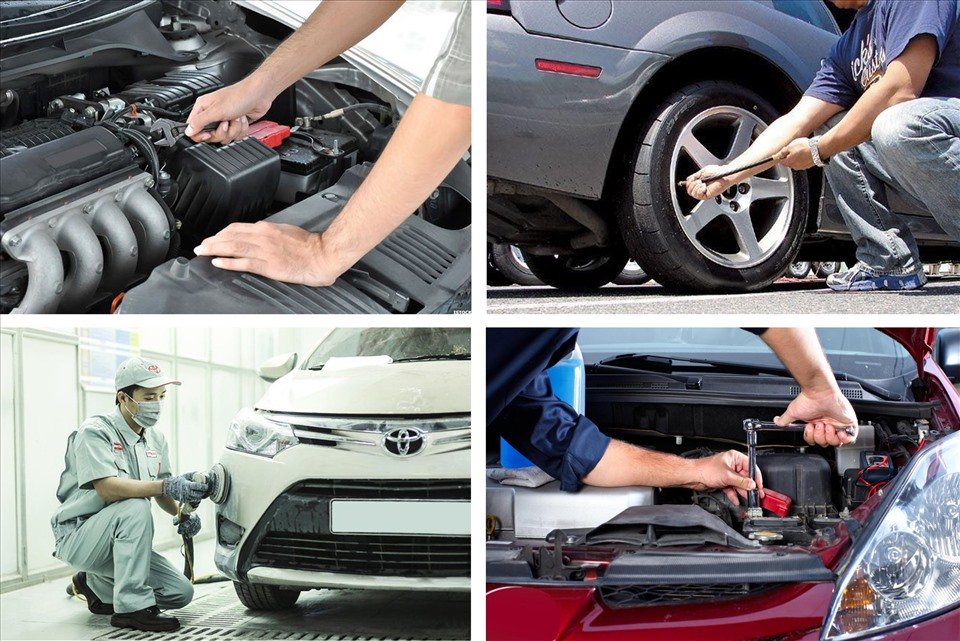
A successful road trip comes down to two things: a car that’s in top running condition, and a driver who’s prepared. Skipping basic checks can lead to trouble you didn’t see coming, turning what should be a fun getaway into an exhausting ordeal. To help you enjoy a safe, stress-free trip, the experts at Noma have put together a detailed checklist covering exactly what to prepare before hitting the road for a long drive.
2. Part 1: Your Car’s Condition — The Make-or-Break Factor for Any Trip
This is the most important part of your prep, and it’s never something to take lightly. Check your car at least 2-3 days before departure so you have enough time to fix any issues you find.
2.1. Tires
Tires are the only part of your car that actually touches the road — and they’re also behind many dangerous breakdowns.
- Check tire pressure: Inflate all tires, including the spare, to the manufacturer’s recommended pressure (usually listed on a sticker on the driver’s side door jamb). Both underinflated and overinflated tires are dangerous and waste fuel.
- Check tread wear: Look at the tread wear indicators in the grooves. If the tread has worn down flush with these markers, it’s time for new tires.
- Inspect the tire surface: Look for cracks, bulges, or any foreign objects lodged in the tire.
2.2. Brakes
- Check brake fluid: Open the hood and check the brake fluid level in the reservoir. If it’s below the “MIN” line, top it off and check for leaks.
- Feel how the brakes respond: During a test drive, pay attention to how the brakes engage — listen for squealing and feel for any vibration in the pedal. If you notice either, take the car to a shop to have the brake pads and rotors inspected.
2.3. Fluids Under the Hood
- Engine oil: Pull the dipstick, wipe it clean, reinsert it, then pull it out again to check the level. It should sit between the “MIN” and “MAX” marks.
- Coolant: Check the level in the overflow reservoir. Never open the main radiator cap while the engine is still hot.
- Windshield washer fluid: Keep the reservoir topped off so you always have a clear view of the road.
2.4. Electrical and Lighting Systems
- Battery: Check the terminals for corrosion or looseness. If your battery is more than 2-3 years old, have it tested at a shop with proper diagnostic equipment.
- Lights: Have someone stand outside the car and check every light: headlights (low and high beam), taillights, brake lights, turn signals, and fog lights.
2.5. Other Essentials
- Wiper blades: Check for hardened or worn rubber. If the wipers streak or leave water marks, replace them right away.
- Air conditioning: Turn it on and make sure it’s cooling properly.
Expert tip: If you’re not confident doing this yourself, or if your car is due for routine maintenance anyway, your best bet is to bring it to a trusted shop like Noma. We offer a [comprehensive pre-road-trip inspection] package, so every part of your car gets a thorough check from professional technicians.
3. Part 2: Essential Items for Your Trip
Once your car is in top shape, it’s time to pack the essentials.
3.1. Personal ID and Vehicle Documents
- Vehicle registration, inspection certificate, and mandatory liability insurance.
- Driver’s license and ID/passport.
- Double-check that your inspection and insurance are still valid before you leave.
3.2. Emergency Repair Kit
- Tire-change tools: A jack and lug wrench. Make sure you know exactly where they’re stored in your car.
- Mini air compressor: An incredibly handy tool to have on hand.
- Jumper cables: In case your battery dies.
- Flashlight: Essential if you run into trouble after dark.
3.3. Driving Aids
- A fully charged smartphone.
- Portable battery pack and charging cable for the car.
- Phone mount.
- Dash cam (make sure the memory card has enough free space).
3.4. Driver Health and Alertness
- Get a full night’s sleep before you set off.
- Pack some snacks, water, and gum to help you stay alert.
- Plan your route and rest stops in advance.
Final Thoughts
Answering the question of what to prepare before a long road trip with a thorough checklist is simply what a responsible driver does. Careful preparation is never wasted effort — it’s the key to a safe, enjoyable trip free of unpleasant surprises. By taking a little time to check your car’s condition and pack the right essentials, you’re giving yourself and your loved ones real peace of mind.

How Often Should You Disinfect Your Car?
Disinfecting your car doesn’t just clear out unpleasant odors — it also eliminates most of the bacteria that can put your health at risk. So how often should you actually get your car disinfected? Let’s dig into the details with CarCare SaiGon below.
1. What causes that bad smell inside your car?
Almost every driver has dealt with an unpleasant odor in their car at some point — and it’s especially noticeable on long drives.
- Moisture and mold: Floor mats, leather seats, and the trunk are all prone to trapping moisture, which creates the perfect environment for mold and mildew to grow — and with it, a musty smell.
- Cigarette smoke: Nicotine and other chemicals in cigarette smoke cling stubbornly to interior surfaces, leaving behind an odor that’s notoriously hard to get rid of.
- Food and drink spills: Accidental spills are one of the most common causes of bad smells in a car.
- The AC system: When your air conditioning system goes too long without cleaning, it becomes a breeding ground for dust, bacteria, and mold — and you’ll smell it every time you turn the AC on.
- New-car smell: The smell of new plastic and leather can also be off-putting for some people, especially those with sensitivities.
2. The most effective way to get rid of the smell
2.1. Disinfecting the cabin
Odors can settle into carpets, leather seats, and every nook and cranny of your AC’s ventilation system — areas that are nearly impossible to clean 100%. Left unchecked, these spots can become long-term breeding grounds for bacteria, viruses, and other pathogens. This is where disinfection becomes the most effective solution.
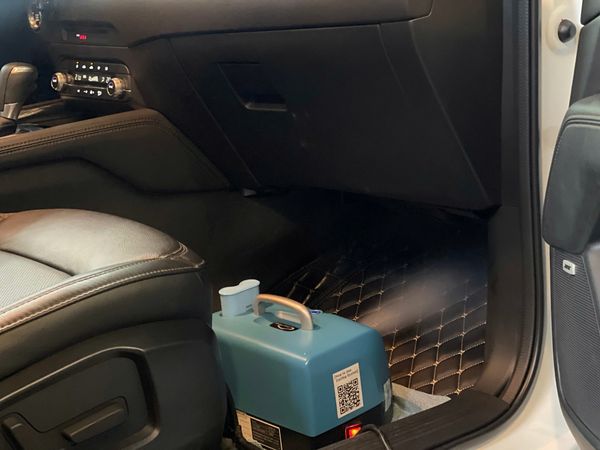
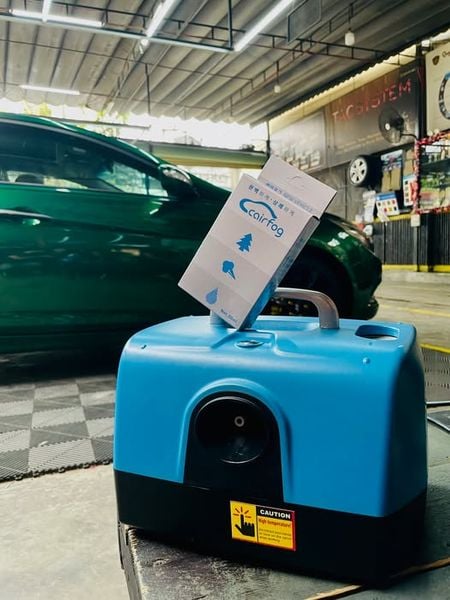
Cairfog disinfection service is an advanced sanitizing and air-purifying treatment that eliminates over 700 types of bacteria, neutralizes odors, and removes mold from interior surfaces and the air itself — all while being completely safe for occupants.
2.2. Interior cleaning
Even small items like old newspapers, used napkins, or food packaging can cause lingering odors in your car. That’s why it’s worth cleaning your interior regularly — a vacuum works great for getting into carpets and tight crevices for the best results.
3. How often should you fog and disinfect your car?
Prevention is the best strategy for keeping your ride in top shape. Experts recommend fogging and disinfecting your car every 3 to 6 months. Doing so brings several benefits:
- Fast, thorough odor elimination
- Removes up to 99% of bacteria and viruses inside the car
- Prevents mold and mildew from forming on interior surfaces
- Saves you money on cleaning and detailing costs down the line
If you’d like to get your car disinfected, reach out to CarCare Saigon through our hotline for detailed advice tailored to your needs.